Mastering SharePoint List Forms: Streamlining Data

Writer
For years, enterprise data collection in Microsoft 365 followed a very specific, somewhat tedious recipe: Build a Microsoft Form to collect the data, create a SharePoint List to act as the database, and write a Power Automate flow to stitch the two together.
While effective, this architecture added unnecessary automation overhead for simple internal processes. Enter the SharePoint List Form—a native feature that marries the user-friendly interface of Microsoft Forms directly with the database capabilities of SharePoint Lists.
In this guide, we will dive deep into how List Forms work, when to use them, and advanced tricks for architecting multi-form lists.
What is a SharePoint List Form?
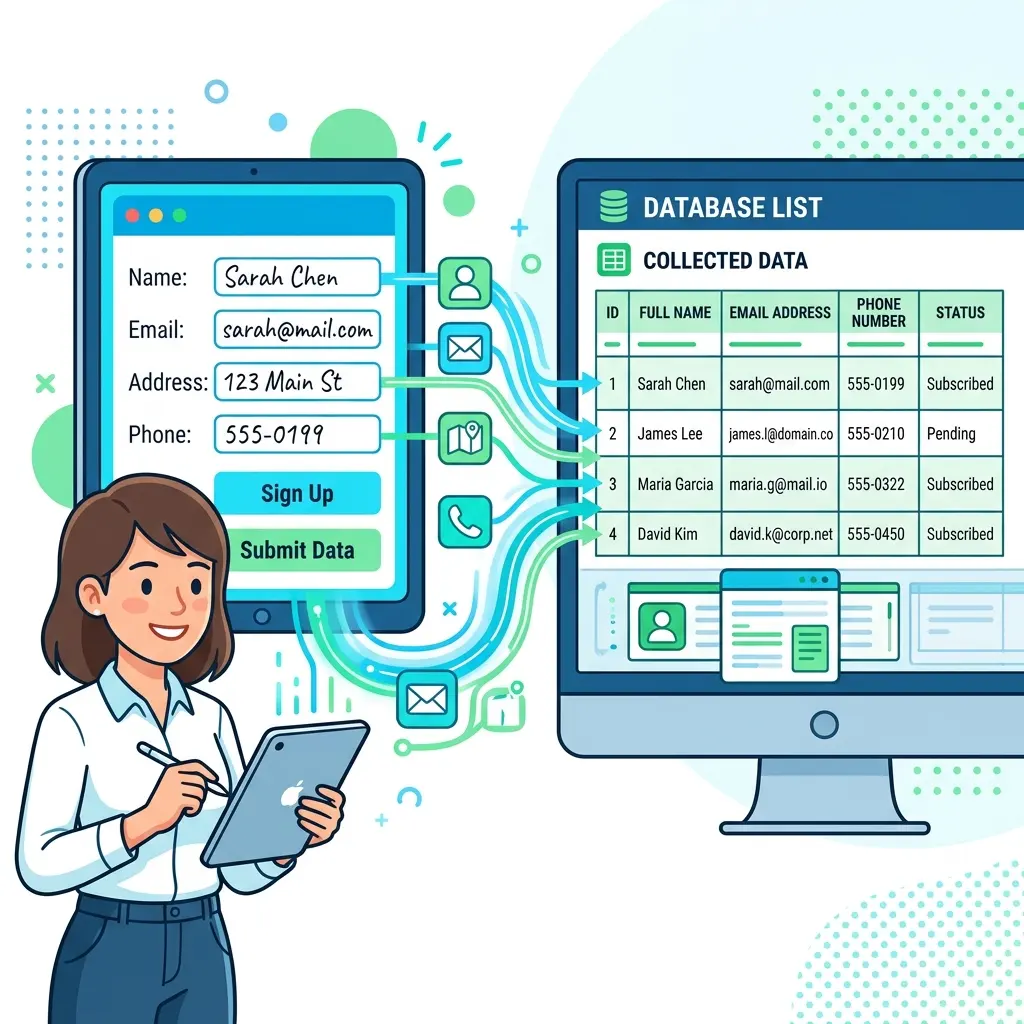
At its core, a SharePoint List Form is a built-in, web-based UI used to add, view, or edit data directly inside a SharePoint list. It looks and feels exactly like a Microsoft Form, but it is stored within and intrinsically tied to SharePoint.

The Primary Advantage: You no longer need to write separate automation to collect responses. When an end-user hits “Submit,” the data populates your list instantly, ready for further processing, smart formatting, or analysis. It essentially eliminates the need for Power Automate (Flow) to bridge data from a Microsoft Form into a SharePoint List because the data lands directly in the database.
Crucial Caveat (The Major Limitation): List Forms are strictly for internal tenant use only. Because the form relies on your tenant’s context and authentication, it does not support anonymous sharing, guest users, or external users outside the tenant. If you need to collect data from these groups, you must revert to the traditional Microsoft Forms + Power Automate architecture.
How to Provision a List Form
Microsoft provides two primary entry points to provision a new List Form:
- Via SharePoint Site: Navigate to your target SharePoint site’s homepage, click the New dropdown, and select List form.
- Via Microsoft Lists: Open the Lists app, click Create, select List form, and you will be prompted to assign it to a specific SharePoint site or your personal “My Lists” space.
Customizing the Form Experience
Once generated, the List Form behaves like a highly customizable Microsoft Form. You can tailor both the visual branding and the logical flow of the data entry process.
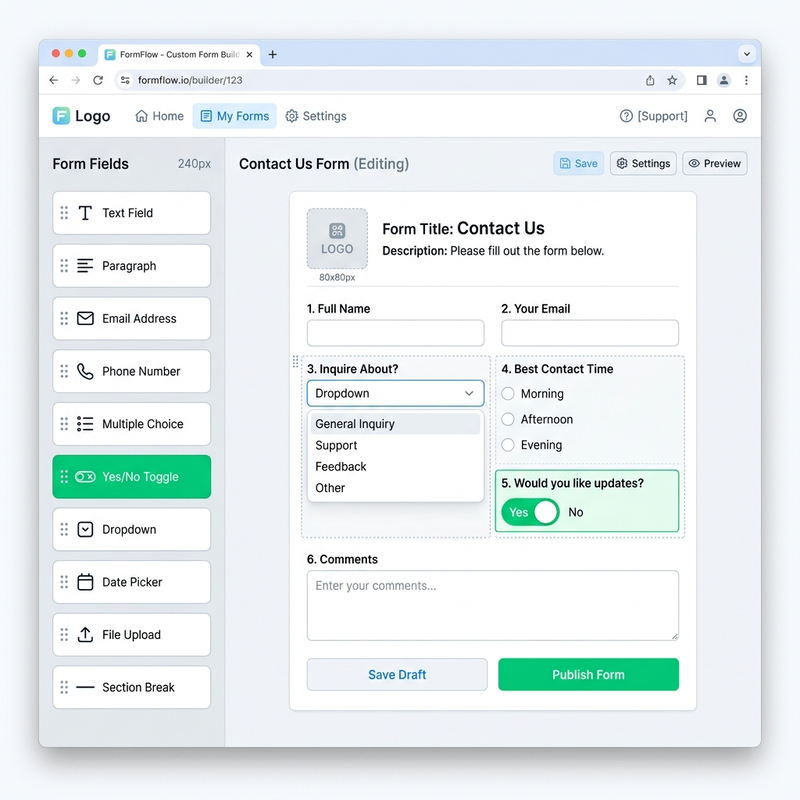
1. Branding and UI Customization
- Logos & Themes: You can upload specific custom logos and apply distinct visual themes. If you have multiple forms on one list, each form can have its own unique logo and theme.
- Contextual Text: Modifying form titles and descriptions is easy and helps guide the user (e.g., “2026 Annual Employee Feedback”).
2. Field/Column Management & Logic
- Data Types: Easily add various field types on the fly, such as Choice blocks, Yes/No toggles, or standard Text inputs.
- Drag-and-Drop Reordering: Move fields up and down the form hierarchy with a simple drag-and-drop interface.
- Visibility & Branching: You can hide specific fields from the user interface and apply conditional logic (branching) so users only see questions relevant to their previous answers.
3. Form Lifecycle & Settings
Under the form settings, you have granular control over the data collection lifecycle:
- Scheduling: Set definitive Start Dates and End Dates. The form will automatically move from a “Scheduled” state to “Live,” and eventually to closed.
- Custom Messaging: Tailor the post-submission experience. You can modify the “Success/Submission” message (“Thanks for your contribution!”) and customize the “Form Closed” message (“No more feedback is being collected at this time”) so users aren’t left guessing.
Form Management
Once your form is live, a dedicated Forms Toolbar becomes available within your SharePoint List UI. From this central hub, administrators can:
- Edit the form structure.
- Manually Stop accepting responses.
- Duplicate the form for rapid deployment.
- Delete the form entirely.
- Preview the form to see what users will see.
- Share (Copy link) to quickly distribute it to staff.
Advanced Architecture: Multiple Forms, One List
One of the most powerful capabilities of List Forms is the ability to attach multiple, distinct forms to a single SharePoint list. Imagine you are managing an internal operations list. You can create an “Annual Feedback” form and a completely separate “Finance Check” form—both feeding into the exact same database.
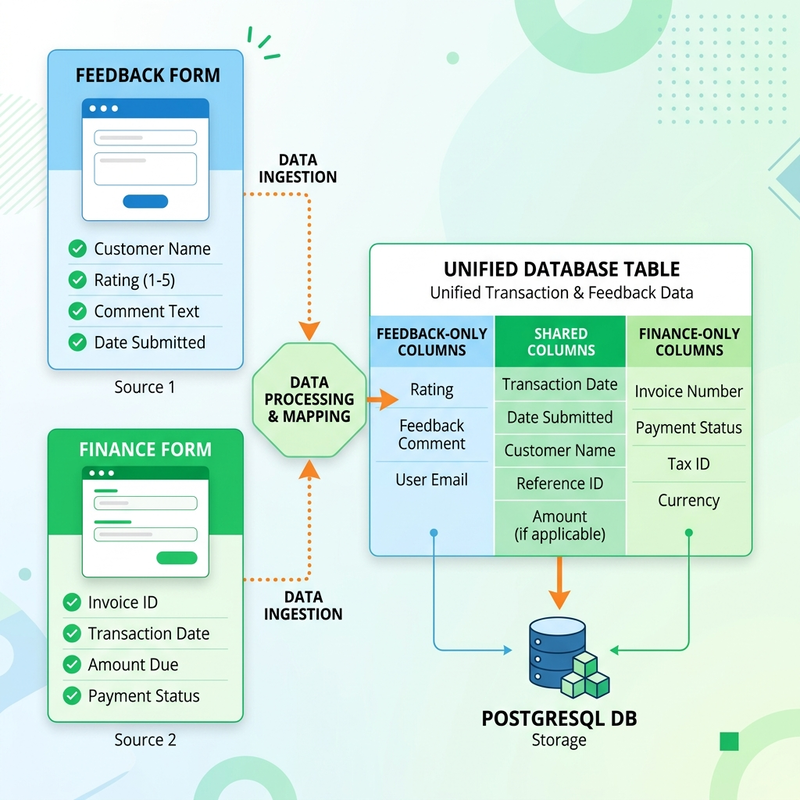
How it works structurally:
- Overlapping Columns: Both forms can share common data points created across forms. For example, both forms can include the “Are you a full-time employee?” Choice column.
- Unique Columns: The Finance form can include a “Category of Expense” (Travel, Food, Vouchers) unique column per form that simply doesn’t exist on the Feedback form.
- Unified View: Aggregating multi-form data into a single pane of glass for analysis. When administrators view the SharePoint list, they will see all aggregated data. If a user submits the Finance form, the feedback-specific columns will simply remain blank for that row, while the shared columns (like Employment Status) populate seamlessly.
Best Practices: When to use this architecture?
- Single List Approach: Use multiple forms on a single list if the data pertains to a single, recurring/related process where centralized reporting is beneficial.
- Siloed List Approach: If you are dealing with entirely unrelated business processes (e.g., IT Ticketing vs. HR Onboarding), keep your data clean by provisioning separate siloed lists for entirely different business processes.
Conclusion
SharePoint List Forms represent a significant quality-of-life improvement for M365 administrators and developers. By stripping away the need for intermediary Power Automate flows, you can spin up data collection interfaces in minutes while keeping all your data cleanly structured within your tenant.
Read next