Generating Dynamic Image Documents in Power Automate (Without Premium Connectors)

Writer
Quiz available
Take a quick quiz for this article.

If you have ever tried to generate a Word document containing a dynamic, varying number of images—like an audit report or asset tracking log—using Power Automate, you’ve likely hit a frustrating wall. The standard Word connector cannot handle dynamic image injection, and the Premium actions require specific licensing that might not be available to you.
Fortunately, there is a highly effective workaround using standard actions: HTML to .doc conversion.
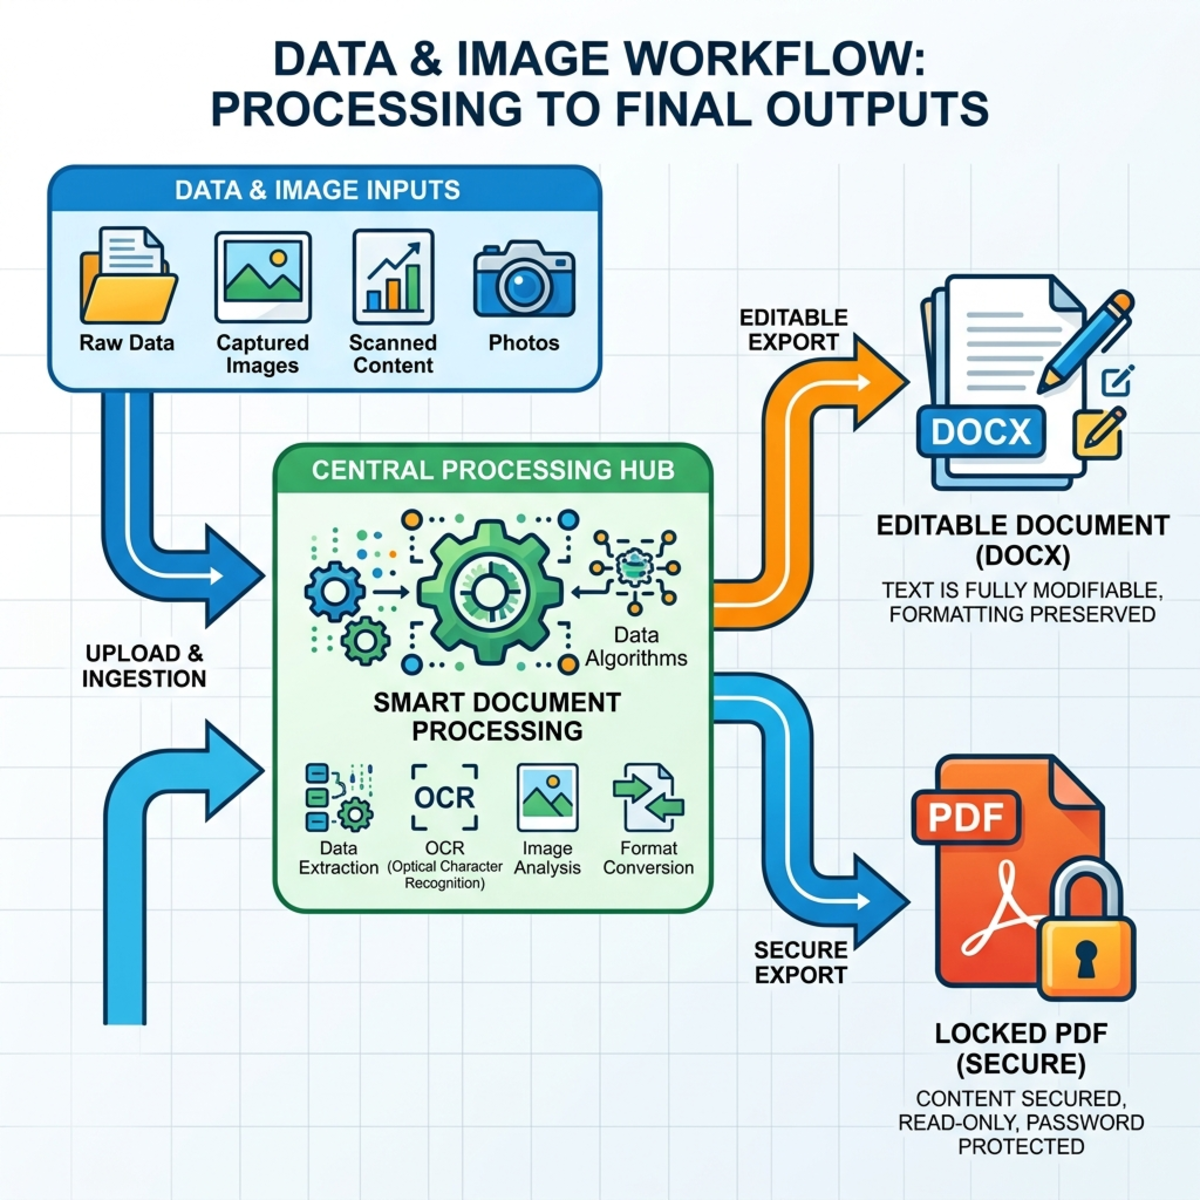
In this post, we will walk through the architecture of building a flow that can take one, five, or zero images from a data source (like a SharePoint list or Canvas app input) and output either a fully editable Word .docx file or a static PDF.
By leveraging HTML markup and standard conversion actions, you can completely bypass licensing bottlenecks and build highly flexible, dynamic documents directly within standard Power Automate.
The Core Concept: Why HTML?
The secret to bypassing the Premium Word connector is leveraging Microsoft Word’s native ability to interpret HTML.
Instead of trying to inject images into a Word template file, we construct the entire document as raw HTML code inside Power Automate. We then create a file in SharePoint containing this HTML, but we forcefully give it a .doc extension.
When a user opens this .doc file, Word recognizes the HTML framework, prompts the user to convert it, and renders it seamlessly. Once saved, it becomes a standard, fully editable .docx file.
Step-by-Step Flow Architecture
1. The “Lazy” Variable Setup
Instead of using five different “Initialize Variable” actions, you can define your environmental variables efficiently using a single Parse JSON action. You can define your SharePoint URL, destination folder paths, and timestamps in one static JSON payload. This keeps your flow tidy and serves as an excellent configuration block at the top of your flow.
2. Handling Static Header Images
If your document requires a static corporate logo in the header, do not hardcode a massive base64 string into a Compose action. Instead:
- Use Get file content targeting the logo file in SharePoint.
Crucial Gotcha: HTML cannot read raw binary file content. You must convert it. When passing this content into your HTML later, use the expression: base64(outputs('Get_file_content')?['body'])
3. Fetching Dynamic Images
To grab a dynamic number of images, use the Get attachments action, passing in the dynamic ID from your flow trigger (or a ‘Get items’ action).
Next, use an Apply to each loop to iterate through the output array of the attachments. Inside this loop, you will add a Get attachment content action to fetch the actual image data for each file.
4. Constructing Dynamic HTML Table Rows
Inside that same Apply to each loop, add a Compose action (let’s name it Compose_HTML_RW). This is where you define the HTML for a single row of your document’s image table. For context, <tr> defines a table row, <td> specifies table data/columns, and <th> indicates a table header.
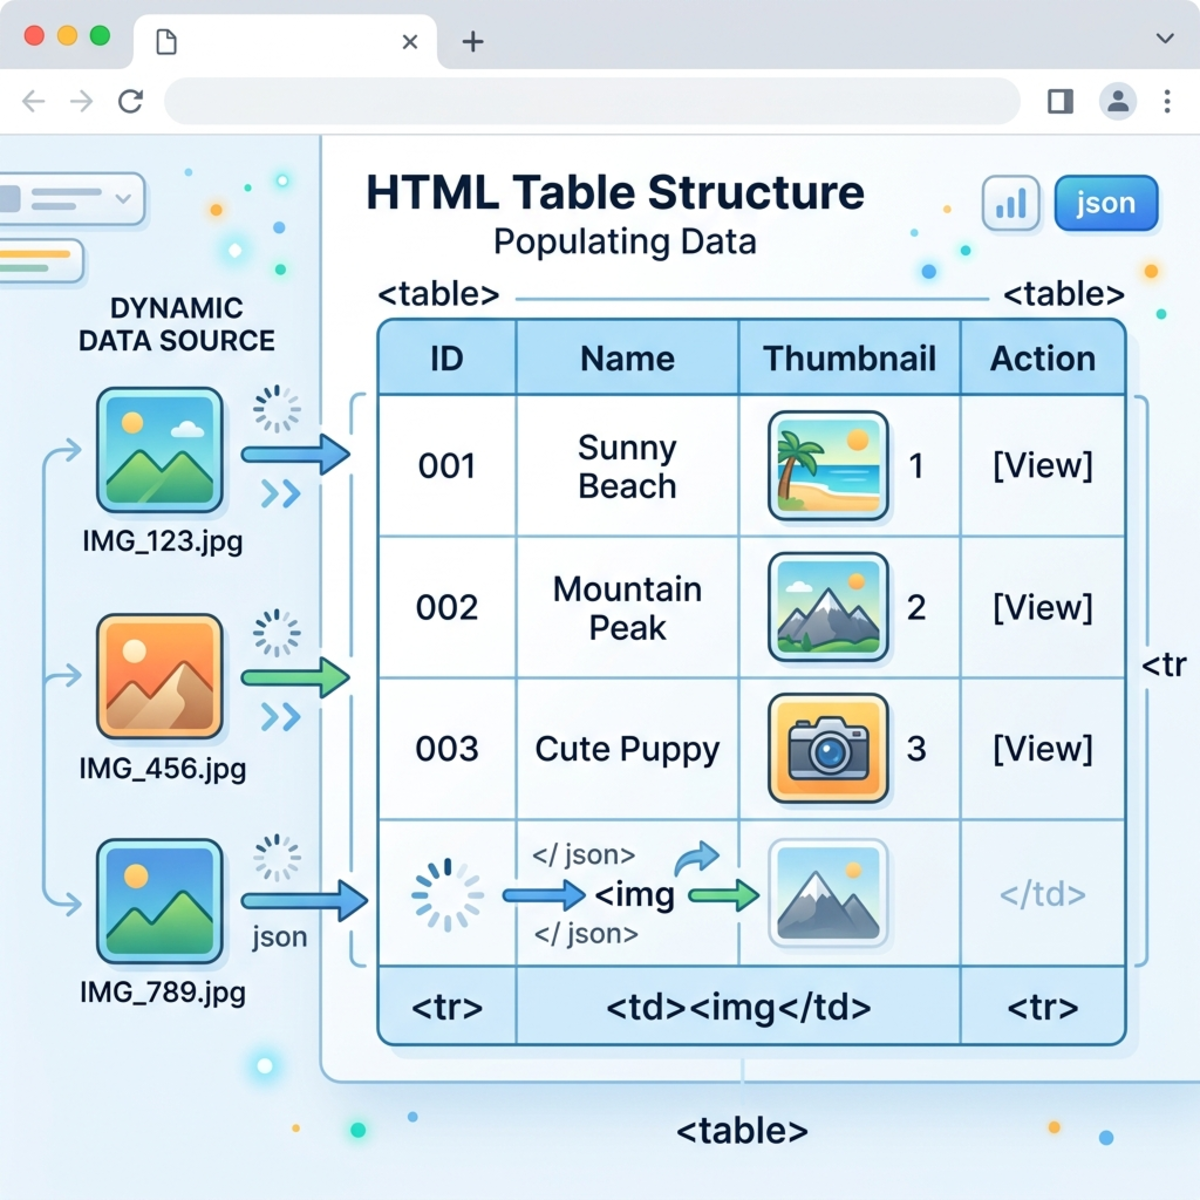
Pro Tip: Pay close attention to the data URI scheme (data:image/png;base64,). If your source images are JPGs, you will need to adjust the string to image/jpeg to prevent rendering errors. You can also manipulate image sizes dynamically by adding width or height attributes directly into the HTML tag.
5. Assembling the Master HTML Document
Outside of your loop, create a master Compose action. This will hold the complete structural HTML of your final document: the <!DOCTYPE html>, the <head>, and the <body>.
Styling Tip: Don’t write CSS from scratch. Use AI assistants like Copilot to generate the <style> block for your <head> tag. It can easily define fonts, table border colors, and spacing.
When you reach the <table> section of your body where the images belong, you need to output the results of your loop. Because the loop generated an array of row strings, you must use the join() expression to merge them into a single continuous string:
6. Routing the Output: Word vs. PDF
Once your master HTML string is composed, you have two options depending on your business requirements:
Option A: The Editable Word Document
- Use a Create file action in SharePoint.
- Set the file extension strictly to
.doc. - Pass the master HTML Compose output as the file content.
Result: When opened, Word will warn that the layout might change, convert the file natively, and leave the user with a fully editable document where they can delete images or rewrite text.
Option B: The Static PDF
- Use a Create file action in OneDrive, giving it an
.htmlextension. - Use the OneDrive standard Convert file action to convert that HTML file into a PDF.
- Use a final Create file action to save the generated PDF back to SharePoint.
Result: A completely locked, read-only PDF perfect for strict compliance auditing or asset tracking.
Important Considerations and Edge Cases
Before deploying this architecture, be aware of a few nuances:
Zero Images: What happens if the SharePoint item has no attachments? The Apply to each loop won’t execute, which means your join() expression will output nothing, potentially breaking your HTML table structure. You should implement a coalesce() expression or a Condition block to handle empty data gracefully.
Performance: Advanced users might wonder why an Apply to each loop is used to build the array instead of a faster Select action. The loop is utilized here for ease of understanding when generating complex HTML strings, but if you are confident in mapping arrays, a Select action can further optimize this flow.
Array Joining: Note that relying on the outputs of a Compose action inside a loop to form an array (as done in Step 4) is a slight workaround to avoid initializing a string variable and using “Append to string” (which can be slower).
Read next