Bypassing Limitations: How to Build Custom RAG Knowledge in Microsoft Copilot Studio

Writer
Quiz available
Take a quick quiz for this article.

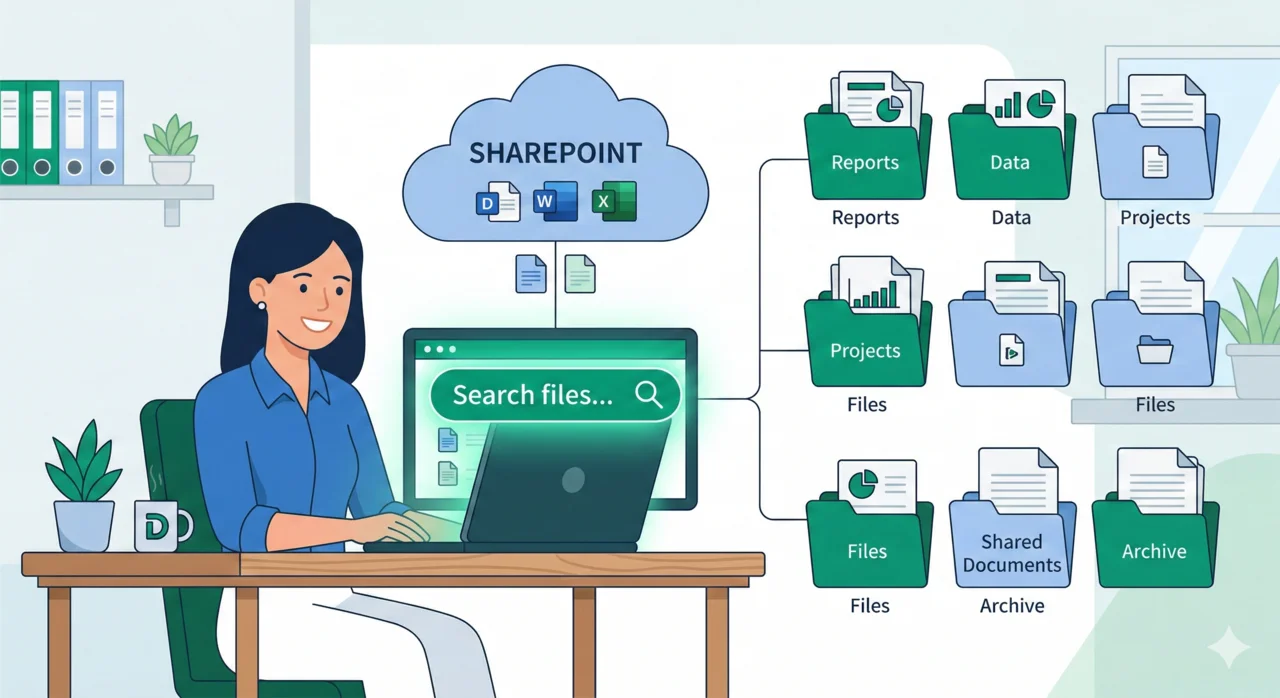
When we talk about “Knowledge” inside Microsoft Copilot Studio, we are essentially talking about a managed, SaaS-based RAG (Retrieval-Augmented Generation) pattern. It allows you to point an AI at a dataset, search through it, and summarize answers based purely on that retrieved context.
Copilot Studio offers an impressive array of out-of-the-box (OOTB) knowledge sources. But what happens when OOTB isn’t enough?
Take ServiceNow, for example. You can easily connect its knowledge base to Copilot Studio, but you hit a wall when it comes to granularity. OOTB implementations often force an “all or nothing” approach. If your organization has separate knowledge bases for IT, HR, and Known Errors, the standard connector won’t let you easily filter your chatbot’s search to just the IT database.
In this technical deep dive, we are going to look under the hood at how Copilot Studio processes knowledge, and more importantly, share an undocumented trick to build your own custom knowledge inputs—giving you absolute control over search APIs, filters, and data retrieval, without needing to build an external RAG architecture from scratch.
The Core Advantage: By hijacking the native knowledge trigger, you keep the security, moderation, and summarization power of Microsoft’s platform while replacing only the data fetch layer.

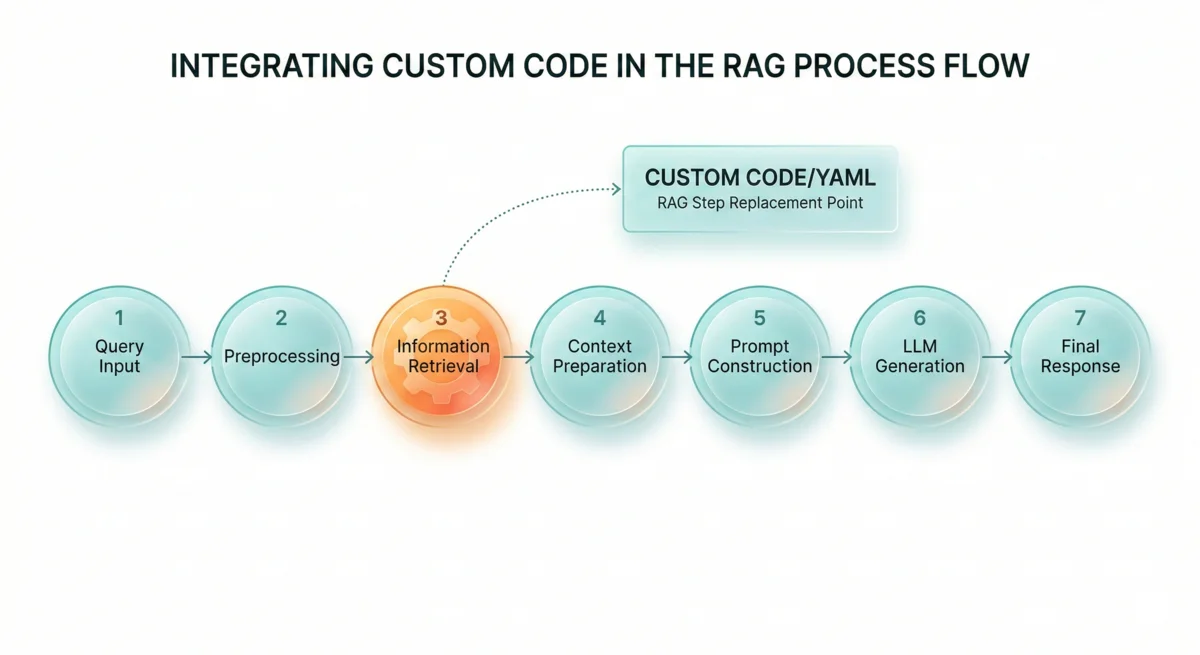
🔍 Understanding the 7 Stages of Copilot Studio Knowledge
Before injecting custom data, you need to understand the pipeline you are hooking into. Being able to build your own RAG pattern is complex; Copilot Studio simplifies this by abstracting it into seven distinct stages:
- Message Moderation: Responsible AI kicks in immediately. If a user asks a malicious or unsafe question (e.g., “how to build a weapon”), the system intercepts and blocks it before it ever reaches the Large Language Model (LLM).
- Query Optimization: Humans speak in shorthand. If a user says, “how long is it?” after discussing a rake from Home Depot, this stage uses context to rewrite the query into an actionable search string: “how long is the Home Depot rake?”
- Information Retrieval: This is the core data fetch. Copilot Studio runs the optimized query against a backend API. (Note: A common misconception is that Copilot Studio ingests entire websites. It actually queries the Bing API for web content, Microsoft Graph for SharePoint, or custom APIs).
- Summarization: The retrieved data is passed to your selected LLM. Because you select from pre-vetted models within the Studio, you bypass the headache of manual red-team testing and upgrading.
- Provenance Validation: The system verifies that the LLM actually answered the question using only the provided content, and it generates the exact citations.
- Summary Moderation: A final AI safety net checks the generated response to ensure no inappropriate content slipped through.
- Response Delivery: The final, cited summary is presented to the user.
By building a custom knowledge trigger, we are going to manually hijack Stage 3 (Information Retrieval) while letting Copilot Studio do the heavy lifting for the rest.
🛠️ Step-by-Step: The Custom Knowledge Implementation
For this walkthrough, we will use a ServiceNow Personal Developer Environment containing multiple Knowledge Bases, but this methodology applies to any custom search API.
Step 1: Unlocking the Hidden Trigger (The YAML Trick)

Currently, the trigger we need isn’t exposed in the standard graphical UI. We have to inject it via code.
- Navigate to Topics and create a Blank Topic.
- Click the specific trigger node, select More (…), and choose Open code editor.
- In the YAML code, delete the
Unrecognizedtrigger text. An error screen will pop up revealing a list of valid backend triggers. - Replace the trigger with
onKnowledgeRequestedand close the code editor.
Modifying topic YAML directly bypasses some UI validations. Always make a backup or export your solution before making structural trigger changes in the code editor.
Step 2: Generating the Search Query
We need an optimized query to pass to our API.
- Add a node: Call a Tool -> Generate a search query.
- Set the input to
System.Activity.Text(which captures the user’s raw prompt). - Save the output to a topic-level variable.
This node generates two outputs: Keyword search query (lexical/text-based) and Full-text search query (vector/embeddings-based). Since ServiceNow uses lexical search, map the keyword output.
Step 3: Calling the API (ServiceNow)
- Add the ServiceNow - Get Knowledge Articles connector.
- Pass your generated Keyword search query into the search parameter.
- The Advanced Filter: This is where we solve the OOTB limitation. In the connector settings, pass a comma-separated list of the specific Knowledge Base
sys_ids you want to query. - Request the
textfield (to ensure the body of the article is returned). - Limit your results: Set a limit (e.g., Top 3 articles). Knowledge articles can be massive, and you must respect the token limits of the LLM in Stage 4.
- Save this output to another topic-level variable.
Step 4: Formatting the Data (Power Fx)
Copilot Studio’s native Knowledge engine expects data in a very specific schema. We must map our ServiceNow JSON payload into a structured table.
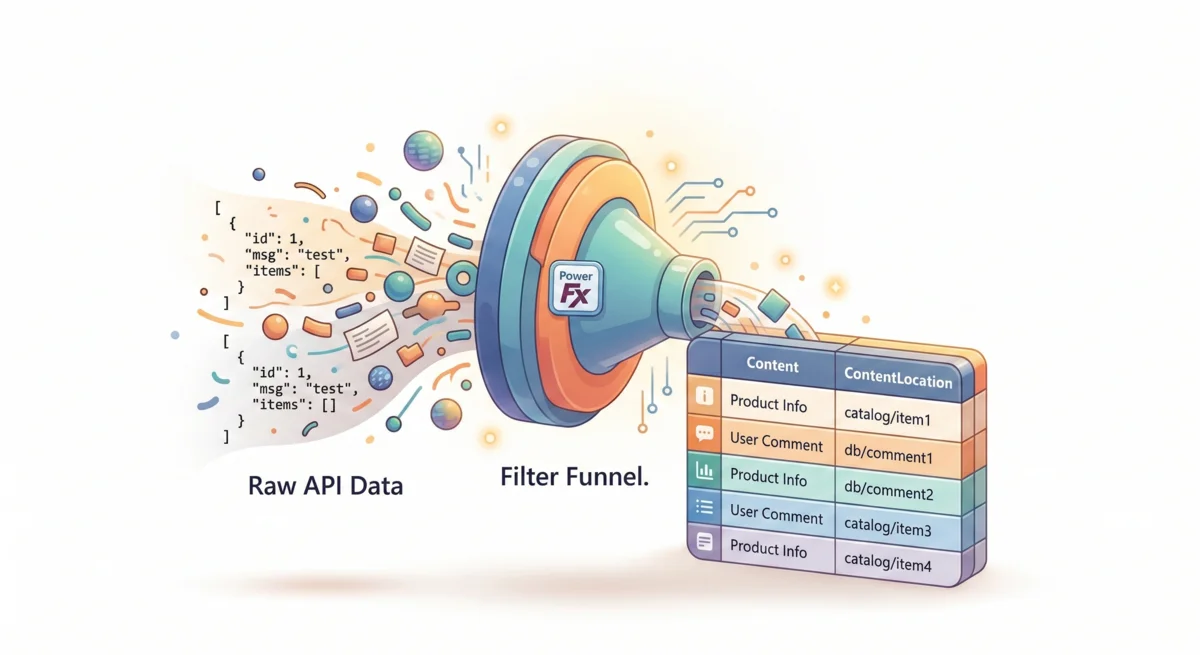
- Create a new topic-level variable called
formattedResults. - Use a Power Fx formula to iterate over the returned API results and build a two-column table. Your table must contain exact column names:
ContentandContentLocation.
Your logic should look conceptually like this:
- Content: Concatenate the Article Title + a dash (”-”) + the Article Body.
- ContentLocation: Concatenate the base URL of your system (e.g.,
https://dev12345.service-now.com/kb_view.do?sysparm_article=) + the Article Number.
Hard Limit: Copilot Studio has a hard cap of passing a maximum of 15 rows
of data into the knowledge engine. If your API returns 50, use the FirstN()
function in Power Fx to truncate the list.
Step 5: Overriding the System Variable
The final, crucial step is handing your carefully formatted data back to the native Copilot Studio pipeline.
- Add a Set Variable Value node.
- Select the native system variable:
System.SearchResults. - Set its value to your
formattedResultstable.
🚀 The End Result: Precision Retrieval
When you test your bot and ask, “How can I get the MAC address for my network card?”, the system triggers onKnowledgeRequested. It silently translates the query, securely hits your filtered ServiceNow API, formats the specific IT documents, and passes them to the LLM.
| Feature | Out-of-the-Box Connector | Custom RAG Implementation |
|---|---|---|
| Filtering | All or Nothing | Granular (Filter by sys_id, category, etc.) |
| API Flexibility | Standard Parameters only | Full API surface area access |
| Data Shaping | Automatic (Uncontrolled) | Explicit (Combine title/body for context) |
| Citations | Standard links | Dynamic deep-links to specific portals |
The user receives a perfectly summarized answer, complete with a clickable citation directly back to the ServiceNow article—all without you having to build, host, or secure a custom RAG infrastructure. You have effectively “unlocked” the built-in enterprise RAG pattern for any data source you can imagine.
📚 Technical Checklist
- Trigger:
onKnowledgeRequested(YAML). - Keyword Generation:
System.Activity.Text->Topic.Keyword. - API Node: Filter by Knowledge Base ID.
- Mapping: Schema must use
ContentandContentLocation. - System Variable: Always map to
System.SearchResults.
For more advanced Copilot Studio patterns, check out the official documentation.
Read next