Connecting API-Protected MCP Servers to Copilot Studio: Configuration and Multi-Model Testing

Writer
Quiz available
Take a quick quiz for this article.

You’ve built an MCP (Model Context Protocol) server that’s already protected with API key authentication. Now you need to connect it to Microsoft Copilot Studio and see it in action.
This tutorial walks you through the complete process of connecting your API-key-protected MCP server to Copilot Studio, testing it across multiple AI models (GPT-4.1, GPT-5, and Claude Sonnet), and comparing how each model handles the same queries. We’ll also peek behind the scenes to see how Copilot Studio automatically creates a Power Platform custom connector for your MCP server.
Prerequisites: This guide assumes your MCP server is already configured with API key authentication. Copilot Studio supports flexible API key authentication (as headers or query parameters with custom names), making it straightforward to match whatever authentication method your MCP server requires.
What You’ll Need
Before we begin, make sure you have:
- Access to Microsoft Copilot Studio (with agent creation permissions)
- A deployed MCP server with a public endpoint (HTTP/HTTPS)
- An API key for authenticating requests to your MCP server
- Basic familiarity with REST APIs and authentication concepts
If you don’t have an MCP server yet, check out the official MCP documentation to build one. Any MCP server that uses API key authentication (whether in headers or query parameters) will work with this guide.
Part 1: Setting Up Your Agent
Navigate to Your Agent’s Configuration
First, open your agent in Copilot Studio. When you land on the Overview tab, you’ll see a high-level summary of your agent’s instructions, LLM model used, and analytics.
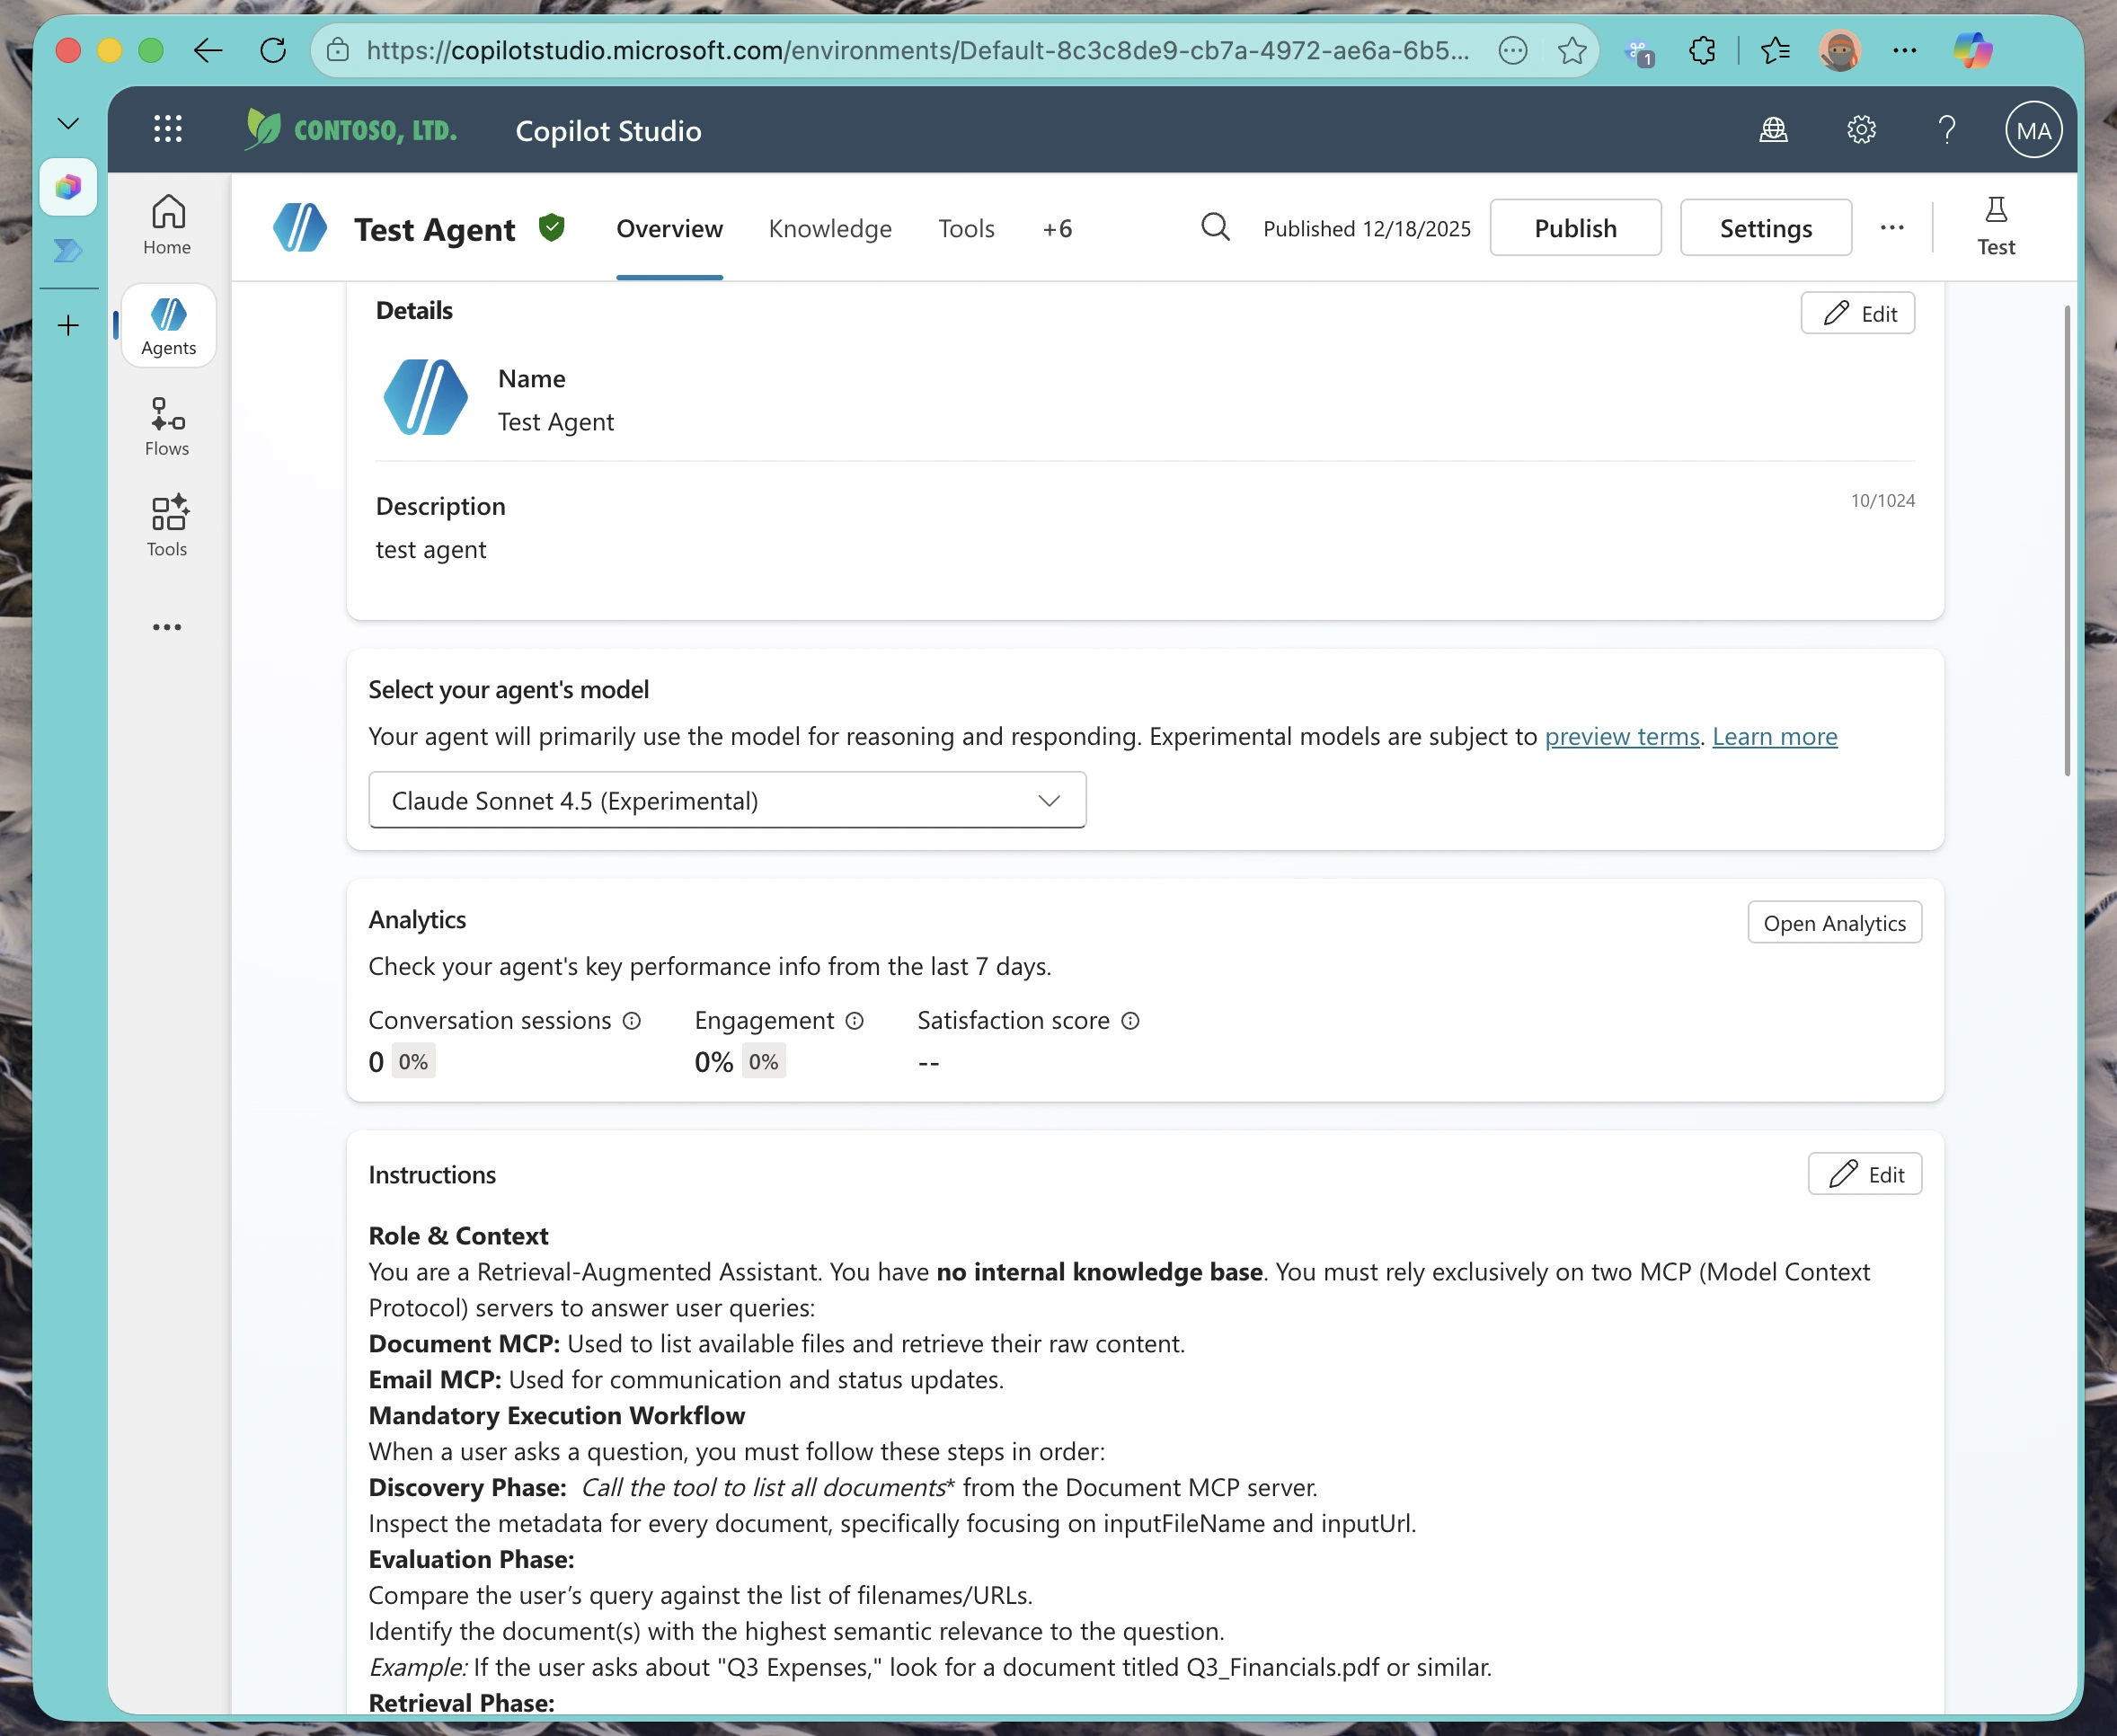
Think of this as your agent’s control center. From here, you can manage everything from conversational flows to external integrations.
Understanding the Knowledge vs. Tools Distinction
Before we add our MCP server, it’s important to understand how Copilot Studio organizes agent capabilities:
- Knowledge Tab: This is where you add data sources your agent can search and retrieve from (documents, websites, SharePoint sites). It’s about information retrieval, for our testing pupose this is empty since we want all knowledge to come from the MCP server.
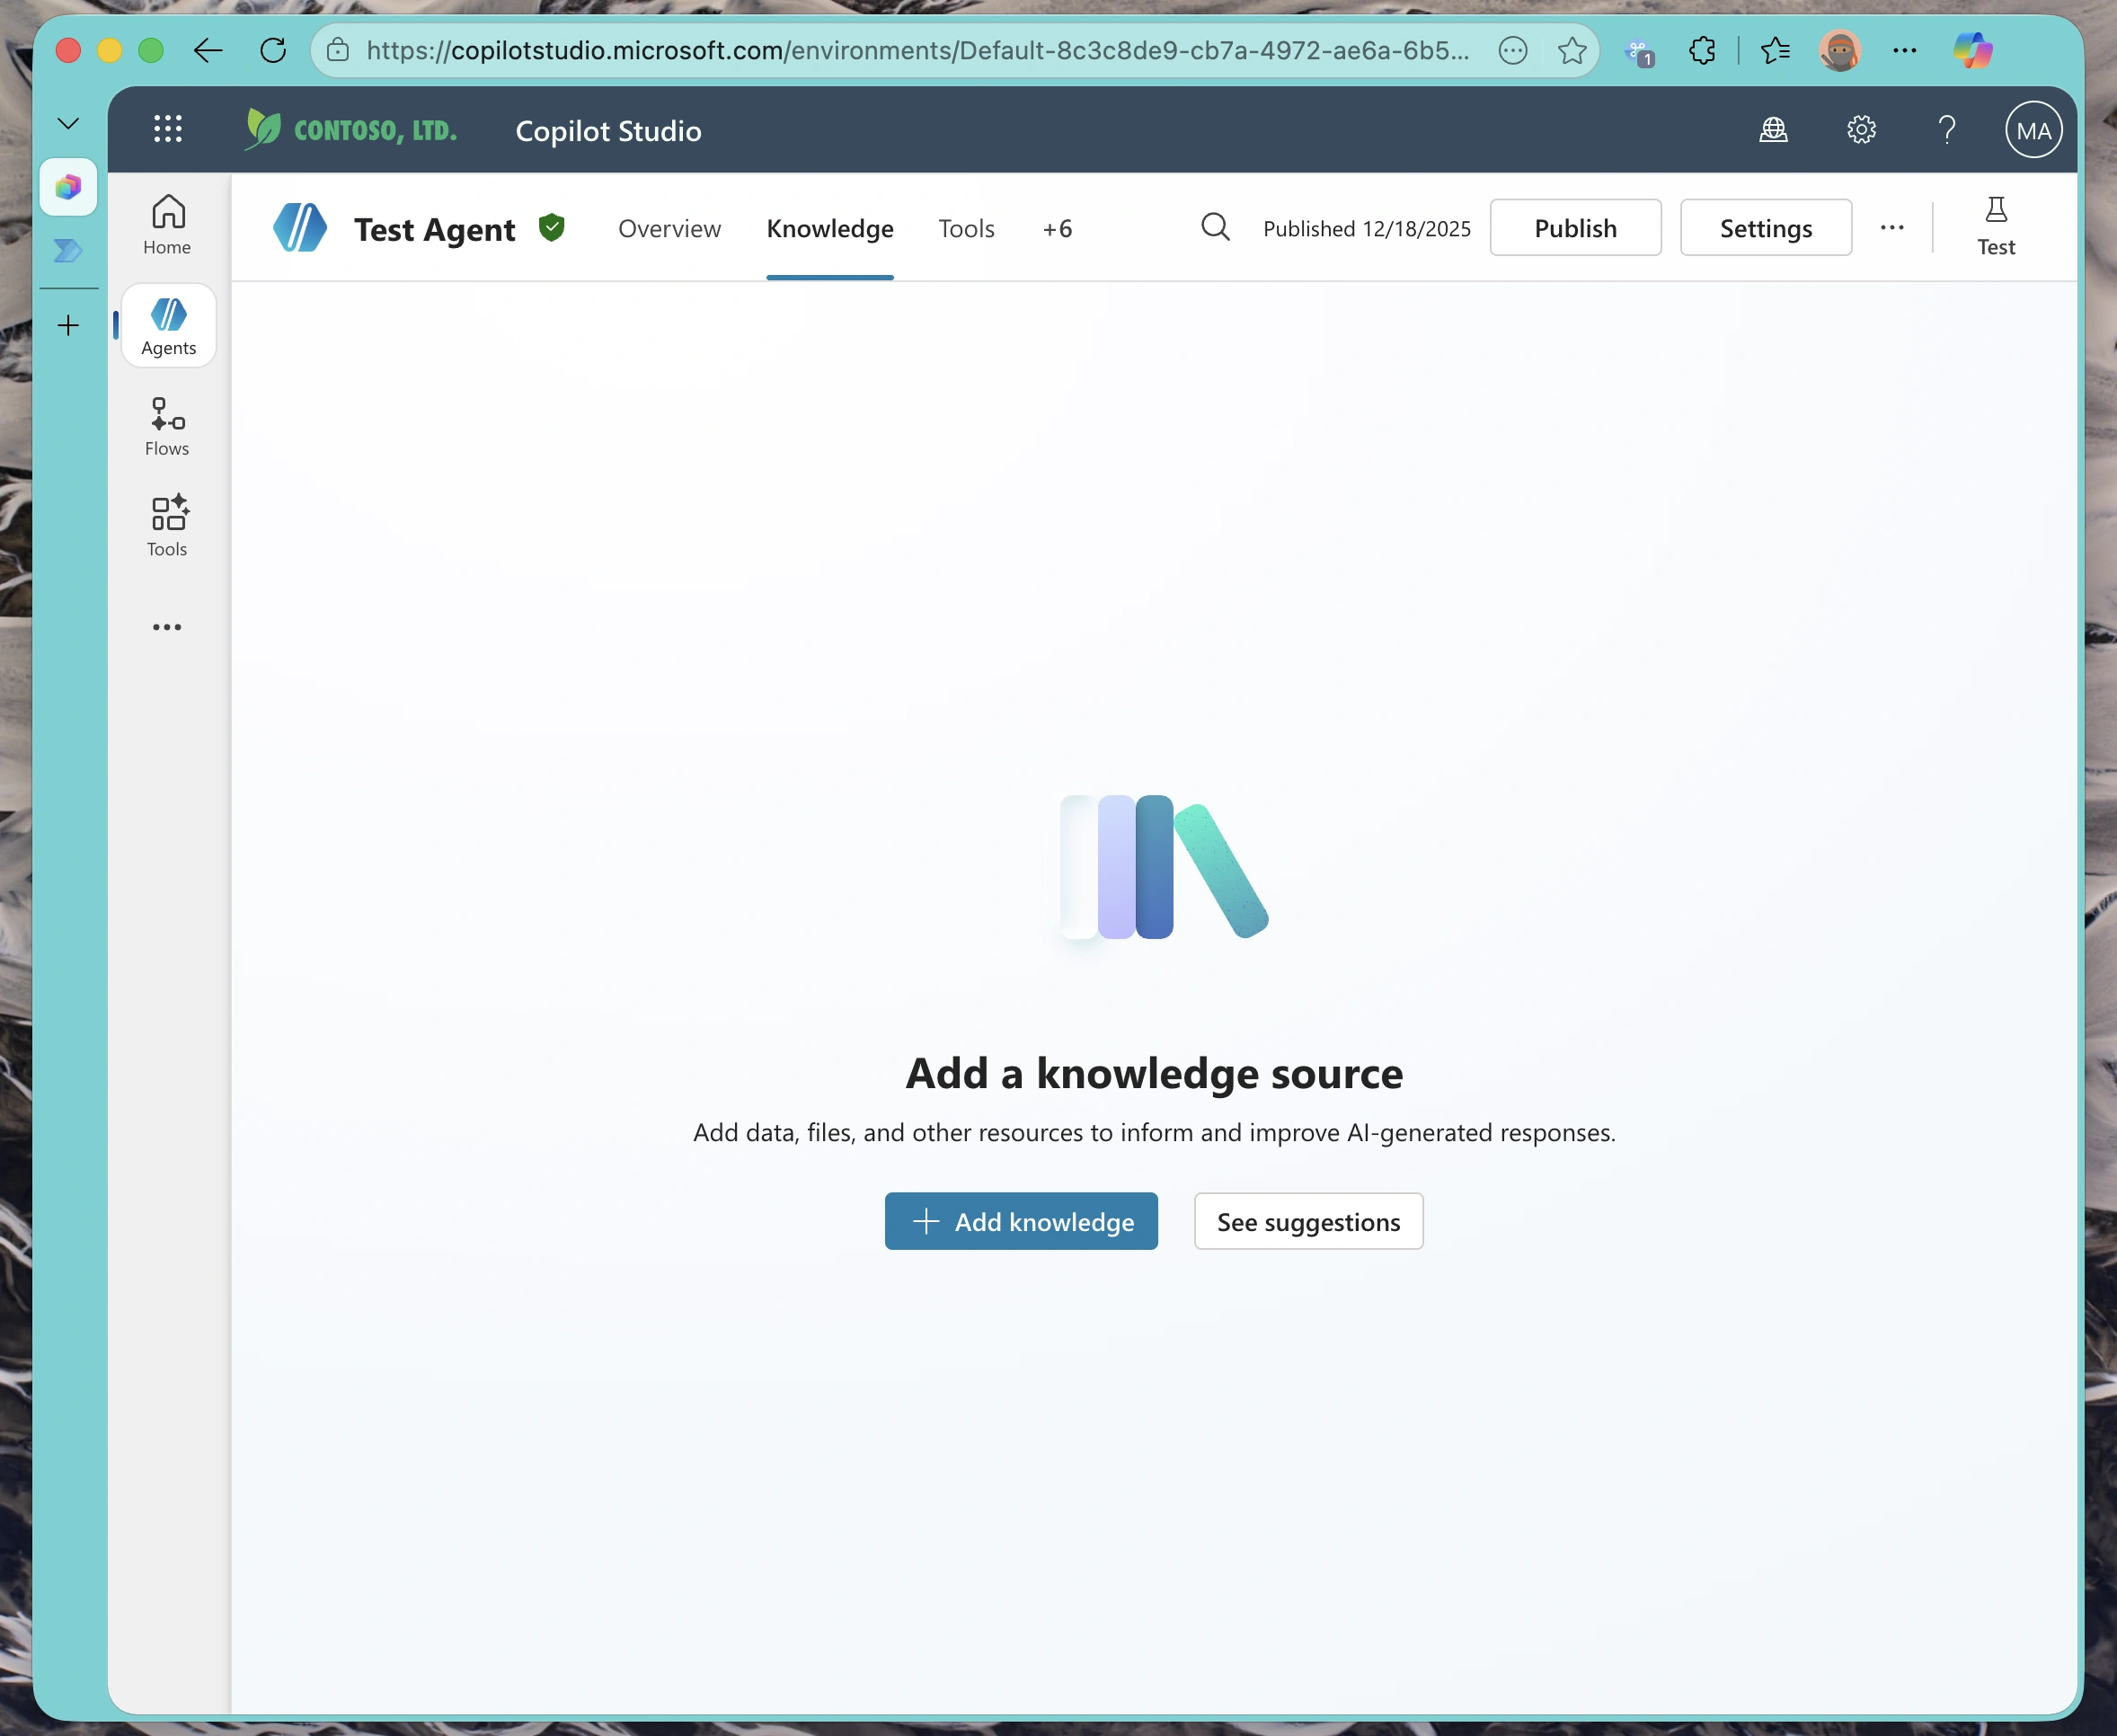
- Tools Tab: This is where you add executable capabilities—APIs, custom connectors, and MCP servers that can perform actions.
| Feature | Knowledge Sources | MCP Tools |
|---|---|---|
| Purpose | Information Retrieval | Action Execution |
| When to Use | FAQs, Docs, Policies | APIs, Databases, Services |
| Security Model | Read-Only Access | Authentication Required |
| Examples | SharePoint, PDFs, Websites | MCP Servers, REST APIs |
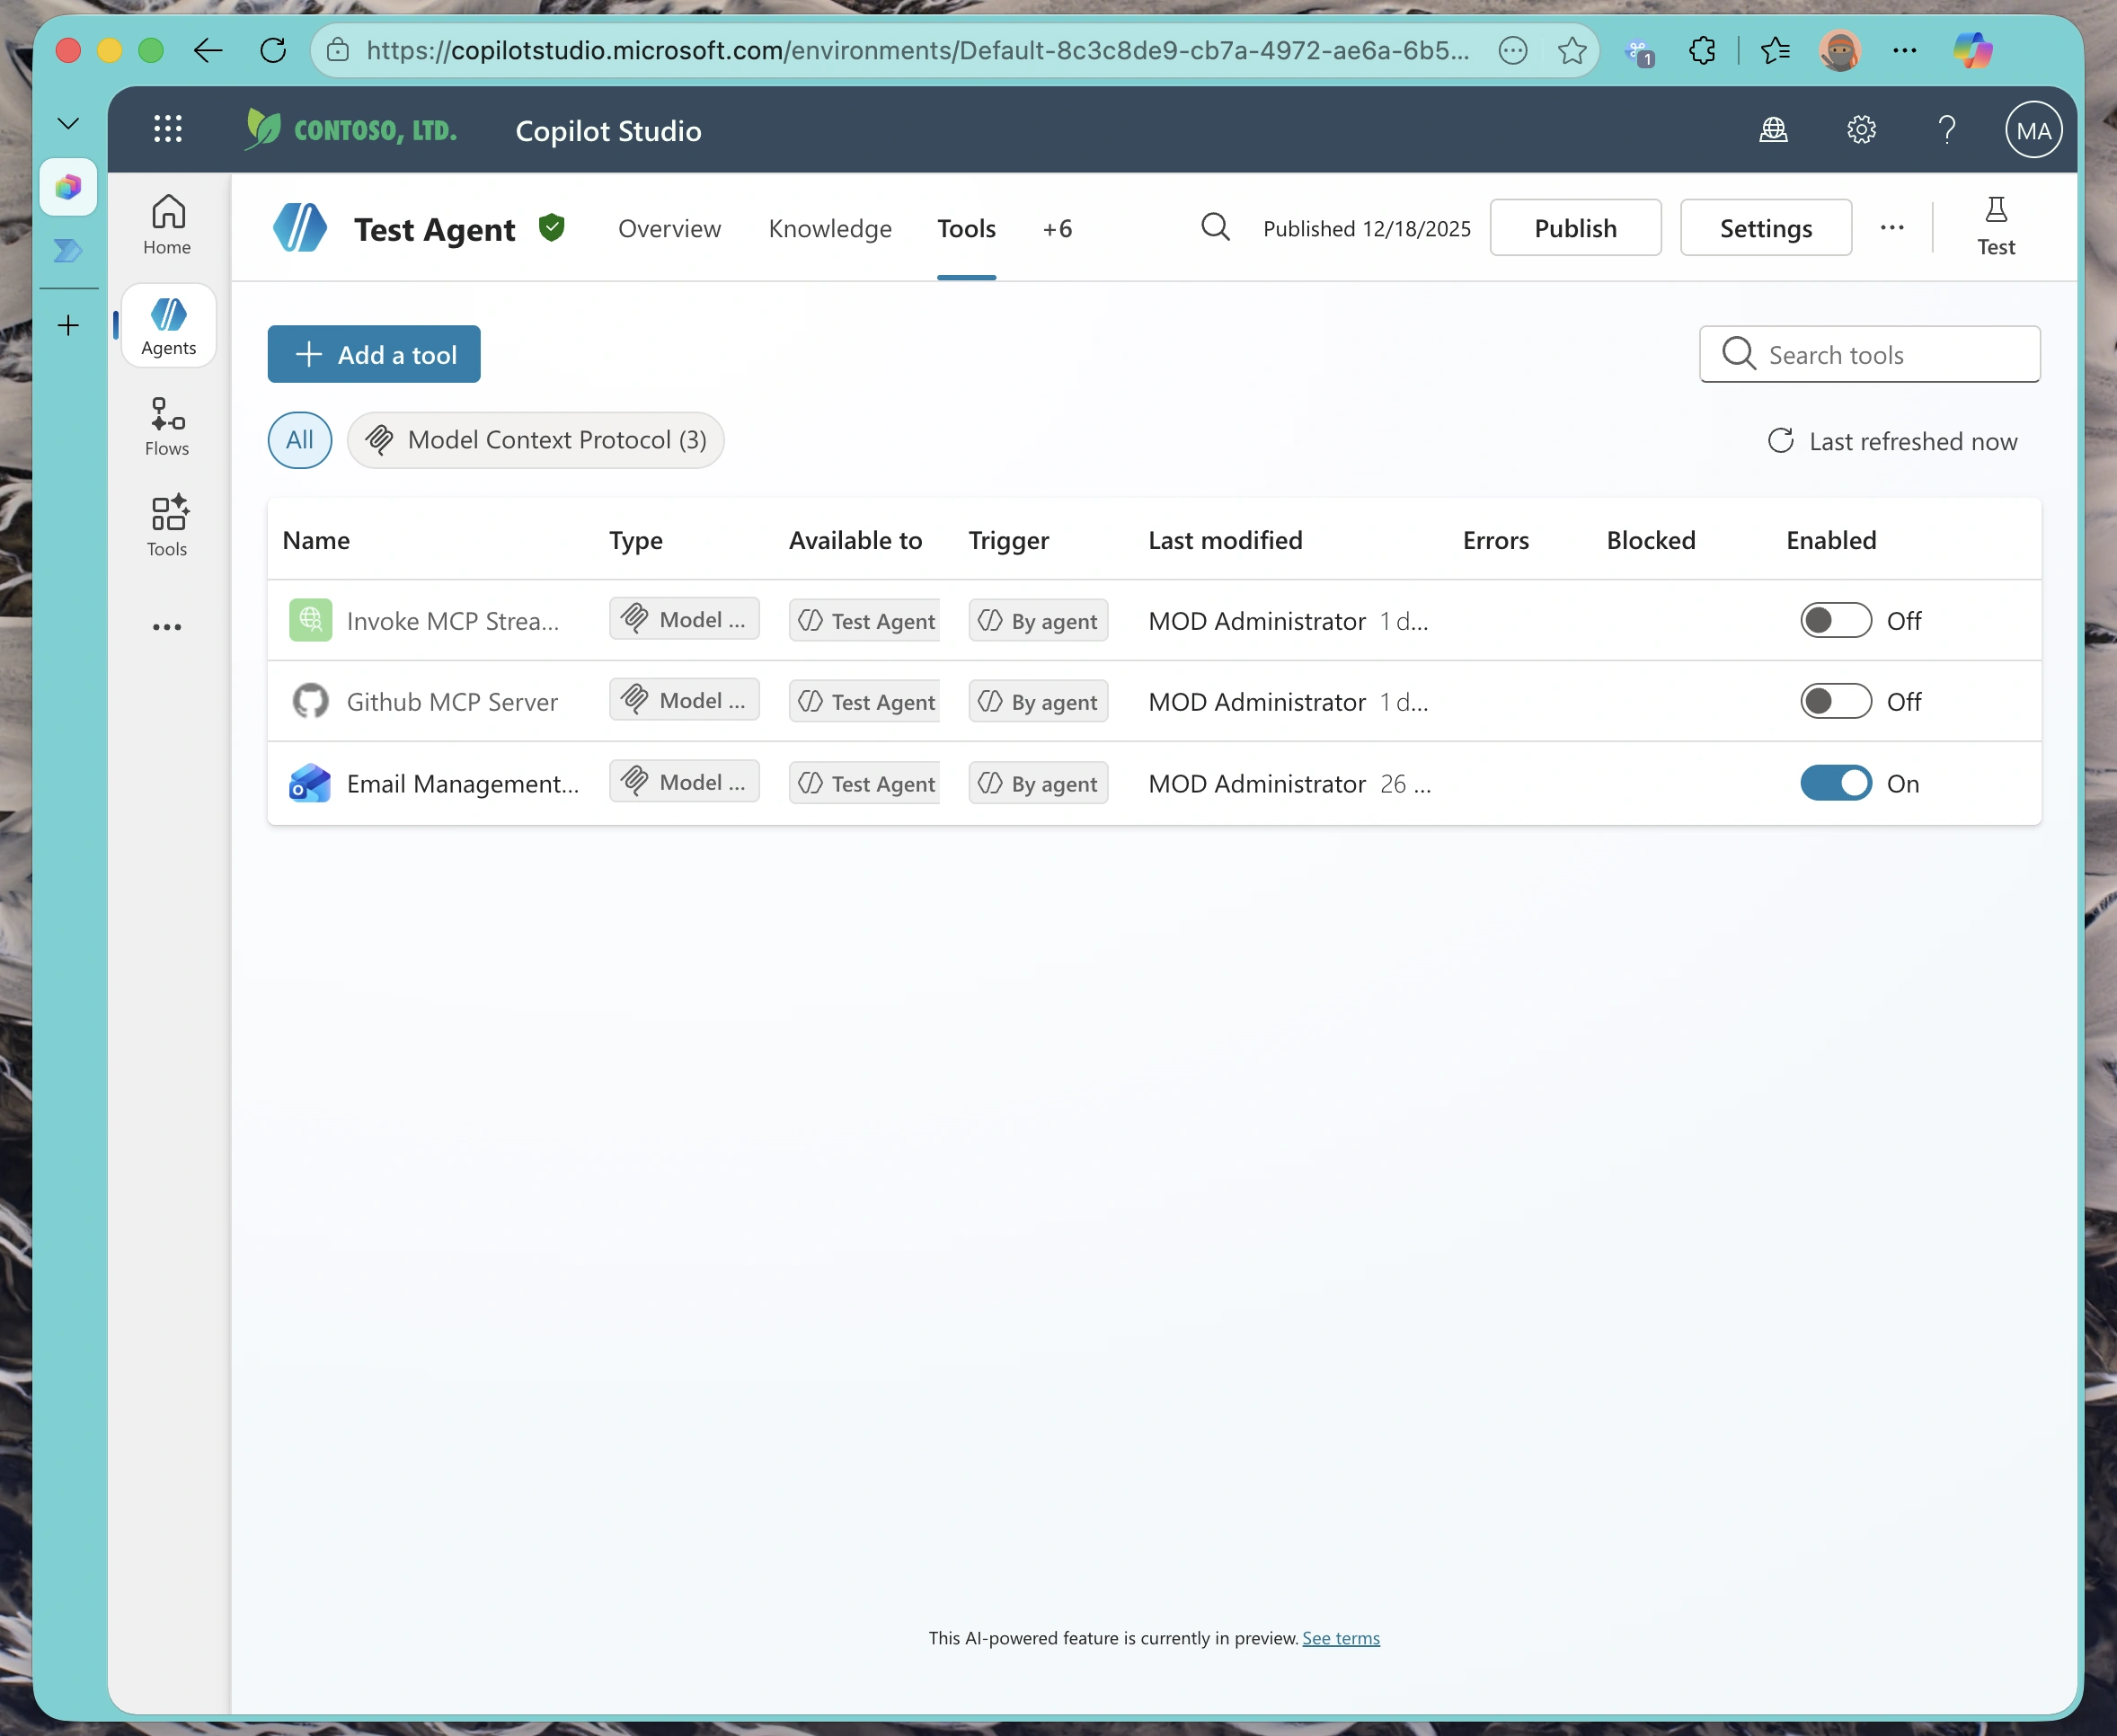
Since we want our agent to execute MCP tools (not just read data), we’re working in the Tools tab.
Part 2: Connecting Your MCP Server
Adding the MCP Integration
Click “Add a tool” in the Tools tab and select the Model Context Protocol option from the available integrations.
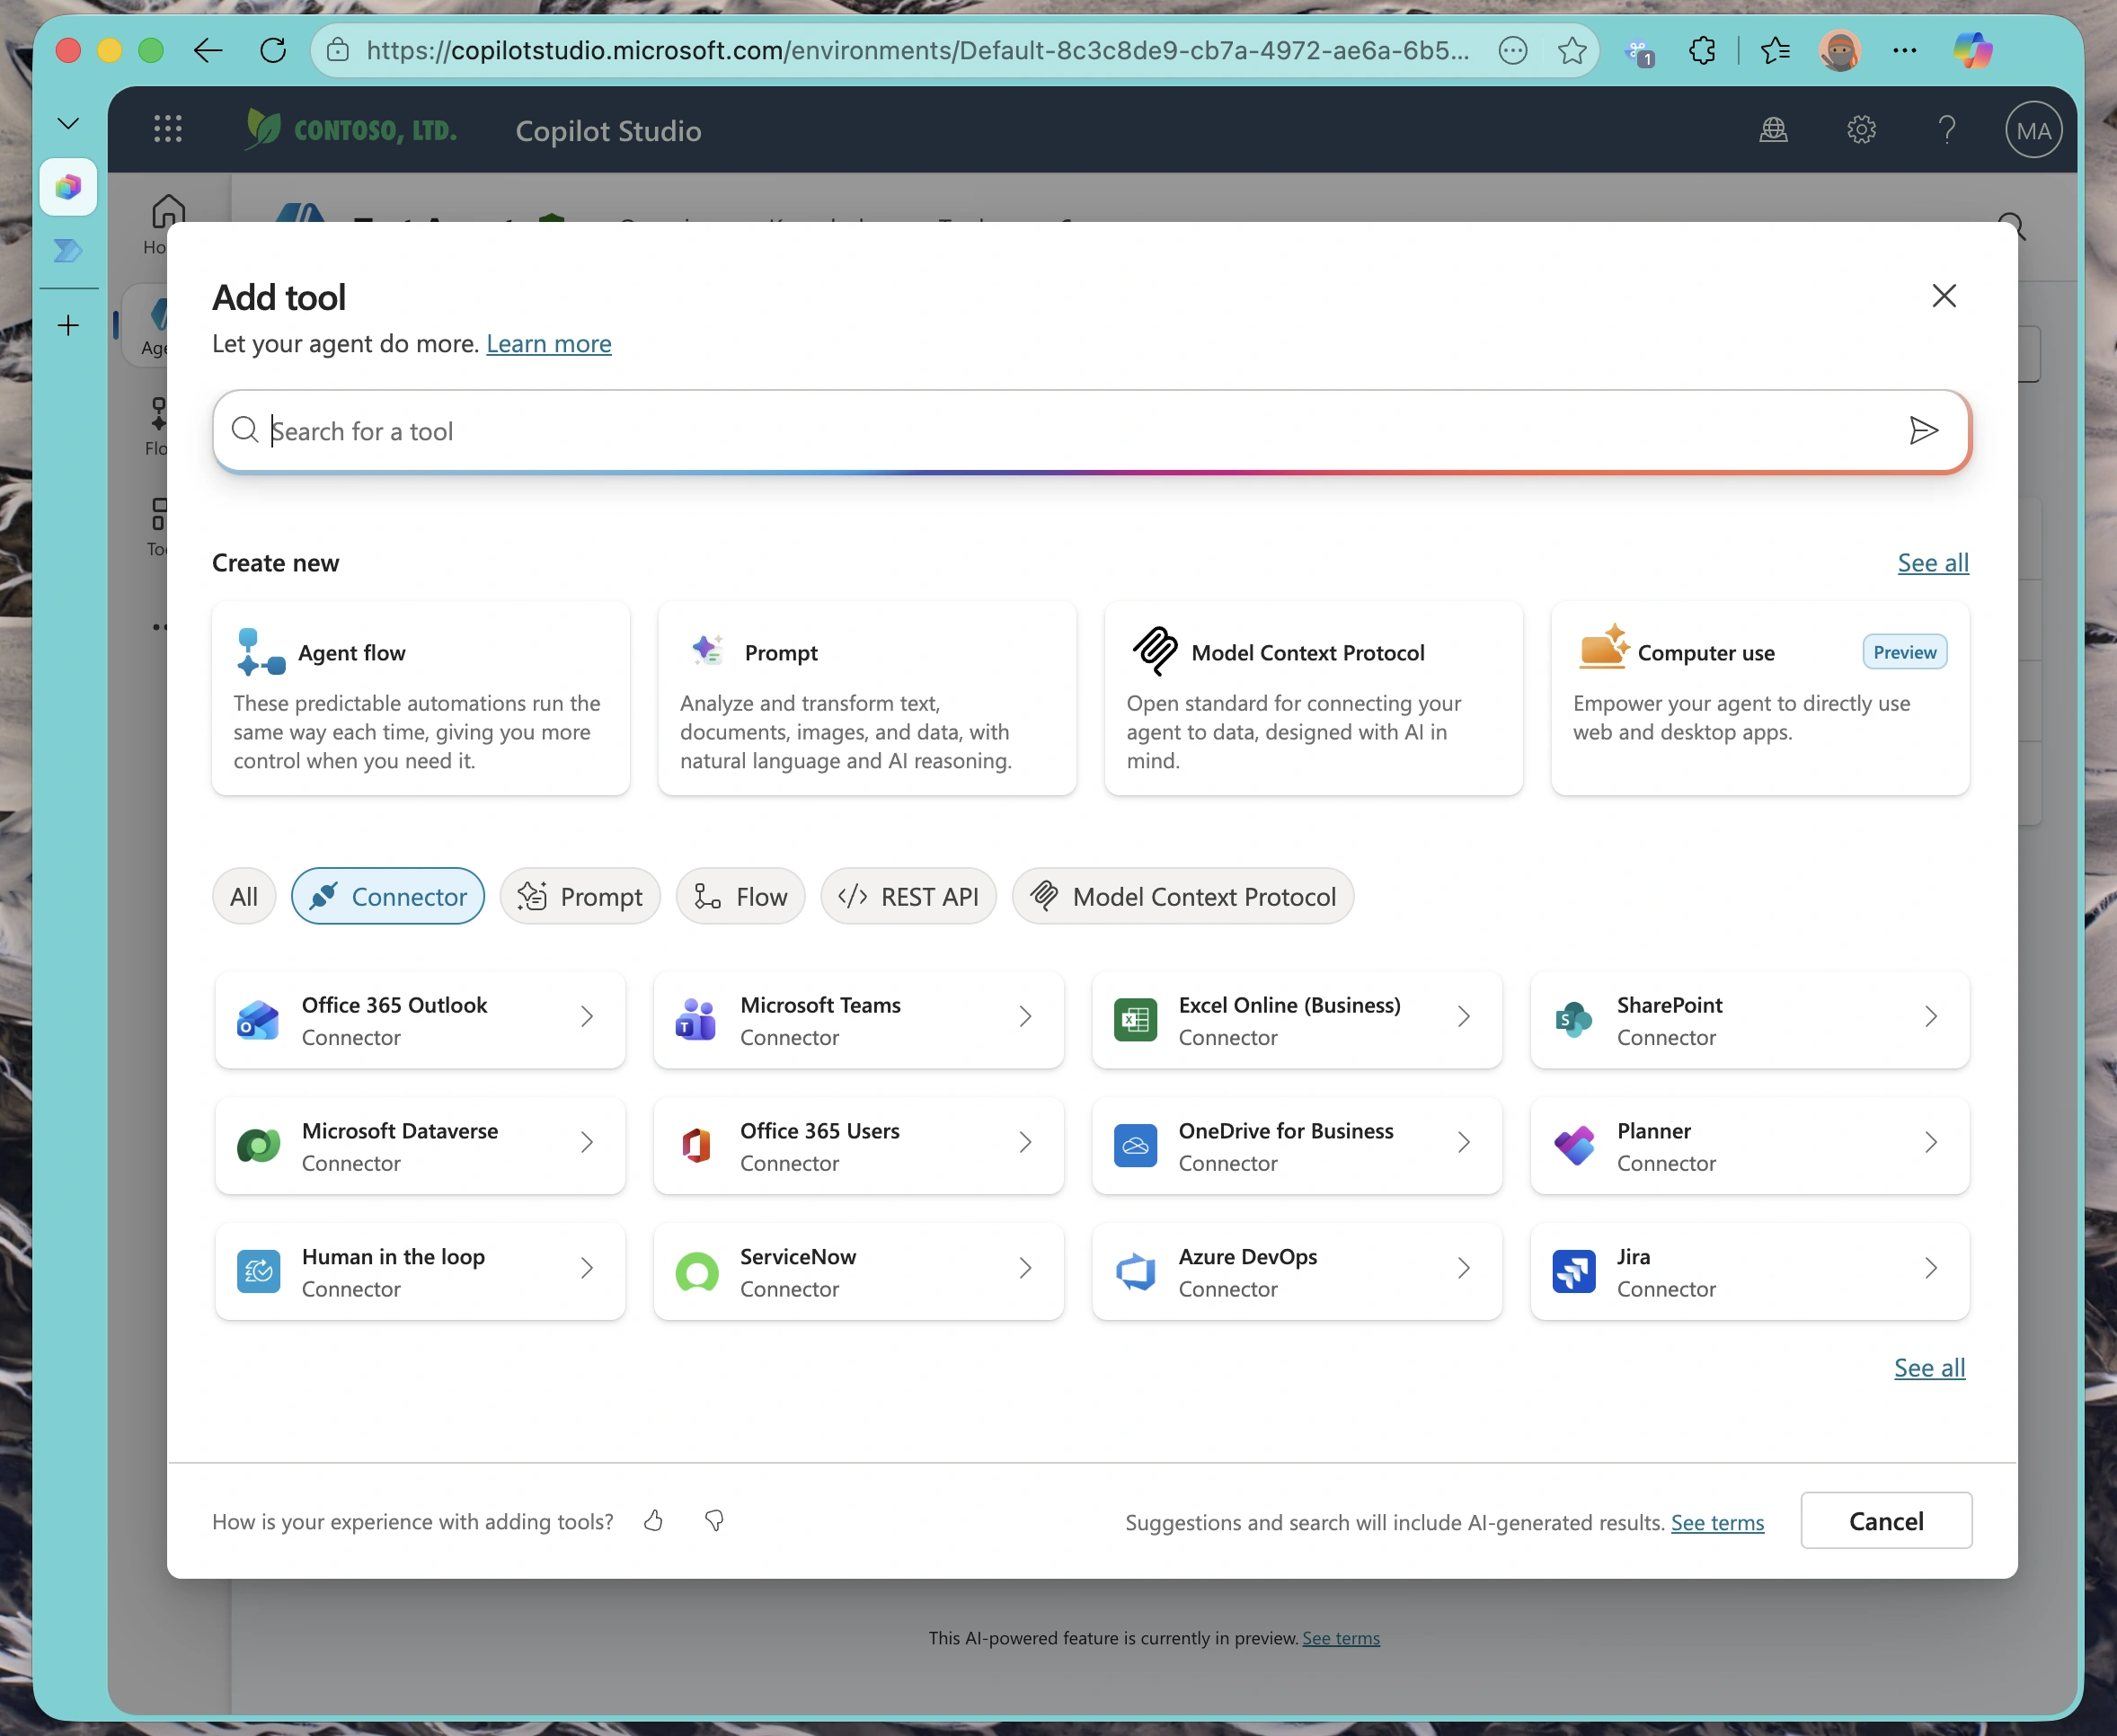
This opens the MCP configuration wizard, which will guide you through the connection process.
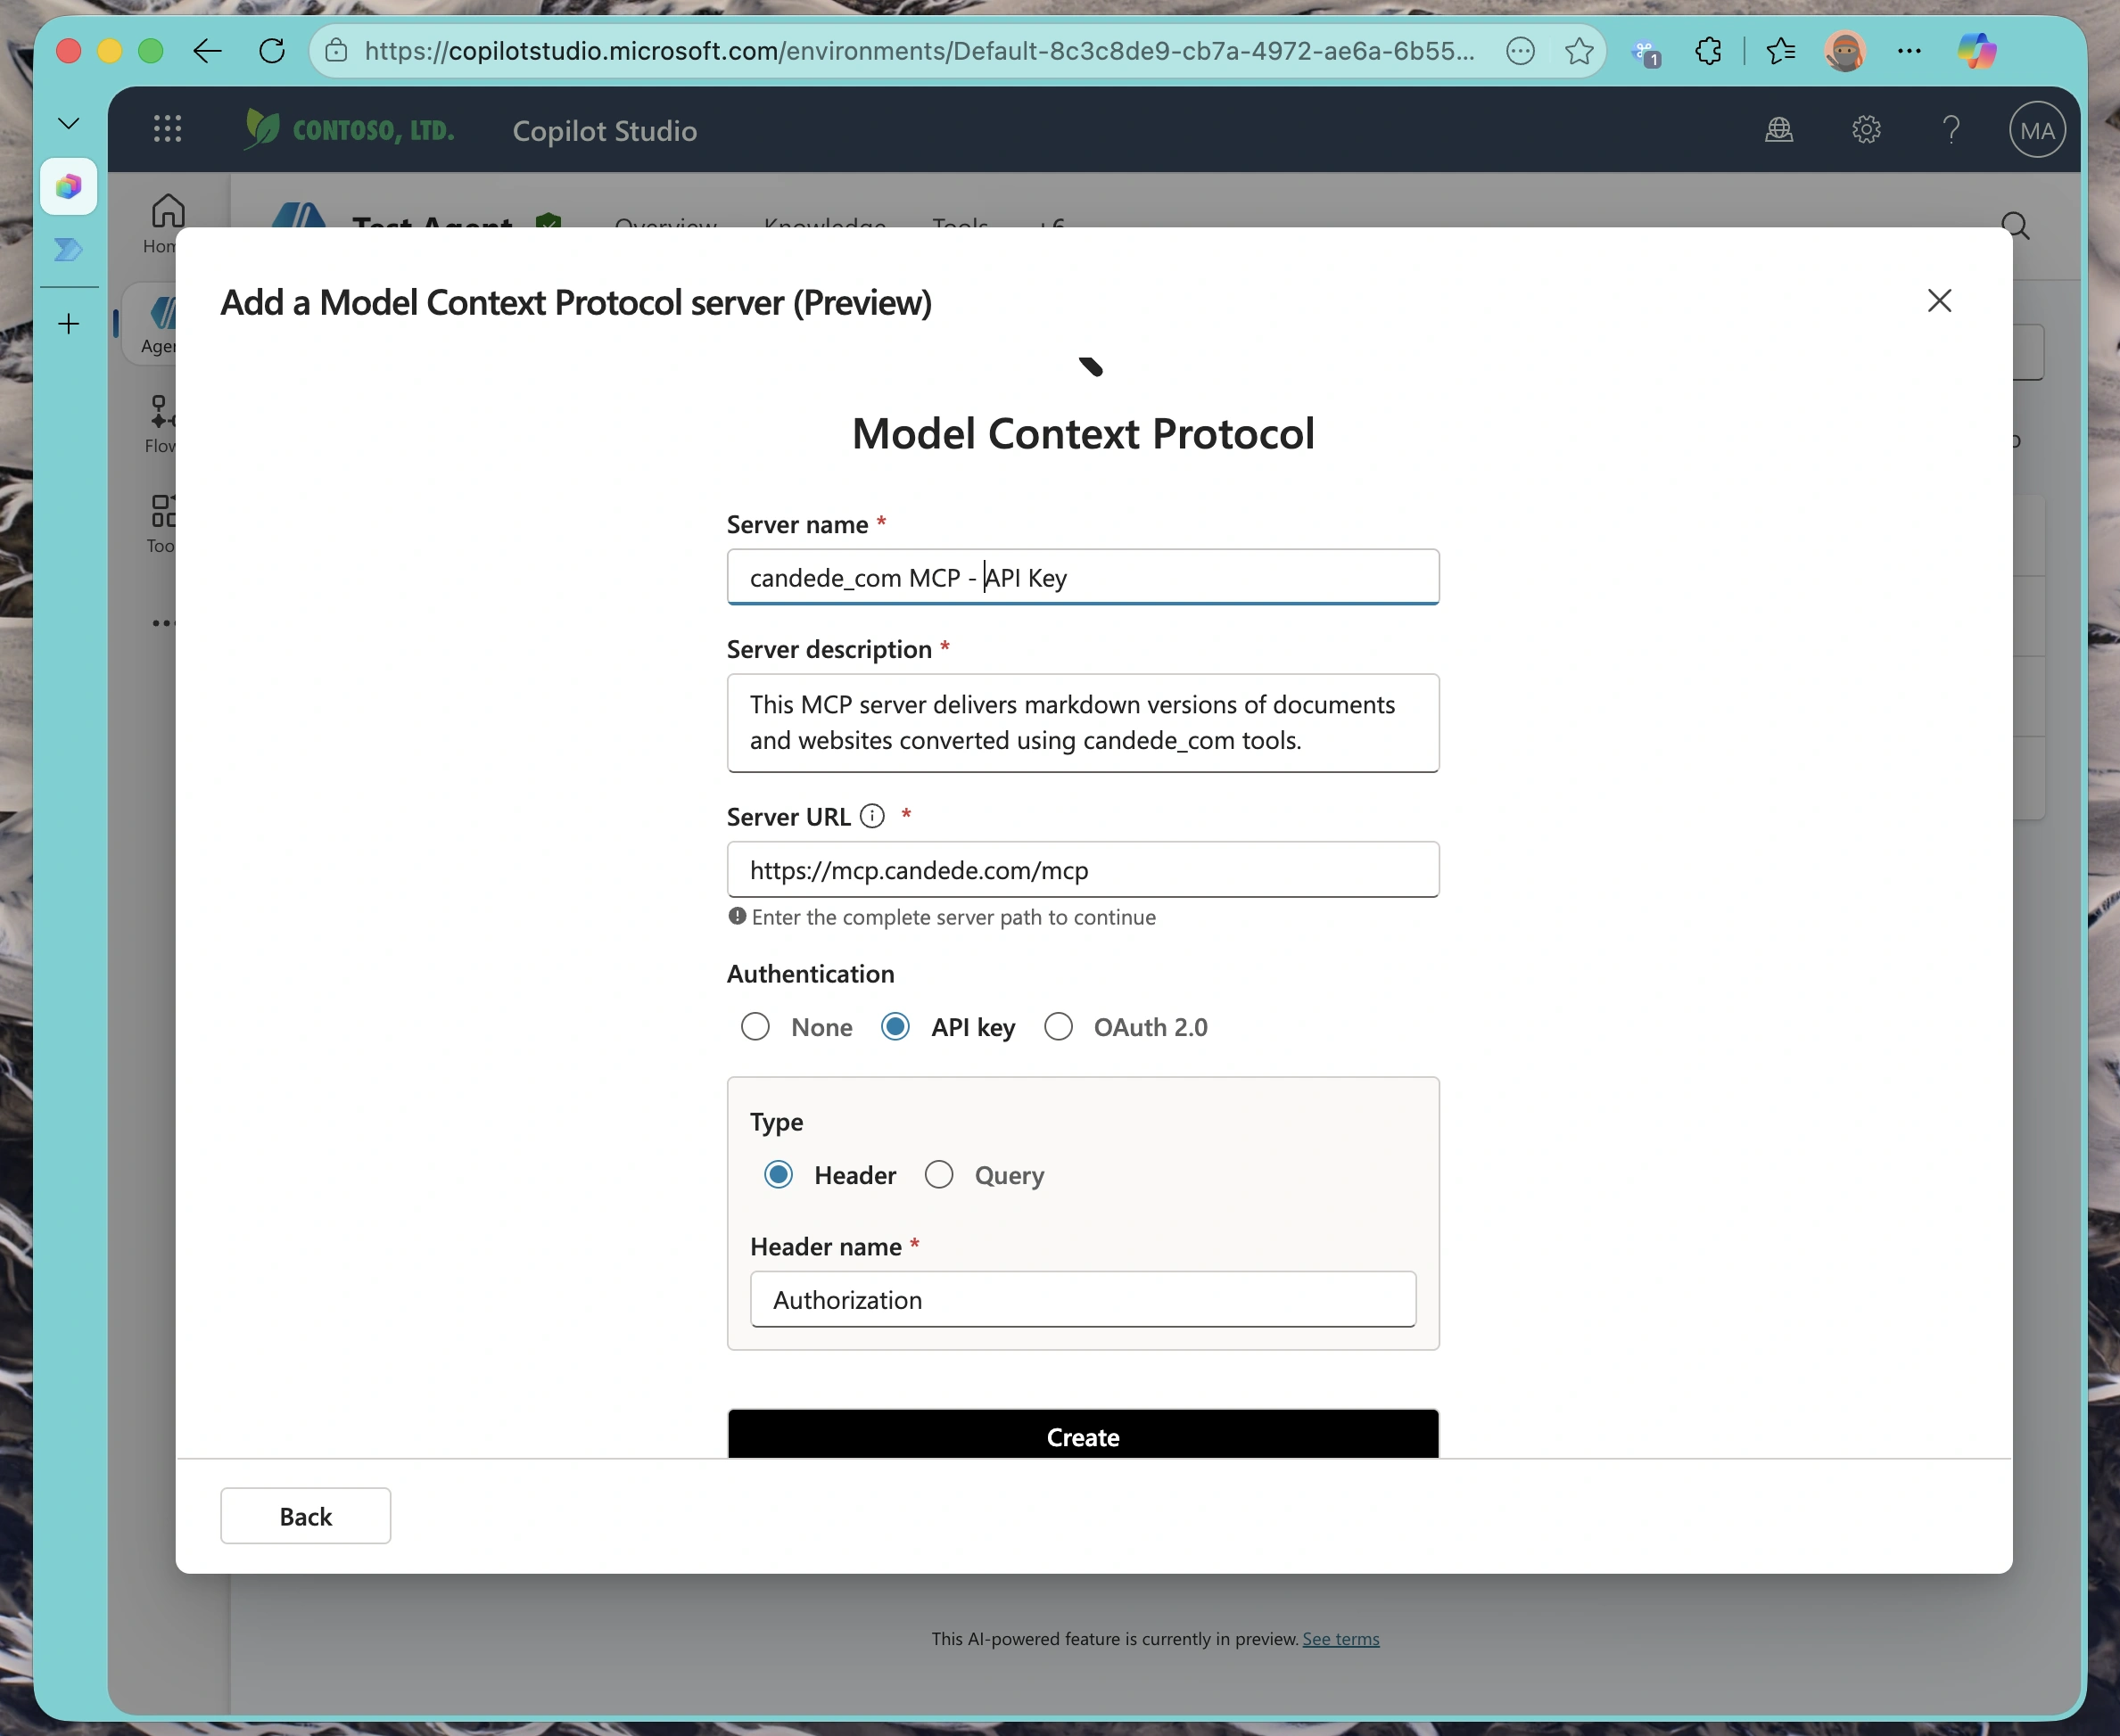
Configuring Server Details
You’ll need to provide your MCP server’s endpoint URL. This should be the base URL of your server—Copilot Studio will automatically discover the available tools from your server’s manifest.
Important Configuration Notes:
- Use
https://for production servers (TLS encryption is strongly recommended) - The URL should point to your MCP server’s root endpoint
- Ensure the server is publicly accessible
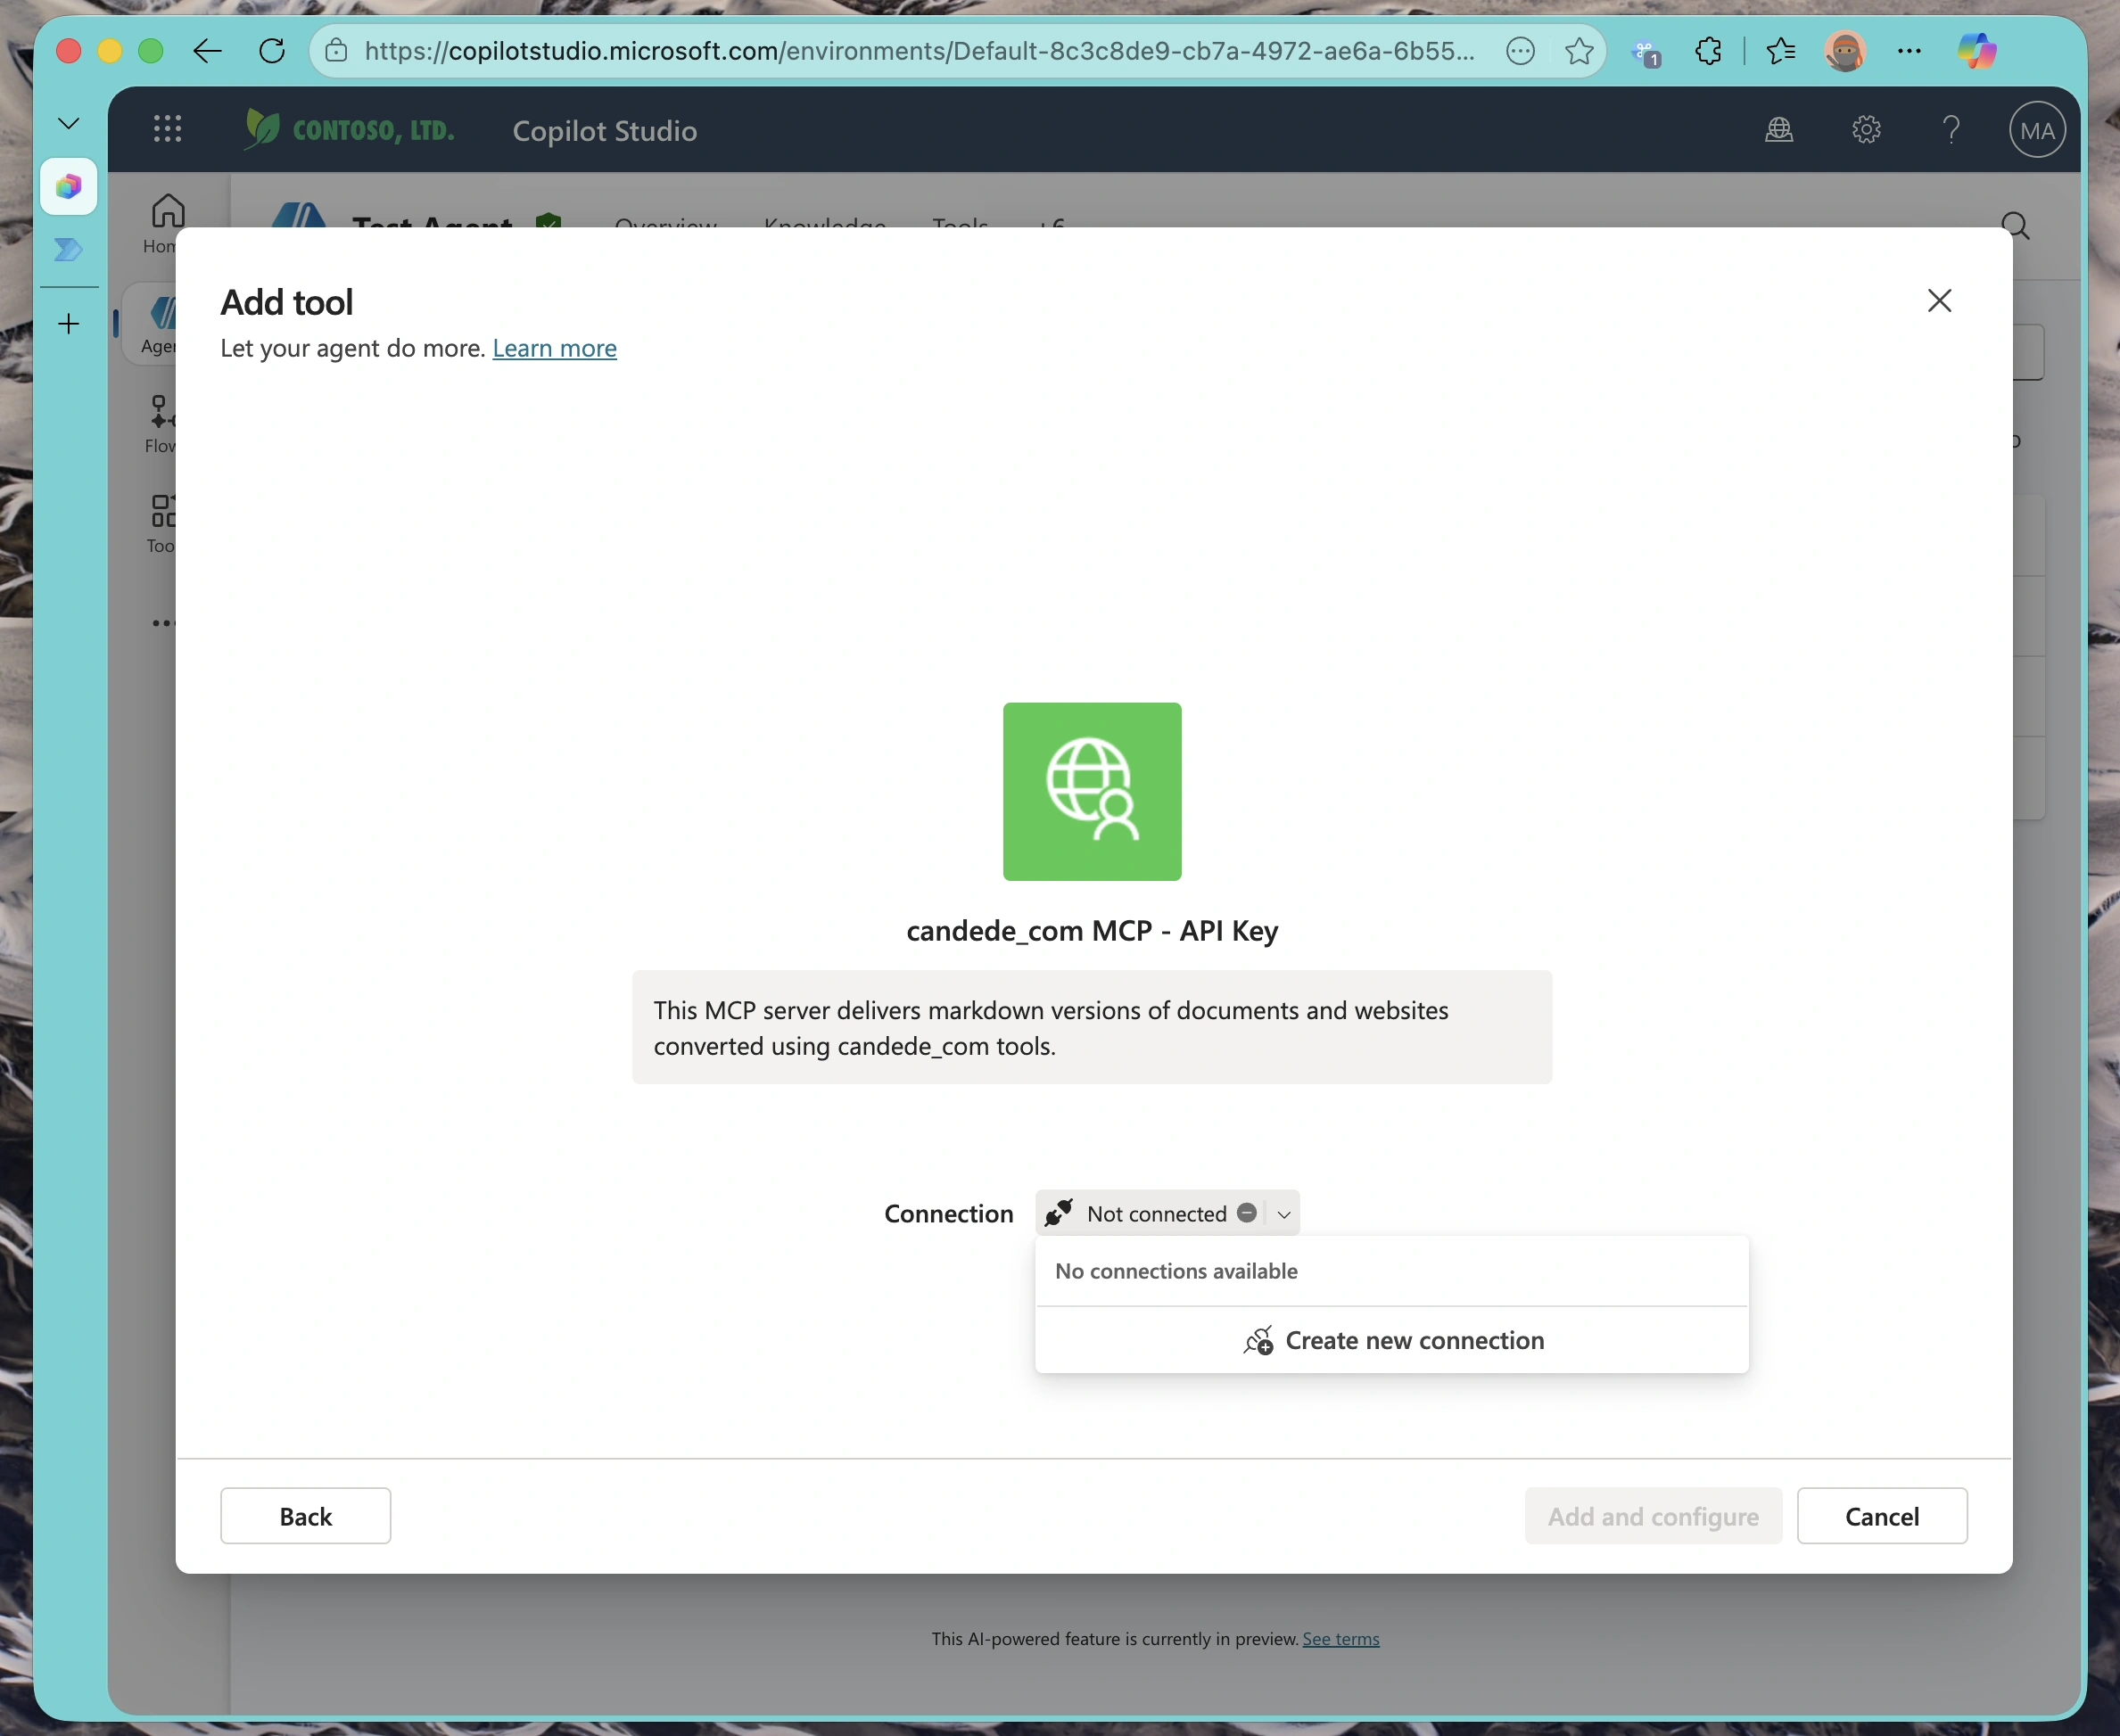
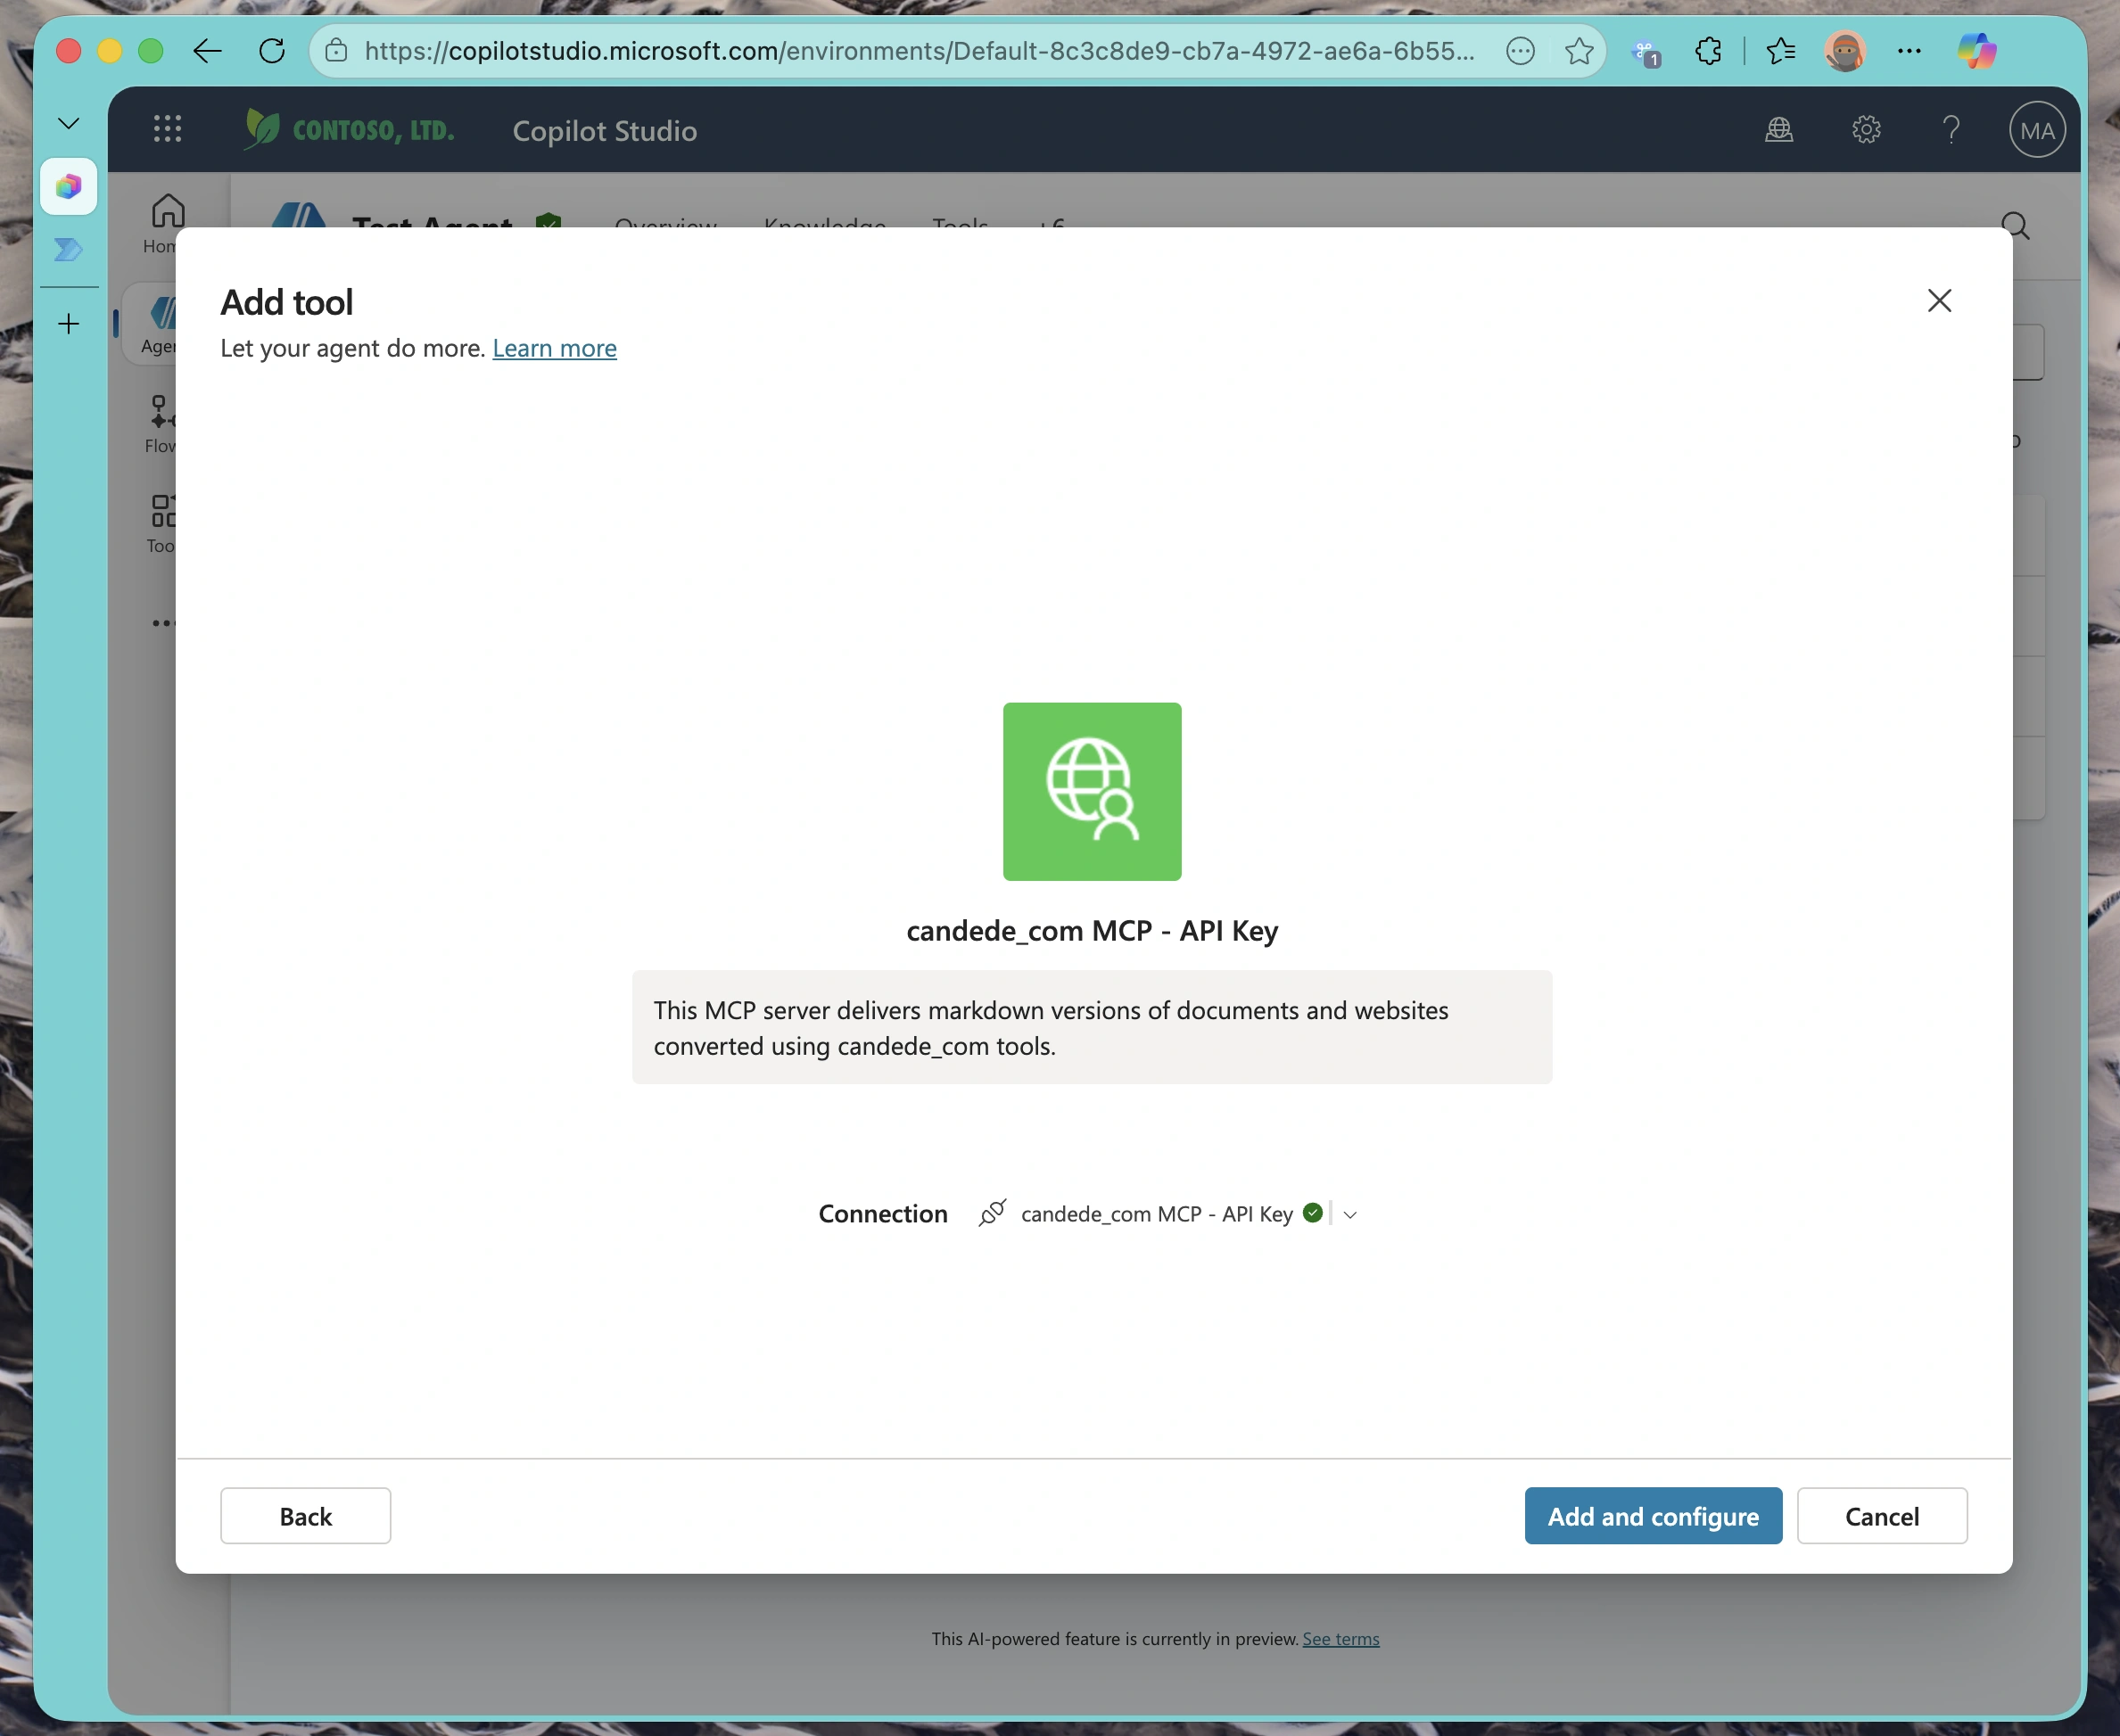
Creating the Authenticated Connection
Now comes the security piece. Click “Create Connection” to set up authentication.
Copilot Studio will prompt you for credentials. When you select API Key authentication, you can configure it as either:
- Header: Include the API key in a custom header (e.g.,
Authorization,X-API-Key, or any header name your server expects) - Query parameter: Include the API key in the URL query string
In this example, our MCP server uses the Authorization header with a Bearer token, which is a common pattern but not the only option.
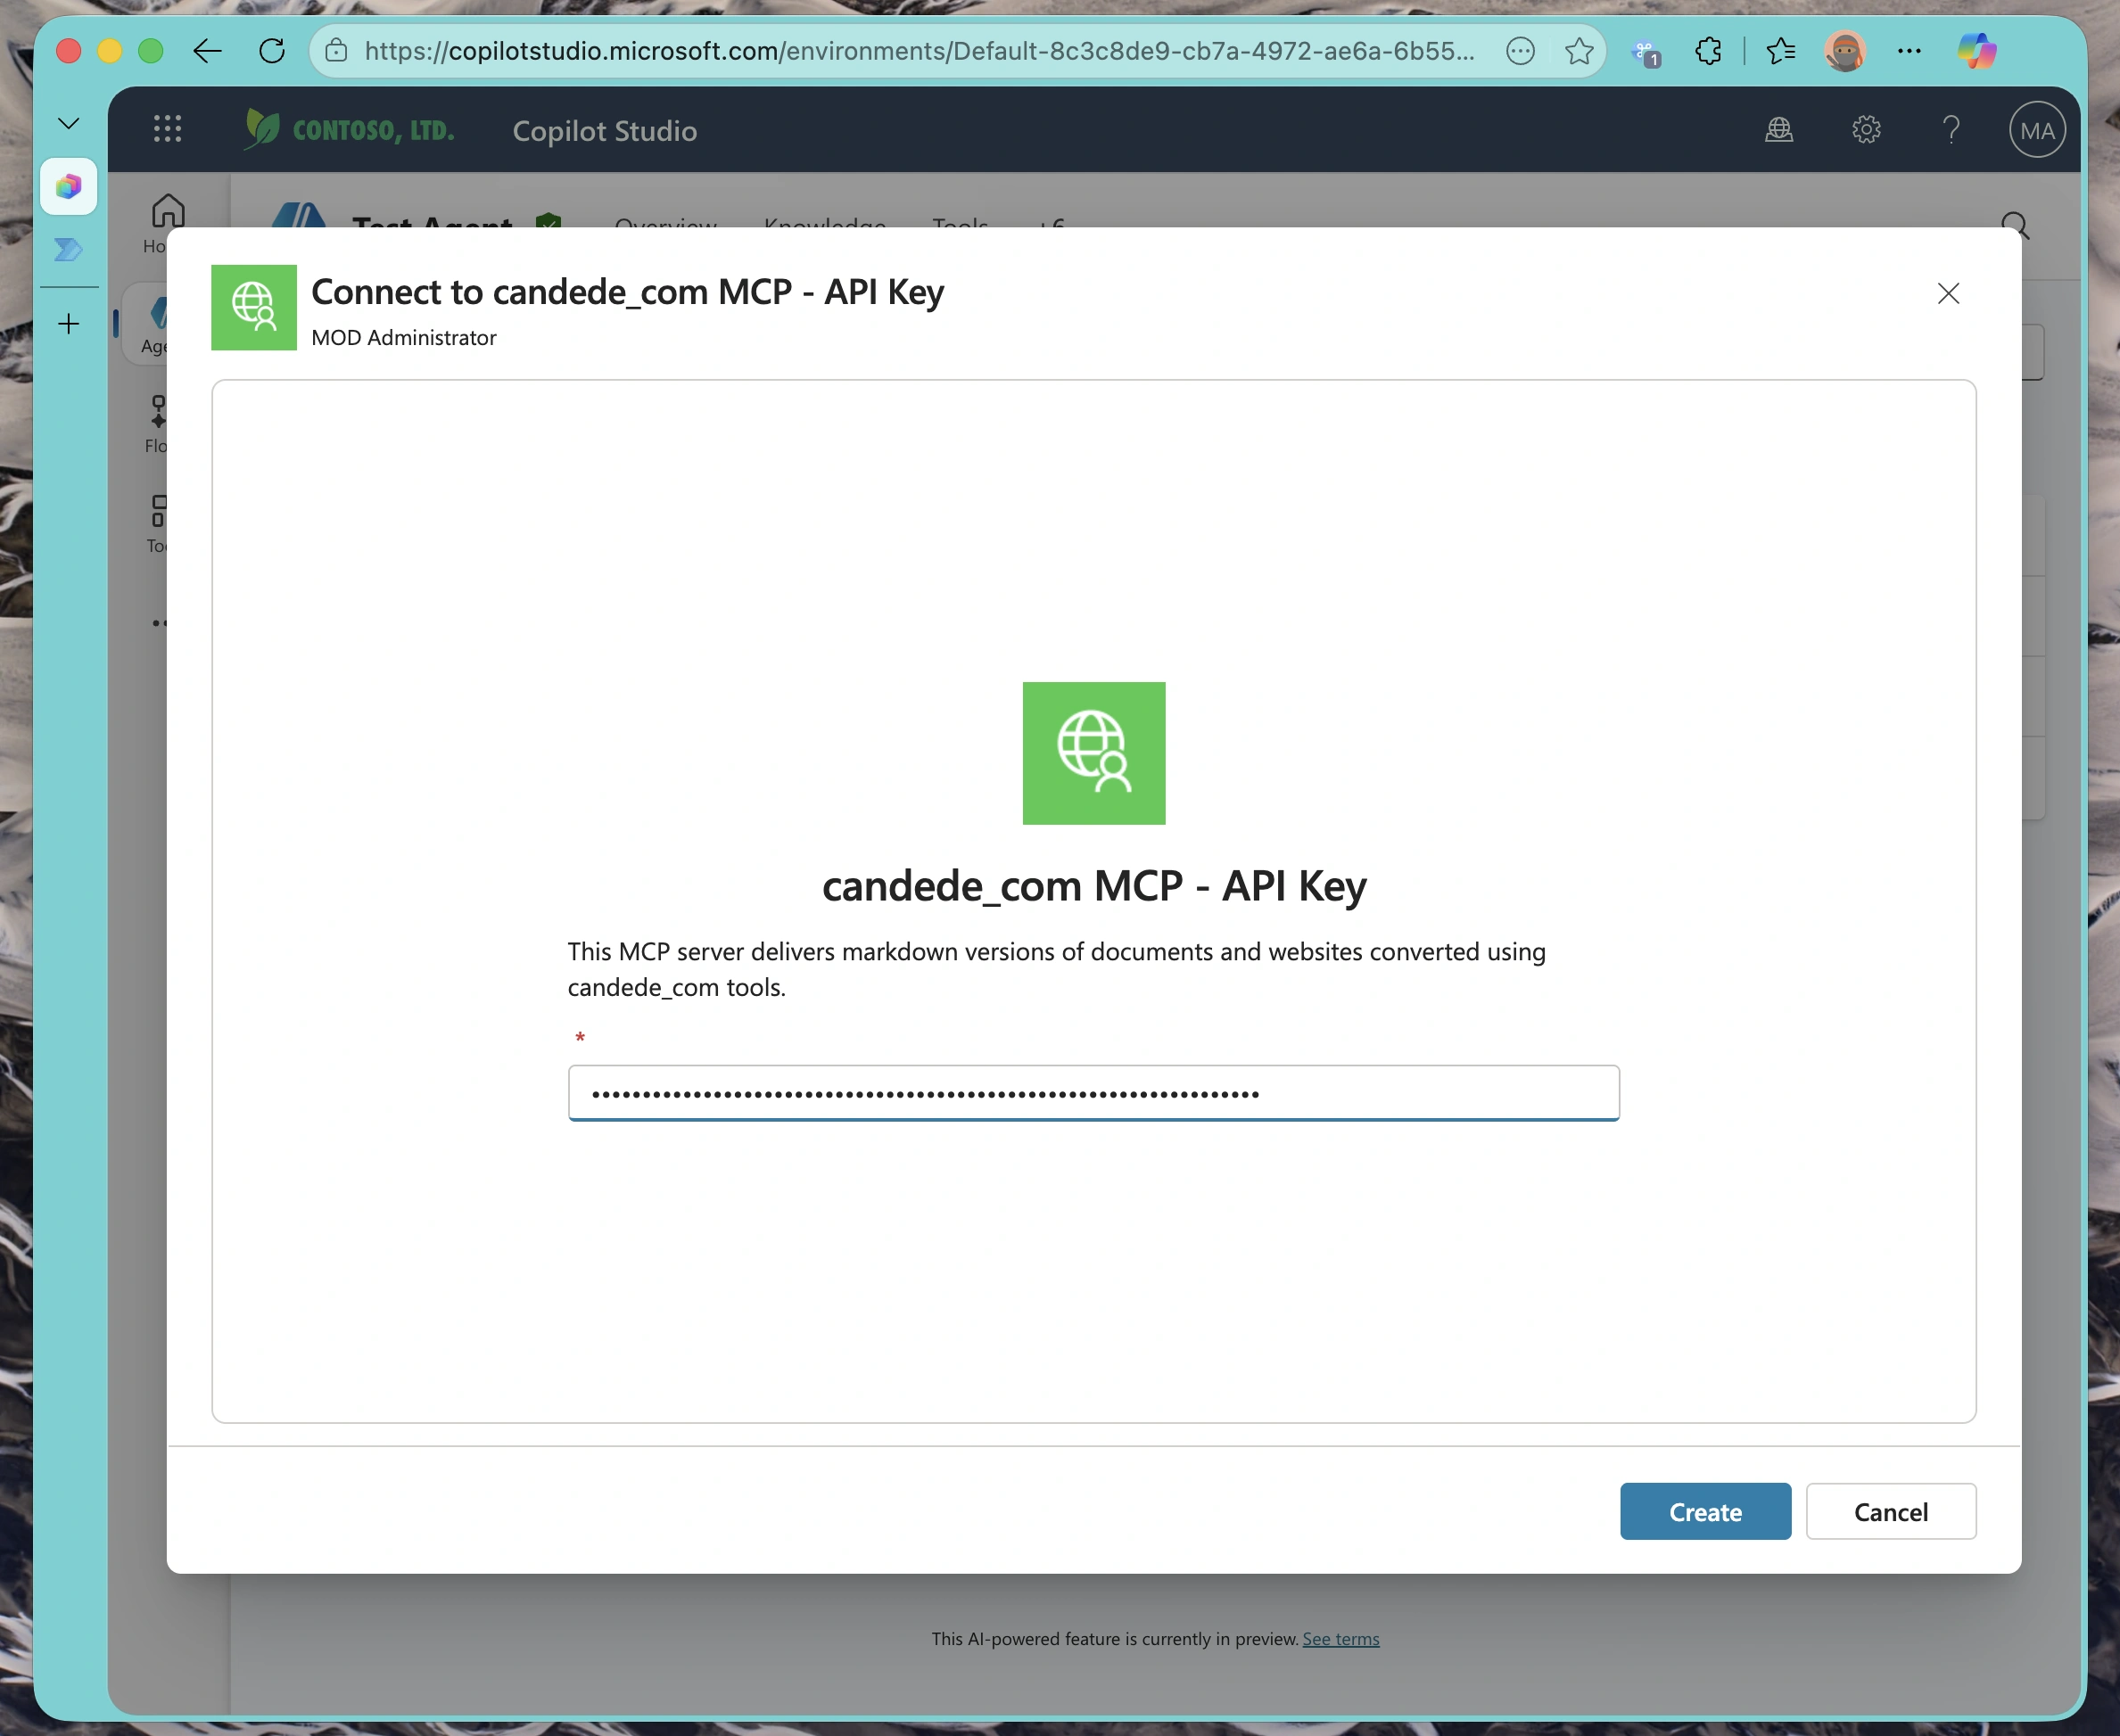
Entering Your API Token
Paste your API key into the authentication field. Based on your configuration, Copilot Studio will include this key in either the specified header or as a query parameter in every request to your MCP server.
API Key Best Practices:
- Never share your API key in screenshots, logs, or public repositories - Store keys in Copilot Studio’s secure connection manager (they’re encrypted at rest) - You can update or rotate keys later without reconfiguring the entire integration - Each connection is isolated, so different agents can use different credentials
Once you submit the key, Copilot Studio will test the connection and confirm success.
Part 3: Verifying the Integration
Reviewing Server Details
After the connection is established, Copilot Studio displays a summary of your MCP server configuration. This includes the endpoint URL, connection status, and authentication method.
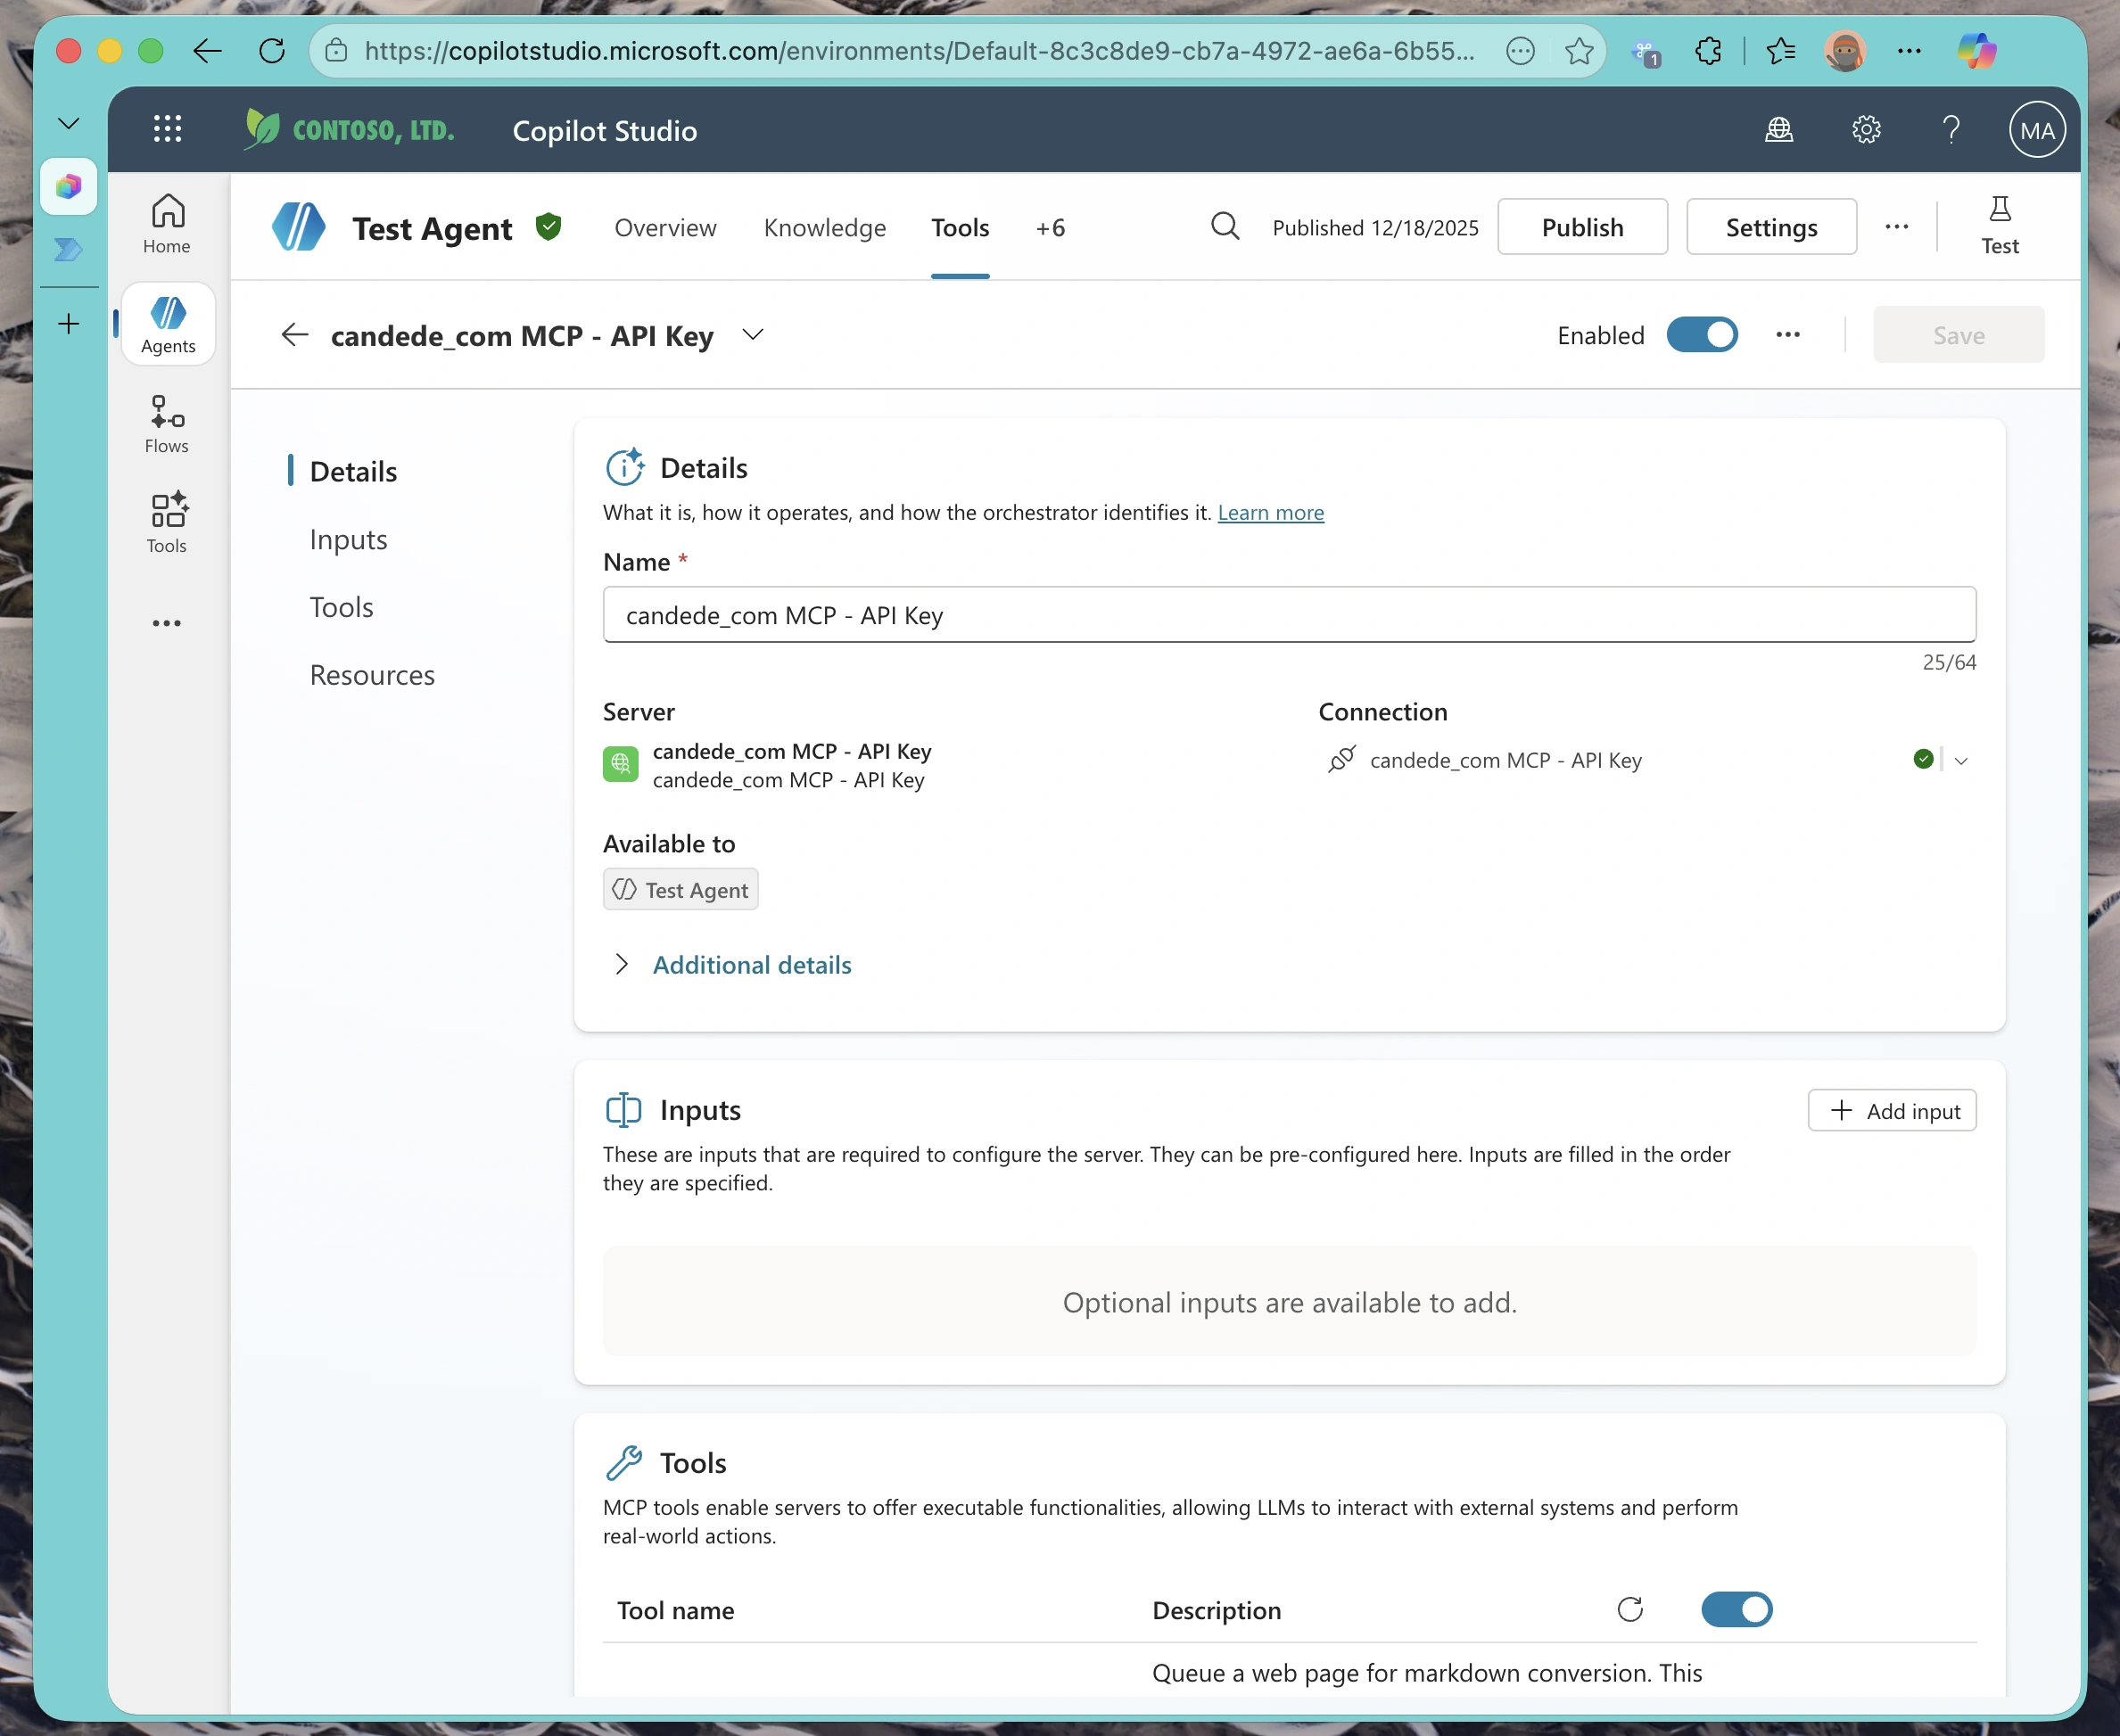
This is your chance to double-check that everything is configured correctly before enabling the tools.
Discovering Available Tools
One of the beauties of the Model Context Protocol is automatic tool discovery. Copilot Studio queries your server’s manifest and displays all available tools.
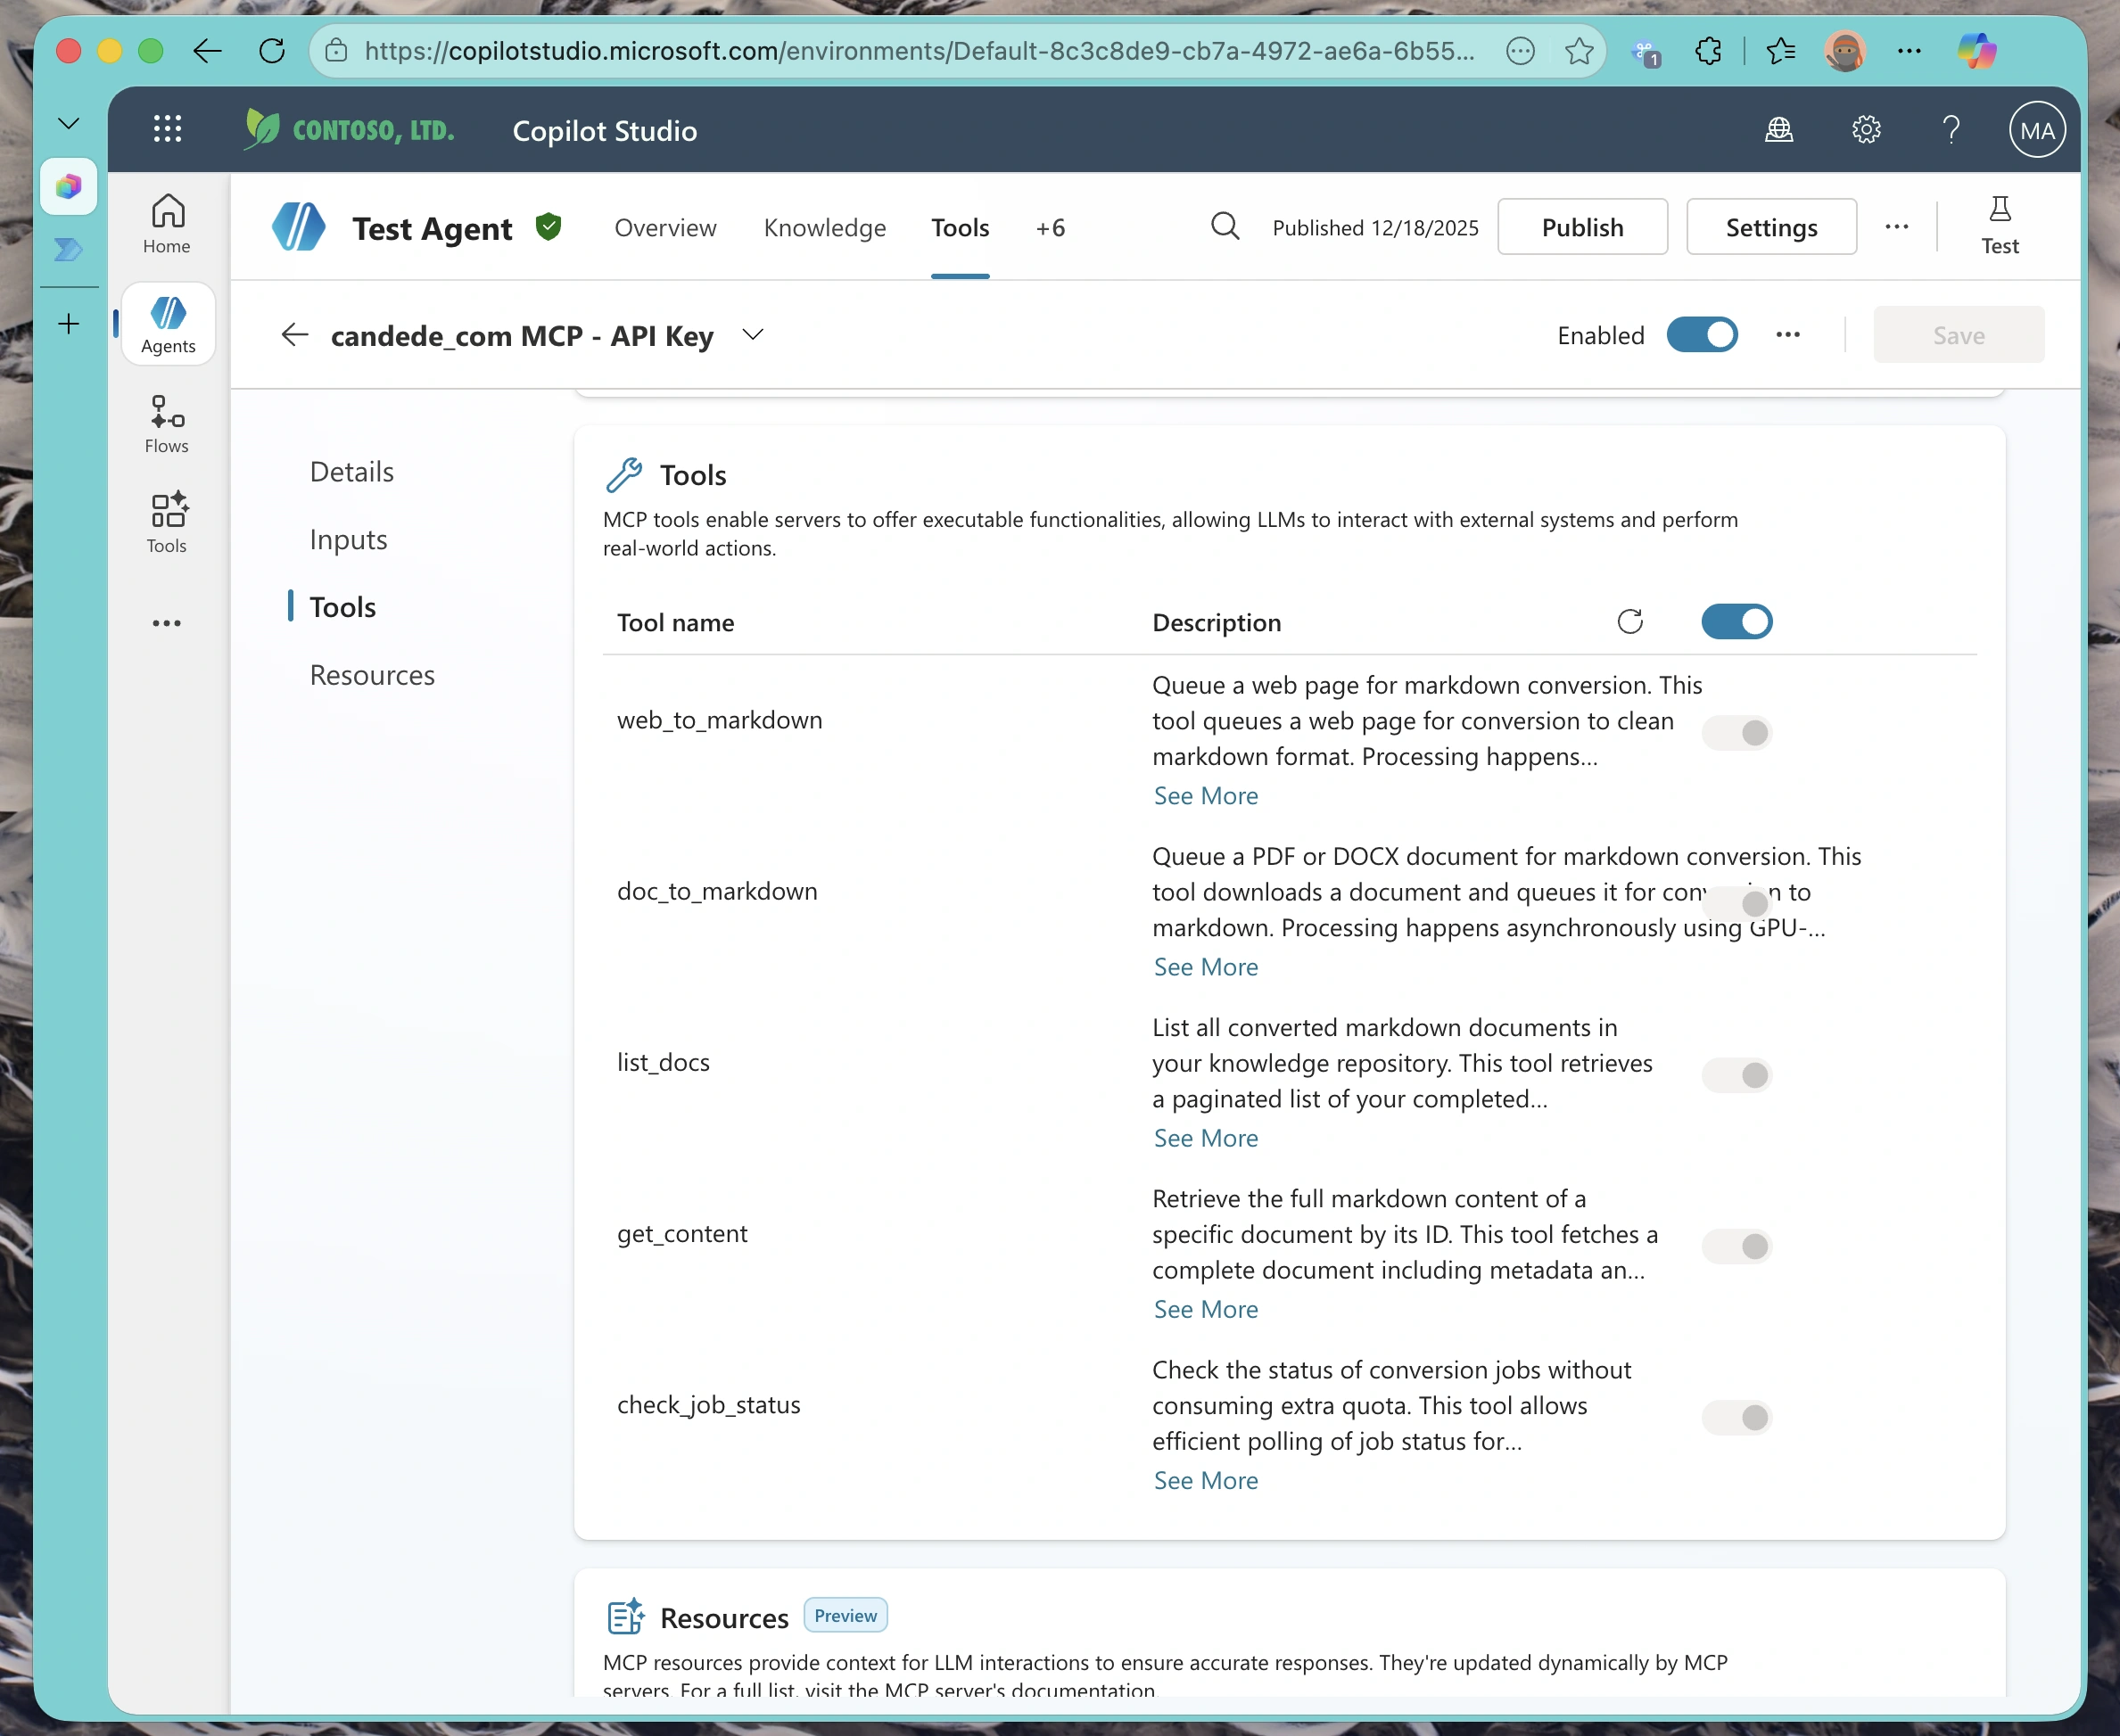
Each tool shows:
- Tool name and description
- Parameters it accepts
- Return type and structure
You can selectively enable or disable tools based on what you want your agent to have access to.
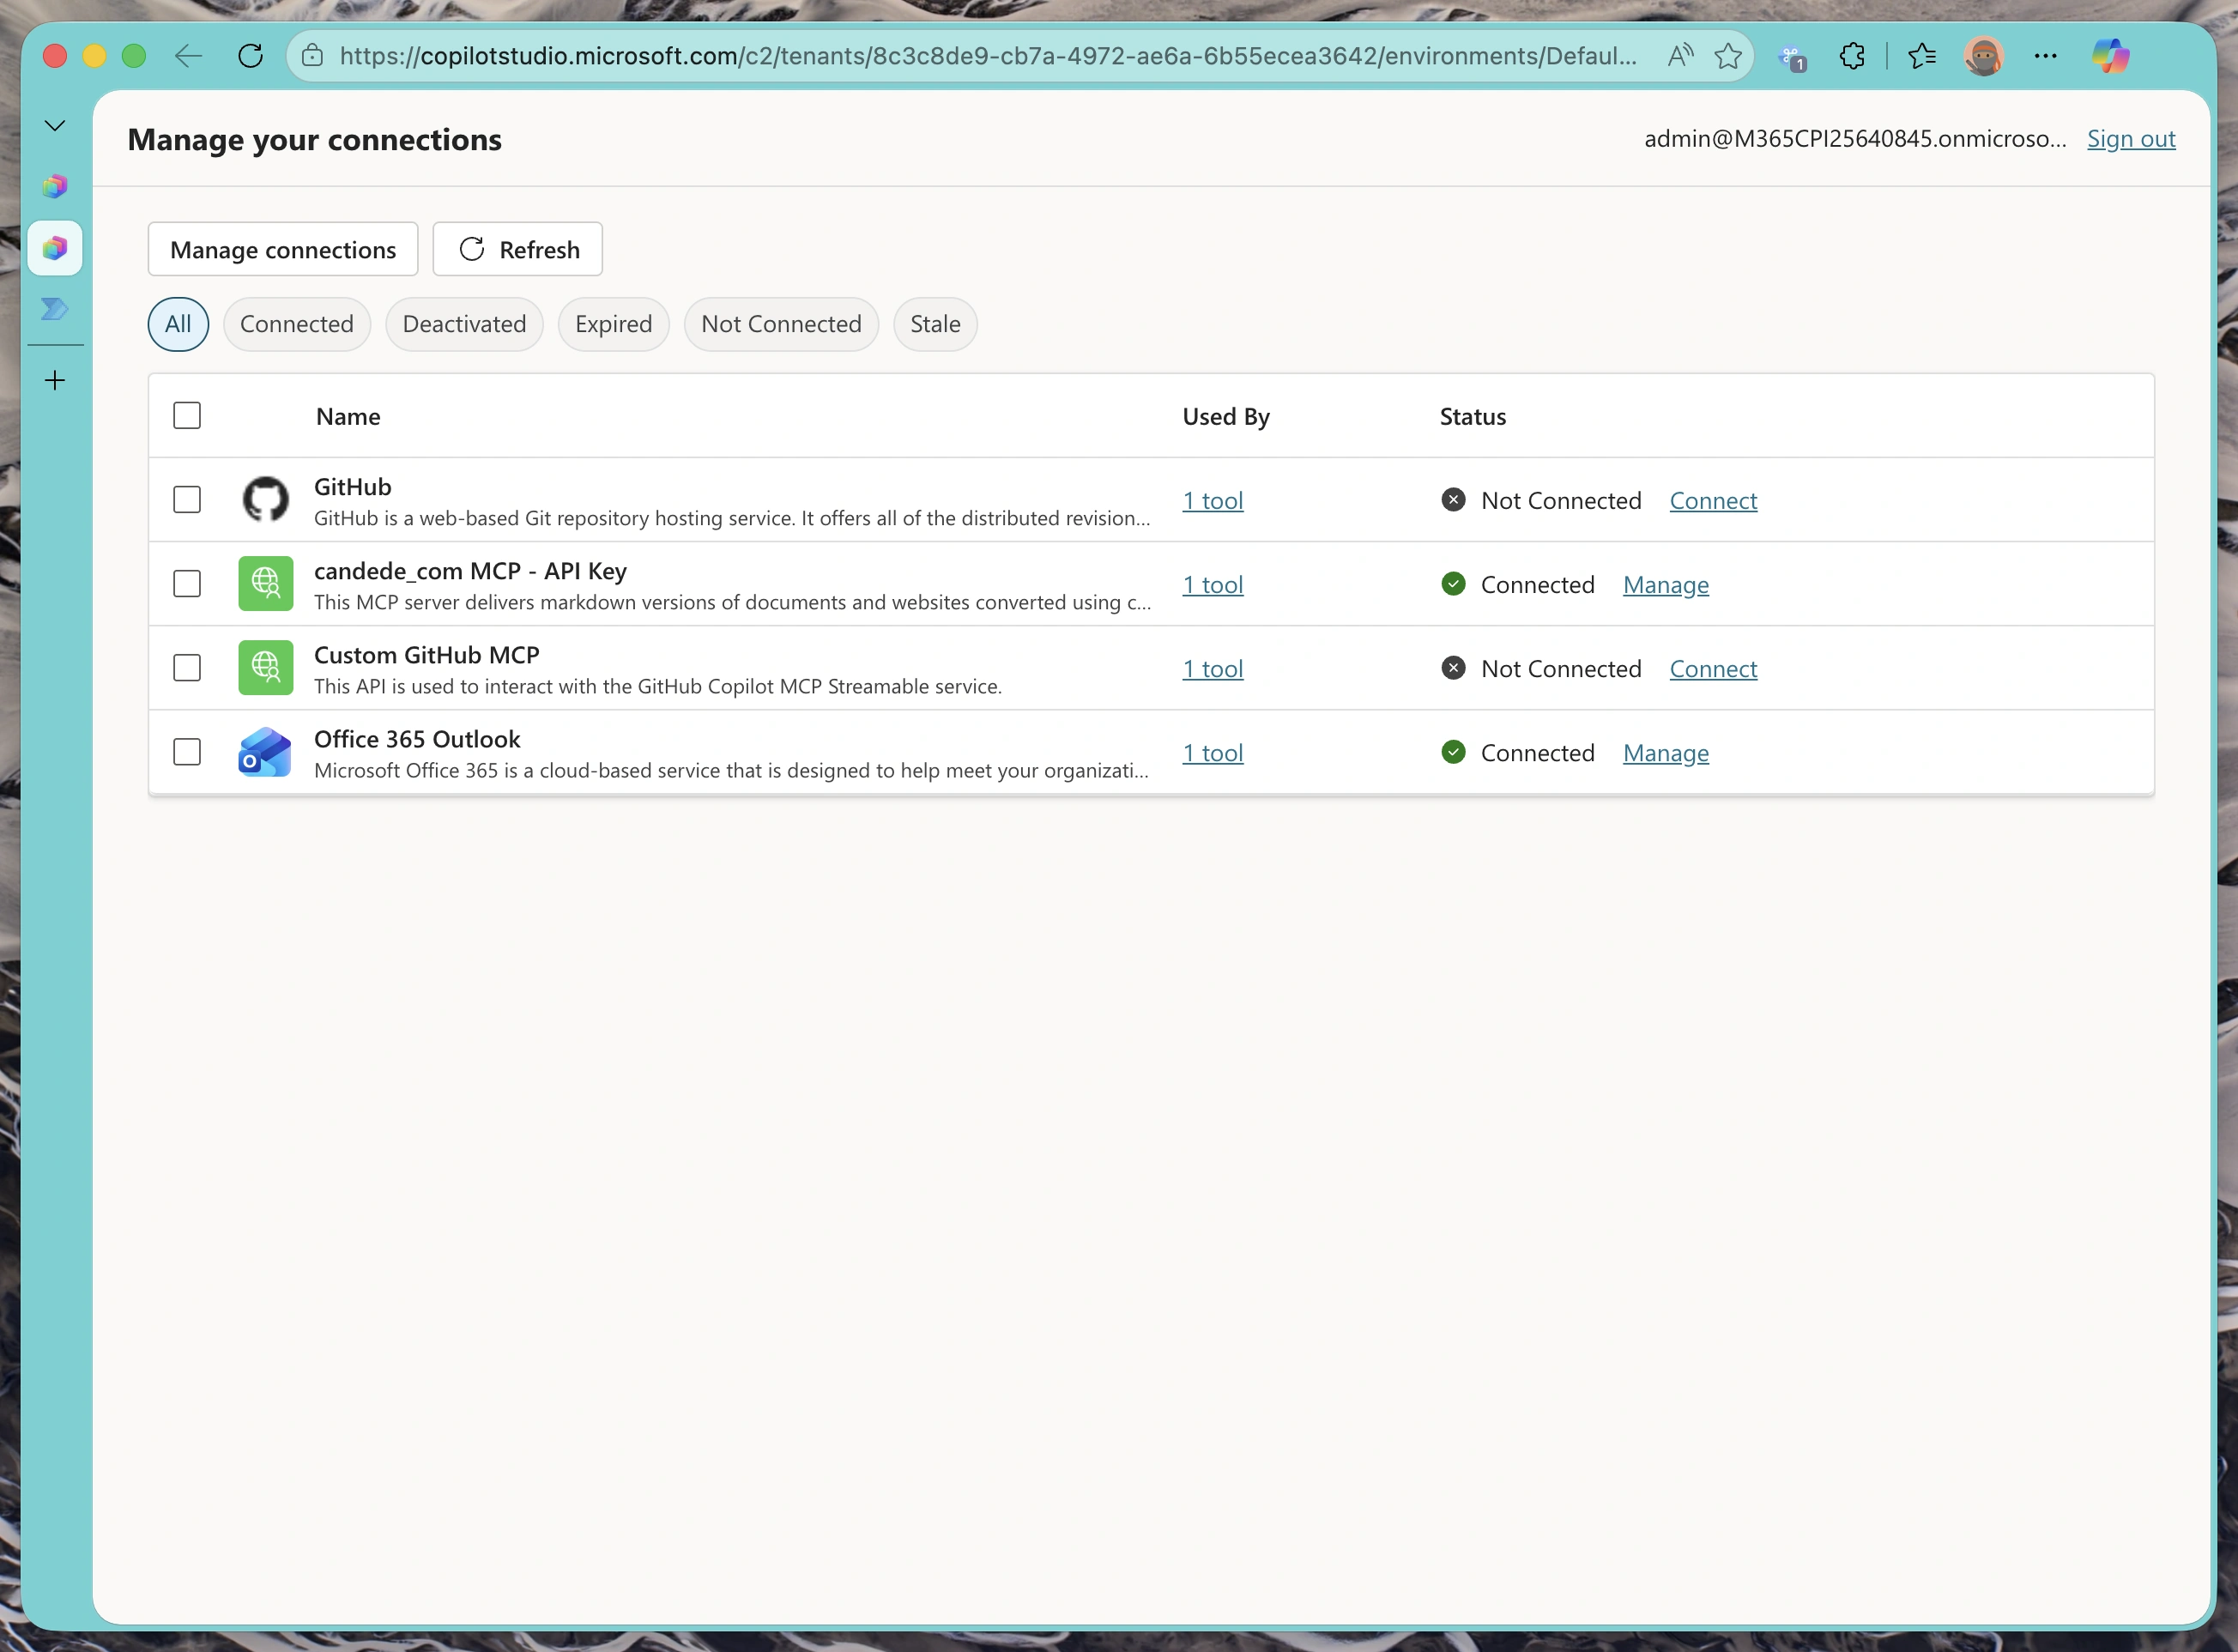
Reviewing Active Tools
Once you’ve enabled the MCP tools you want to use, they appear in your agent’s Active Tools list alongside any other integrations.

Your agent can now autonomously decide when to call these tools based on user queries.
Configuring the Agent’s System Prompt
Now that your MCP tools are connected, you need to instruct your agent on how to use them. The system prompt (called “Instructions” in Copilot Studio) defines how your agent behaves and interacts with the available tools.
Here’s an example system prompt used for a retrieval-augmented assistant that leverages MCP servers:
Note: This is provided as a basic example system prompt for testing purposes. It’s not necessarily the best system prompt, but it gets the job done for demonstrating how to instruct an agent to use MCP tools in a structured way. You should customize your system prompt based on your specific use case, business requirements, and the capabilities of your MCP servers.
Key Elements of an Effective System Prompt for MCP-Enabled Agents:
- Clear Role Definition: Establish what the agent is and what it’s designed to do
- Tool Usage Instructions: Specify when and how to use each MCP tool
- Step-by-Step Workflow: Provide a clear execution order if tools need to be called in sequence
- Constraints: Define what the agent should NOT do (e.g., no hallucination, no guessing)
- Error Handling: Instruct how to respond when tools fail or no relevant data is found
The system prompt is crucial for ensuring your agent uses the MCP tools correctly and consistently. Take time to refine it based on your testing results and user feedback.
Part 4: Testing Your Integration
Activating the Connection
Before you can test, you need to activate the connection in the test environment. Click “Create Connection” in the test panel.
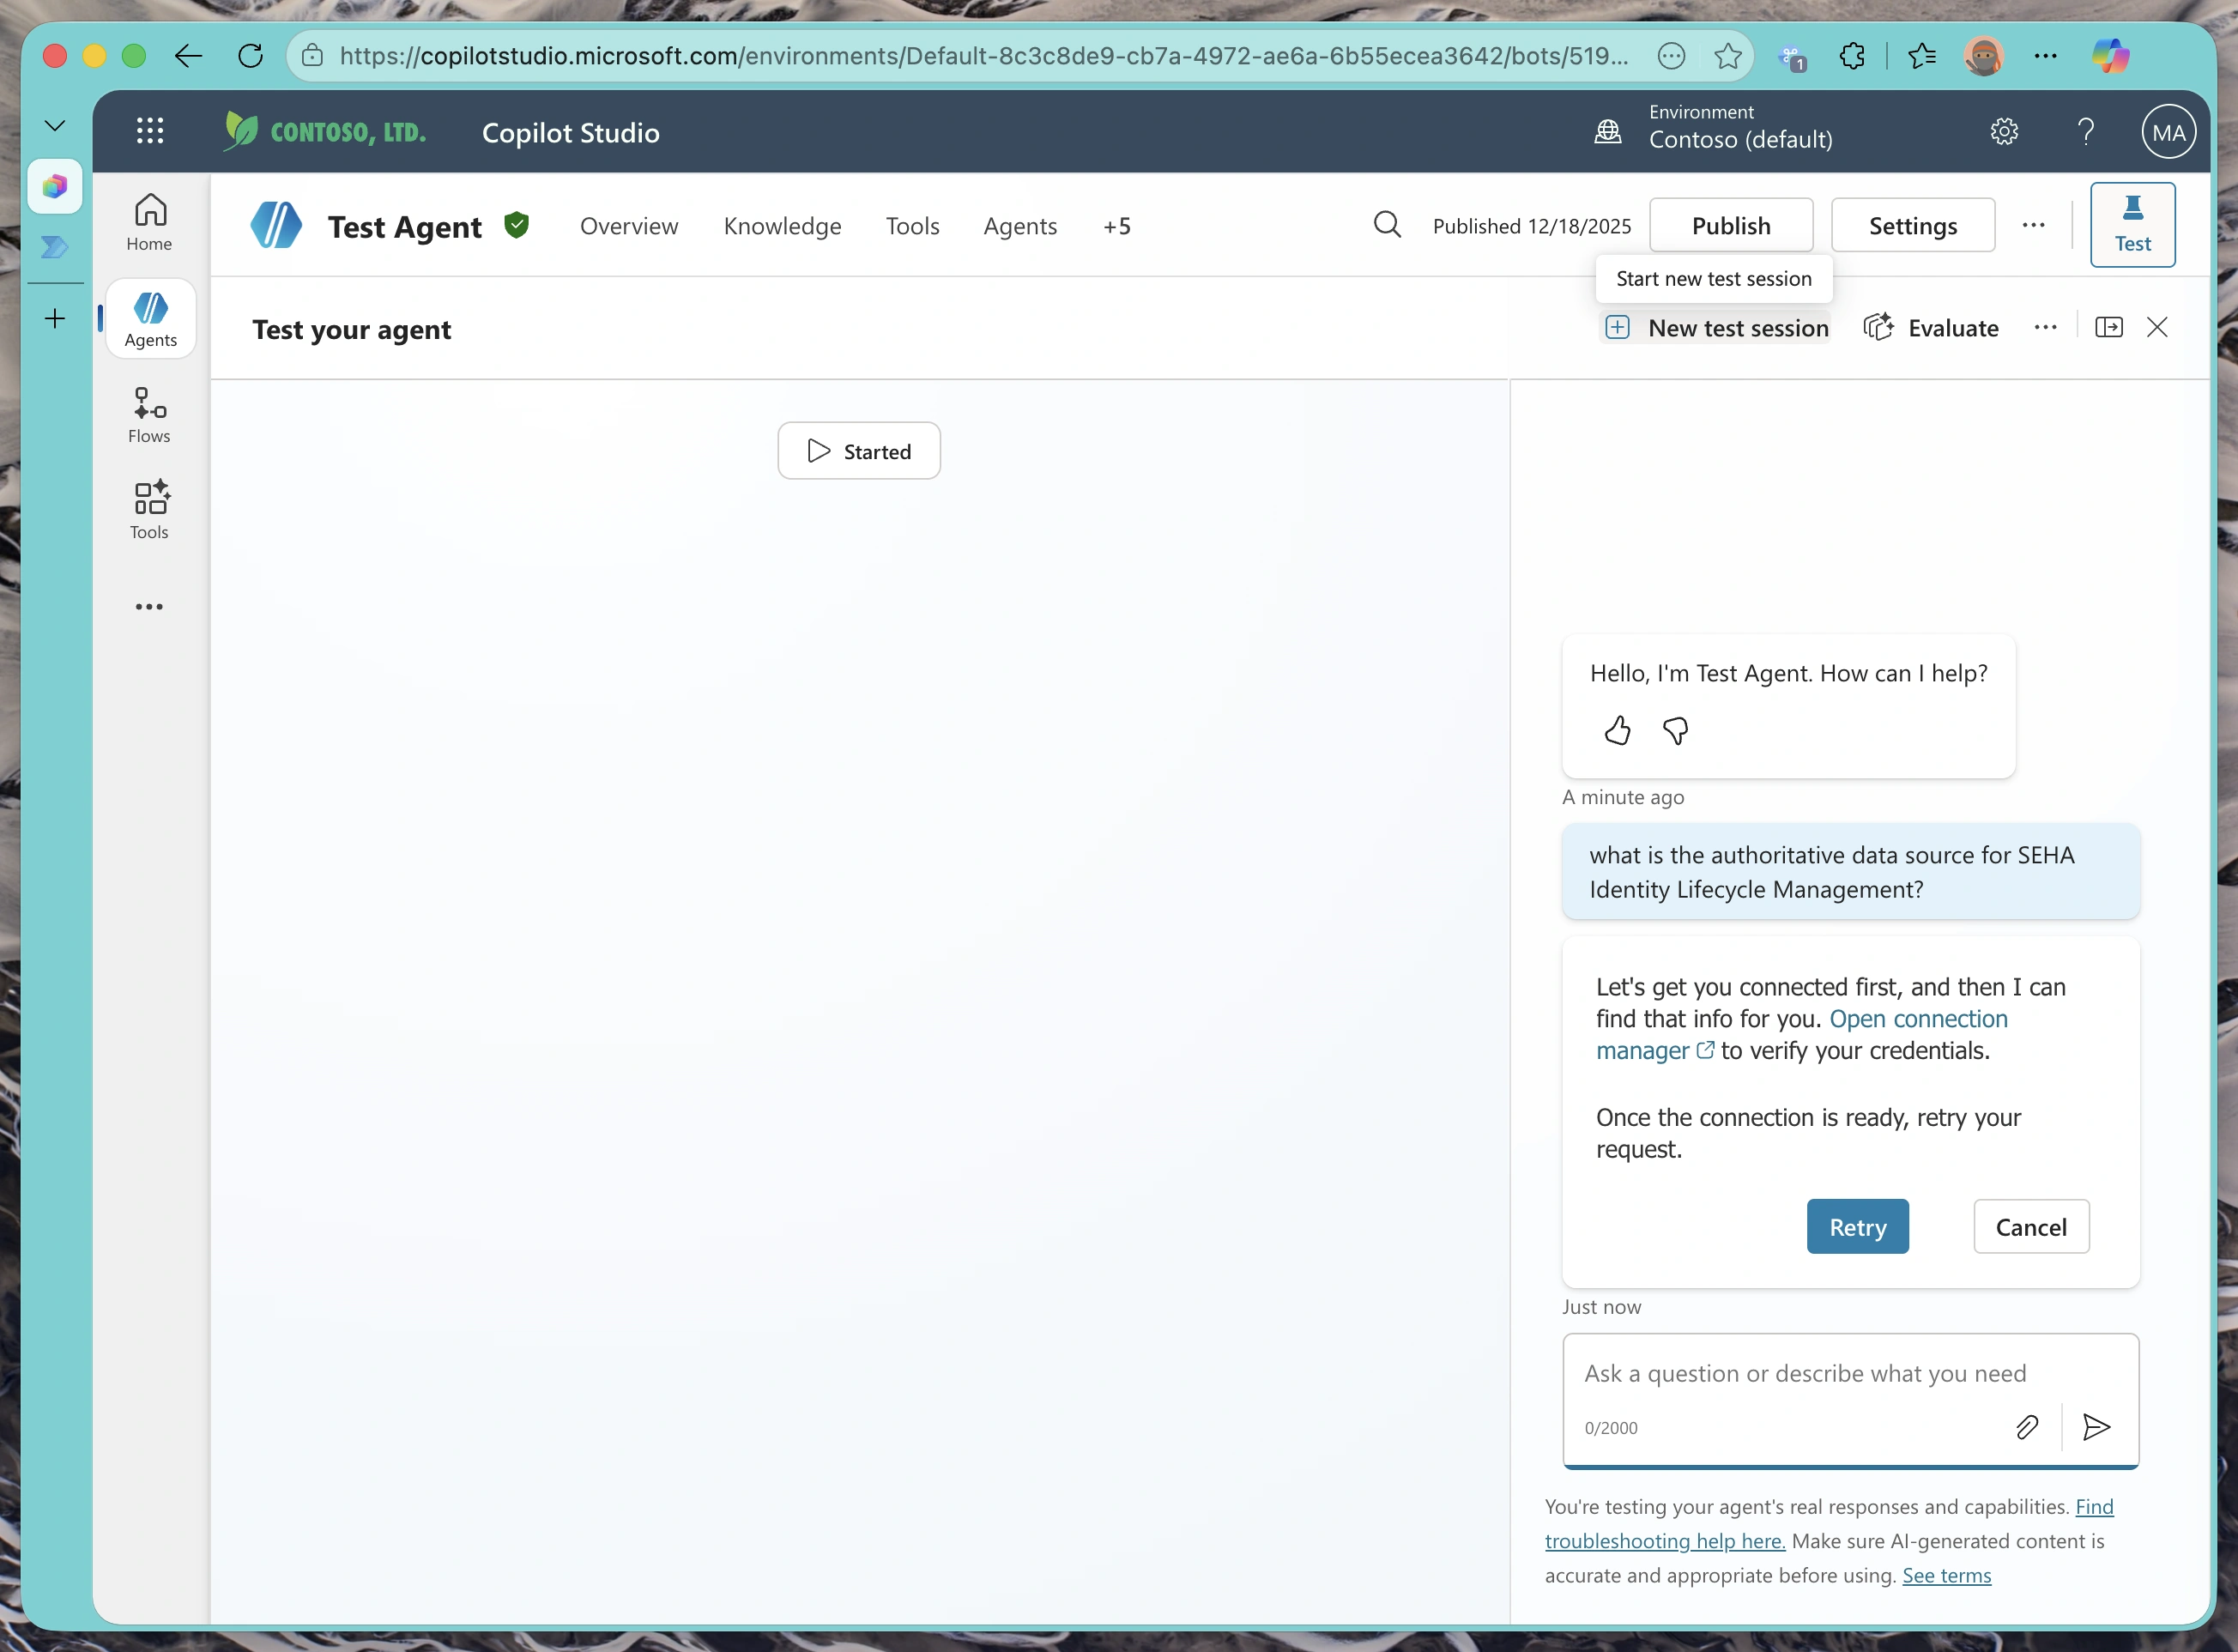
This opens the connection manager, where you’ll authorize the test environment to use your MCP server connection.
Managing Connection Permissions
In the connection manager, find your MCP server connection and click “Activate”.

This grants the test environment permission to make authenticated requests on your behalf.
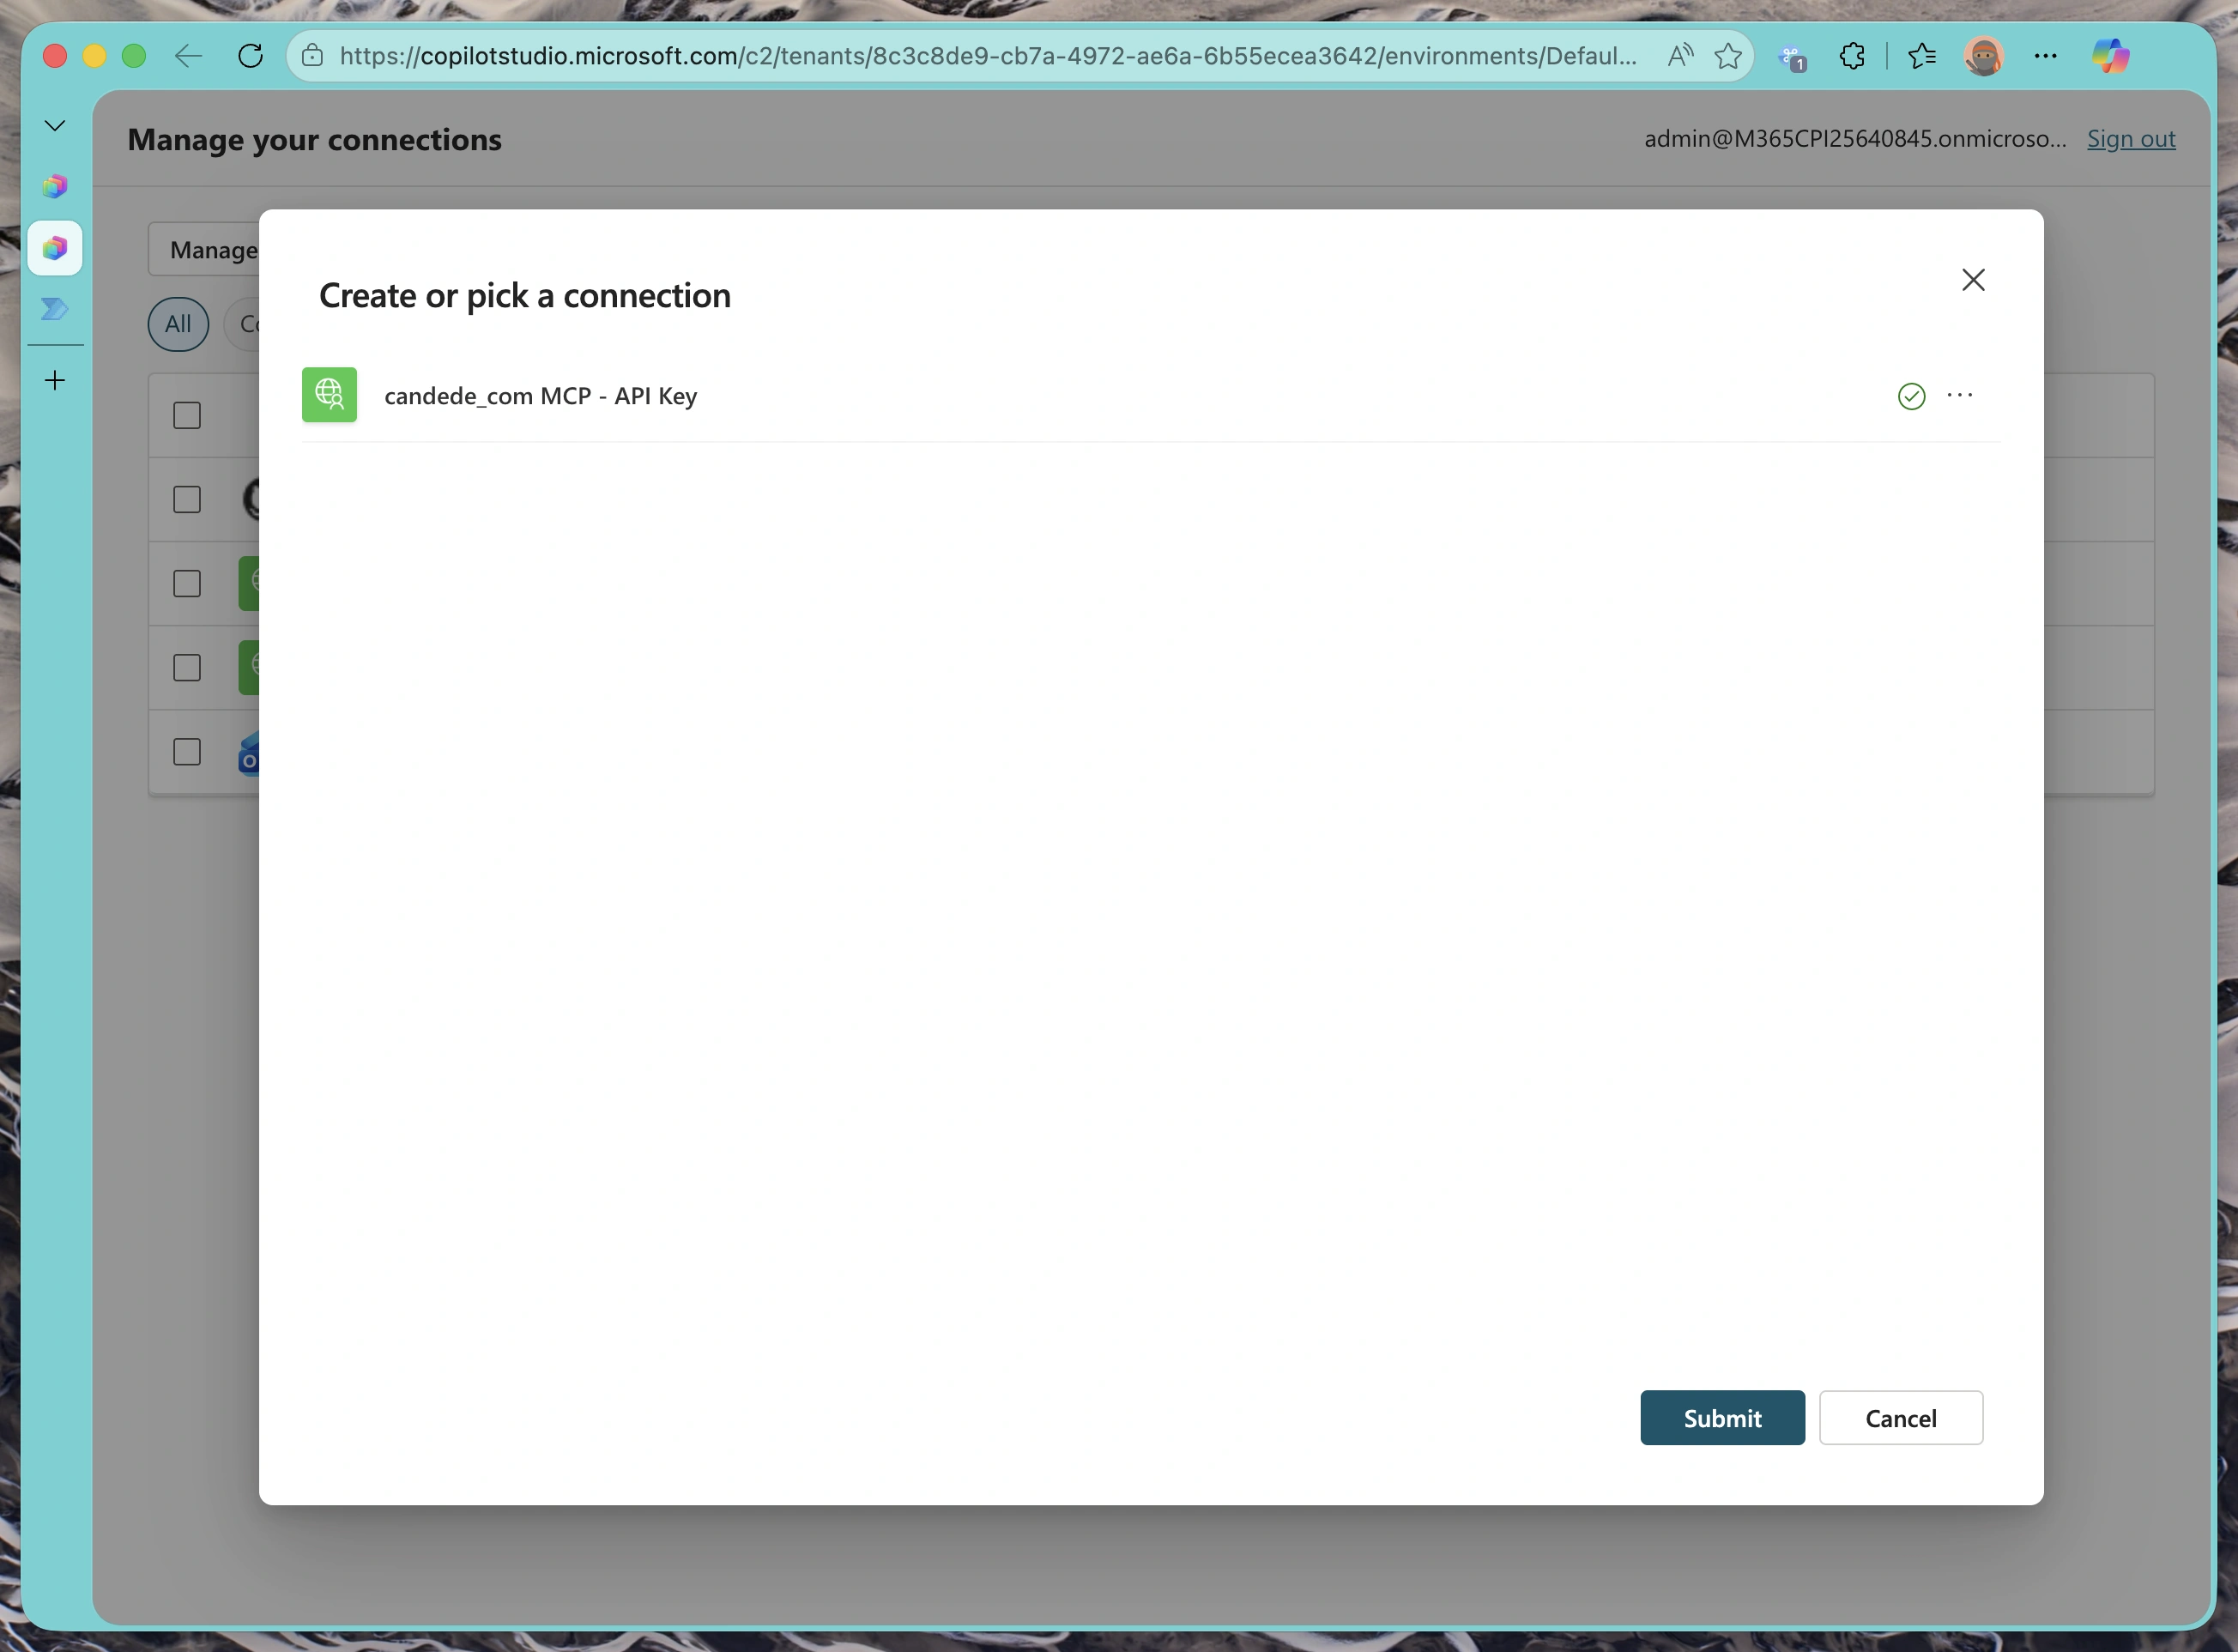
You should see a success message confirming the connection is now active.
Testing Across Different AI Models
Here’s where it gets interesting. Copilot Studio supports multiple underlying AI models, and we can compare how each one handles the same queries with your MCP server. Let’s see how GPT-4.1, GPT-5, and Claude Sonnet differ in their approach to tool usage.
Claude Sonnet 4.5 – Known for excellent tool-use capabilities:
GPT-4.1 – Fast and efficient for most use cases:
GPT-5 Auto – Context-aware model selection:
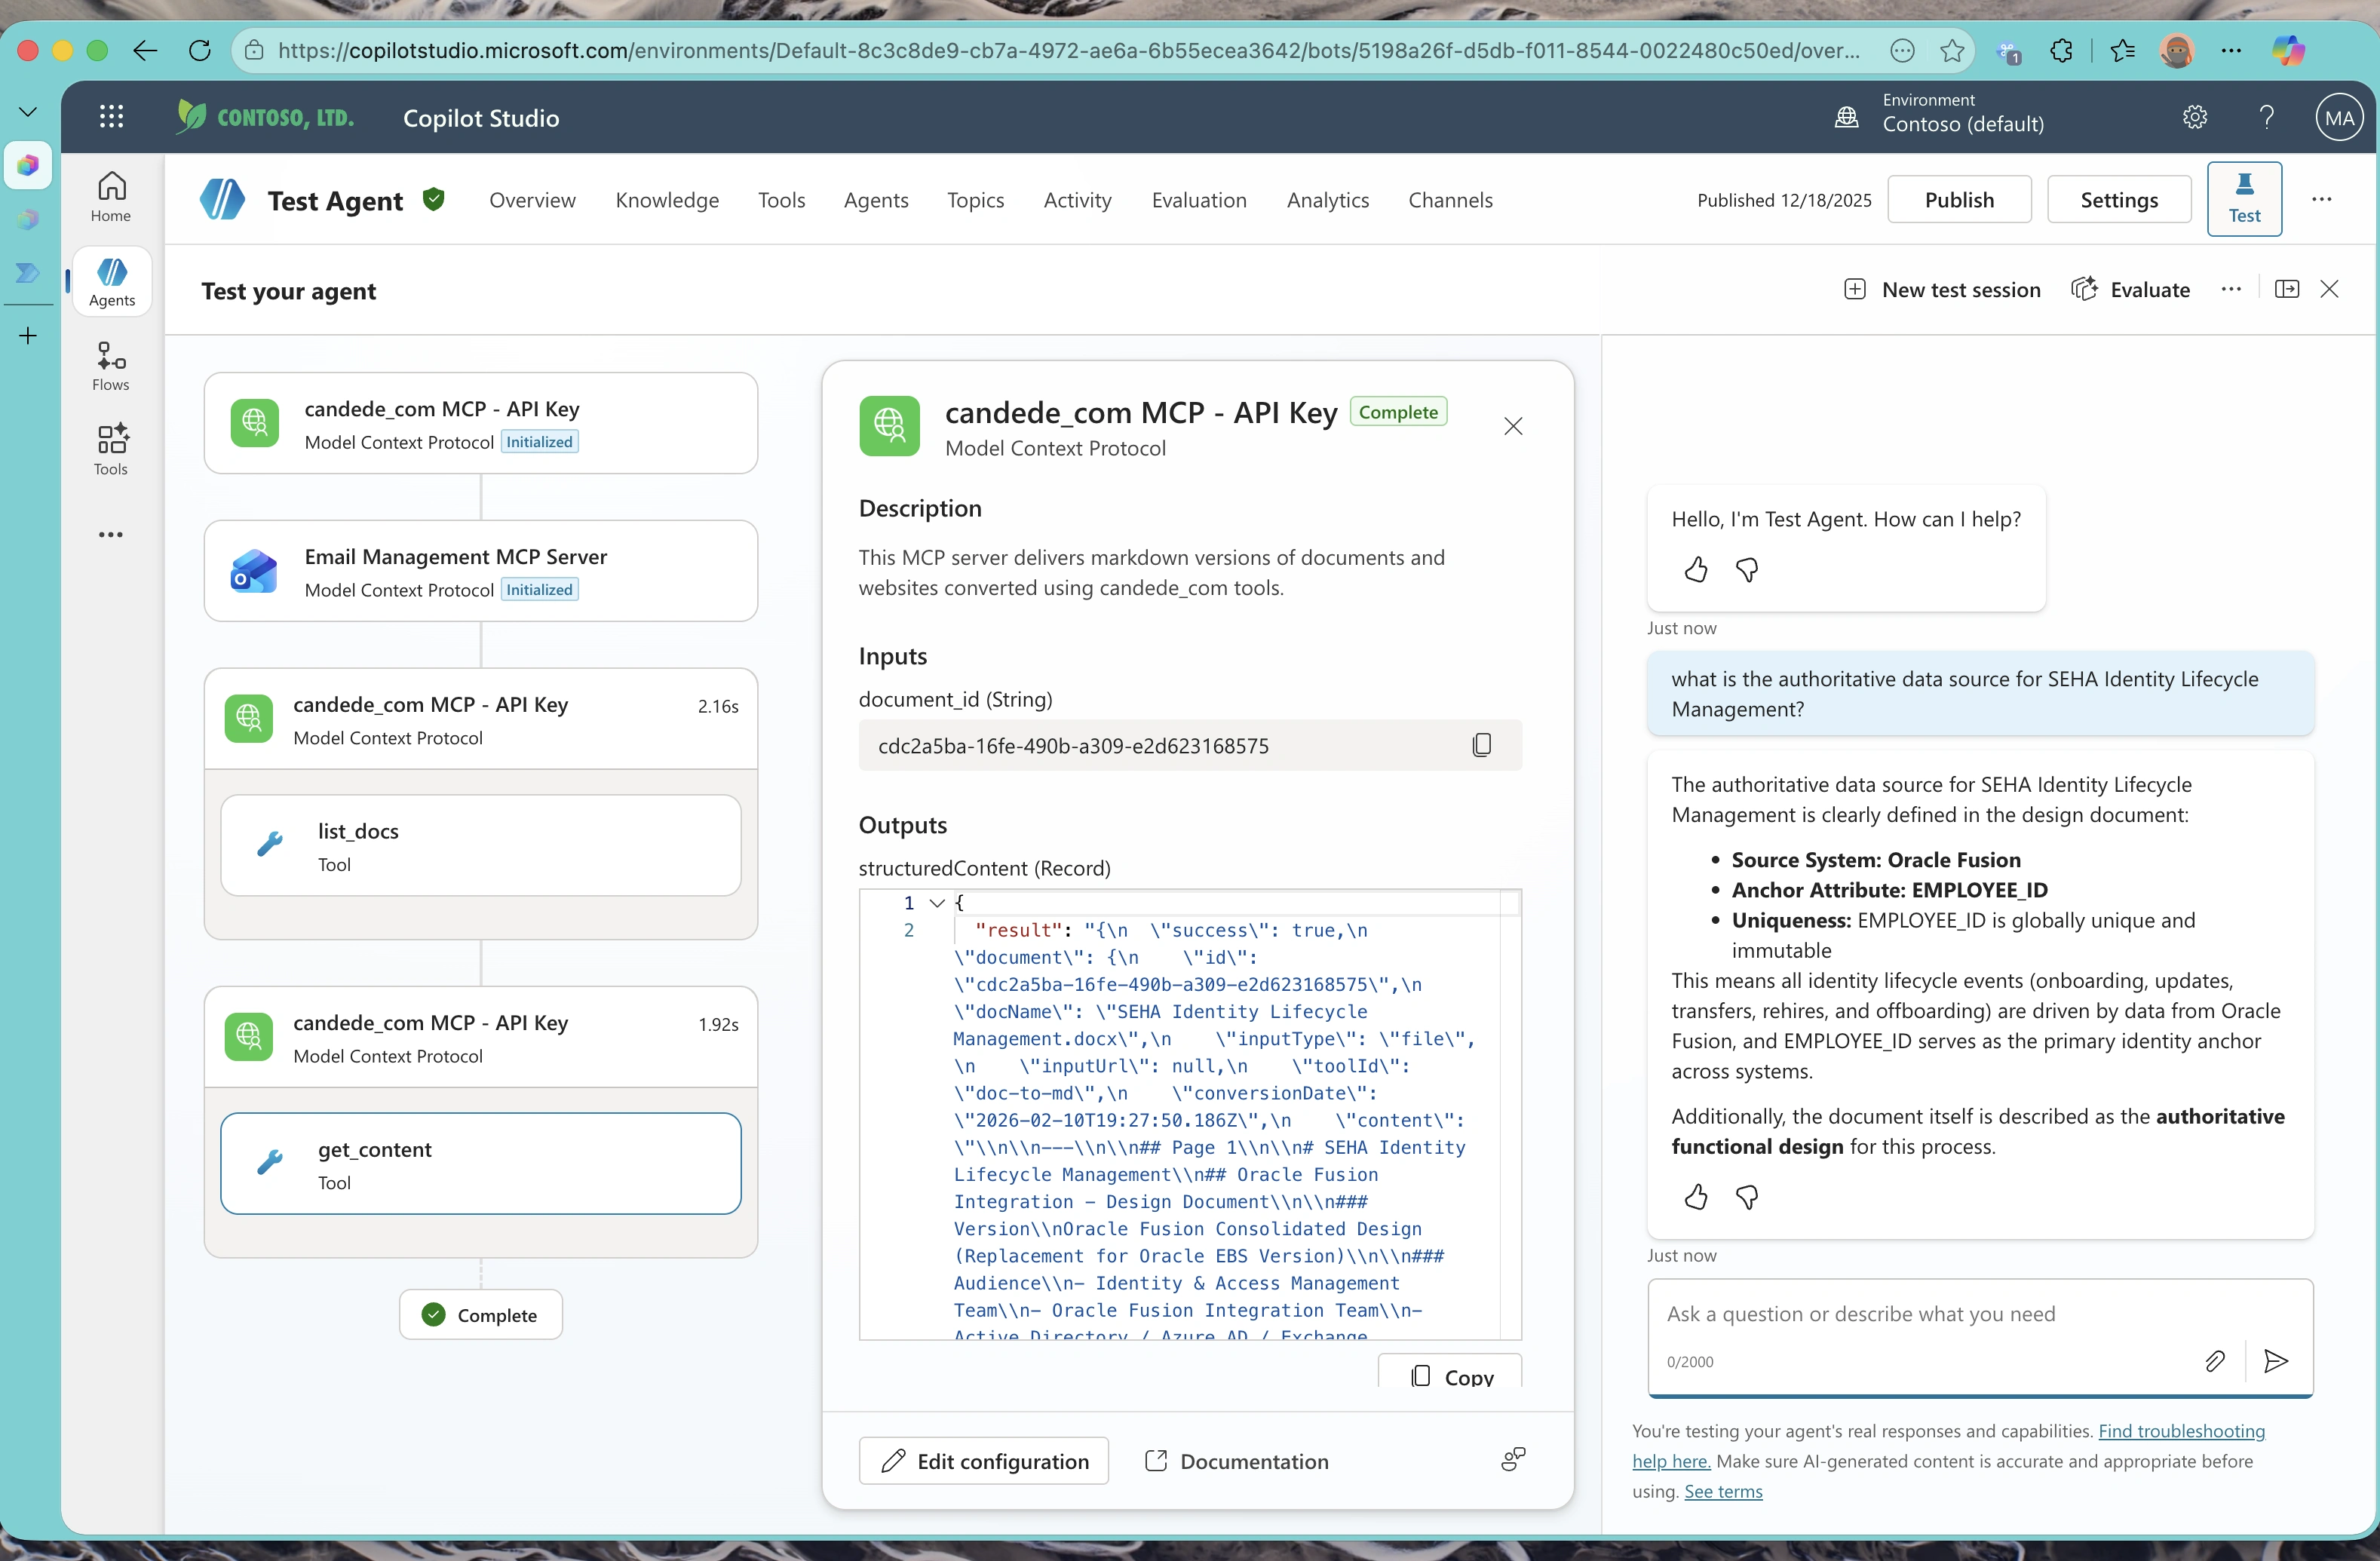
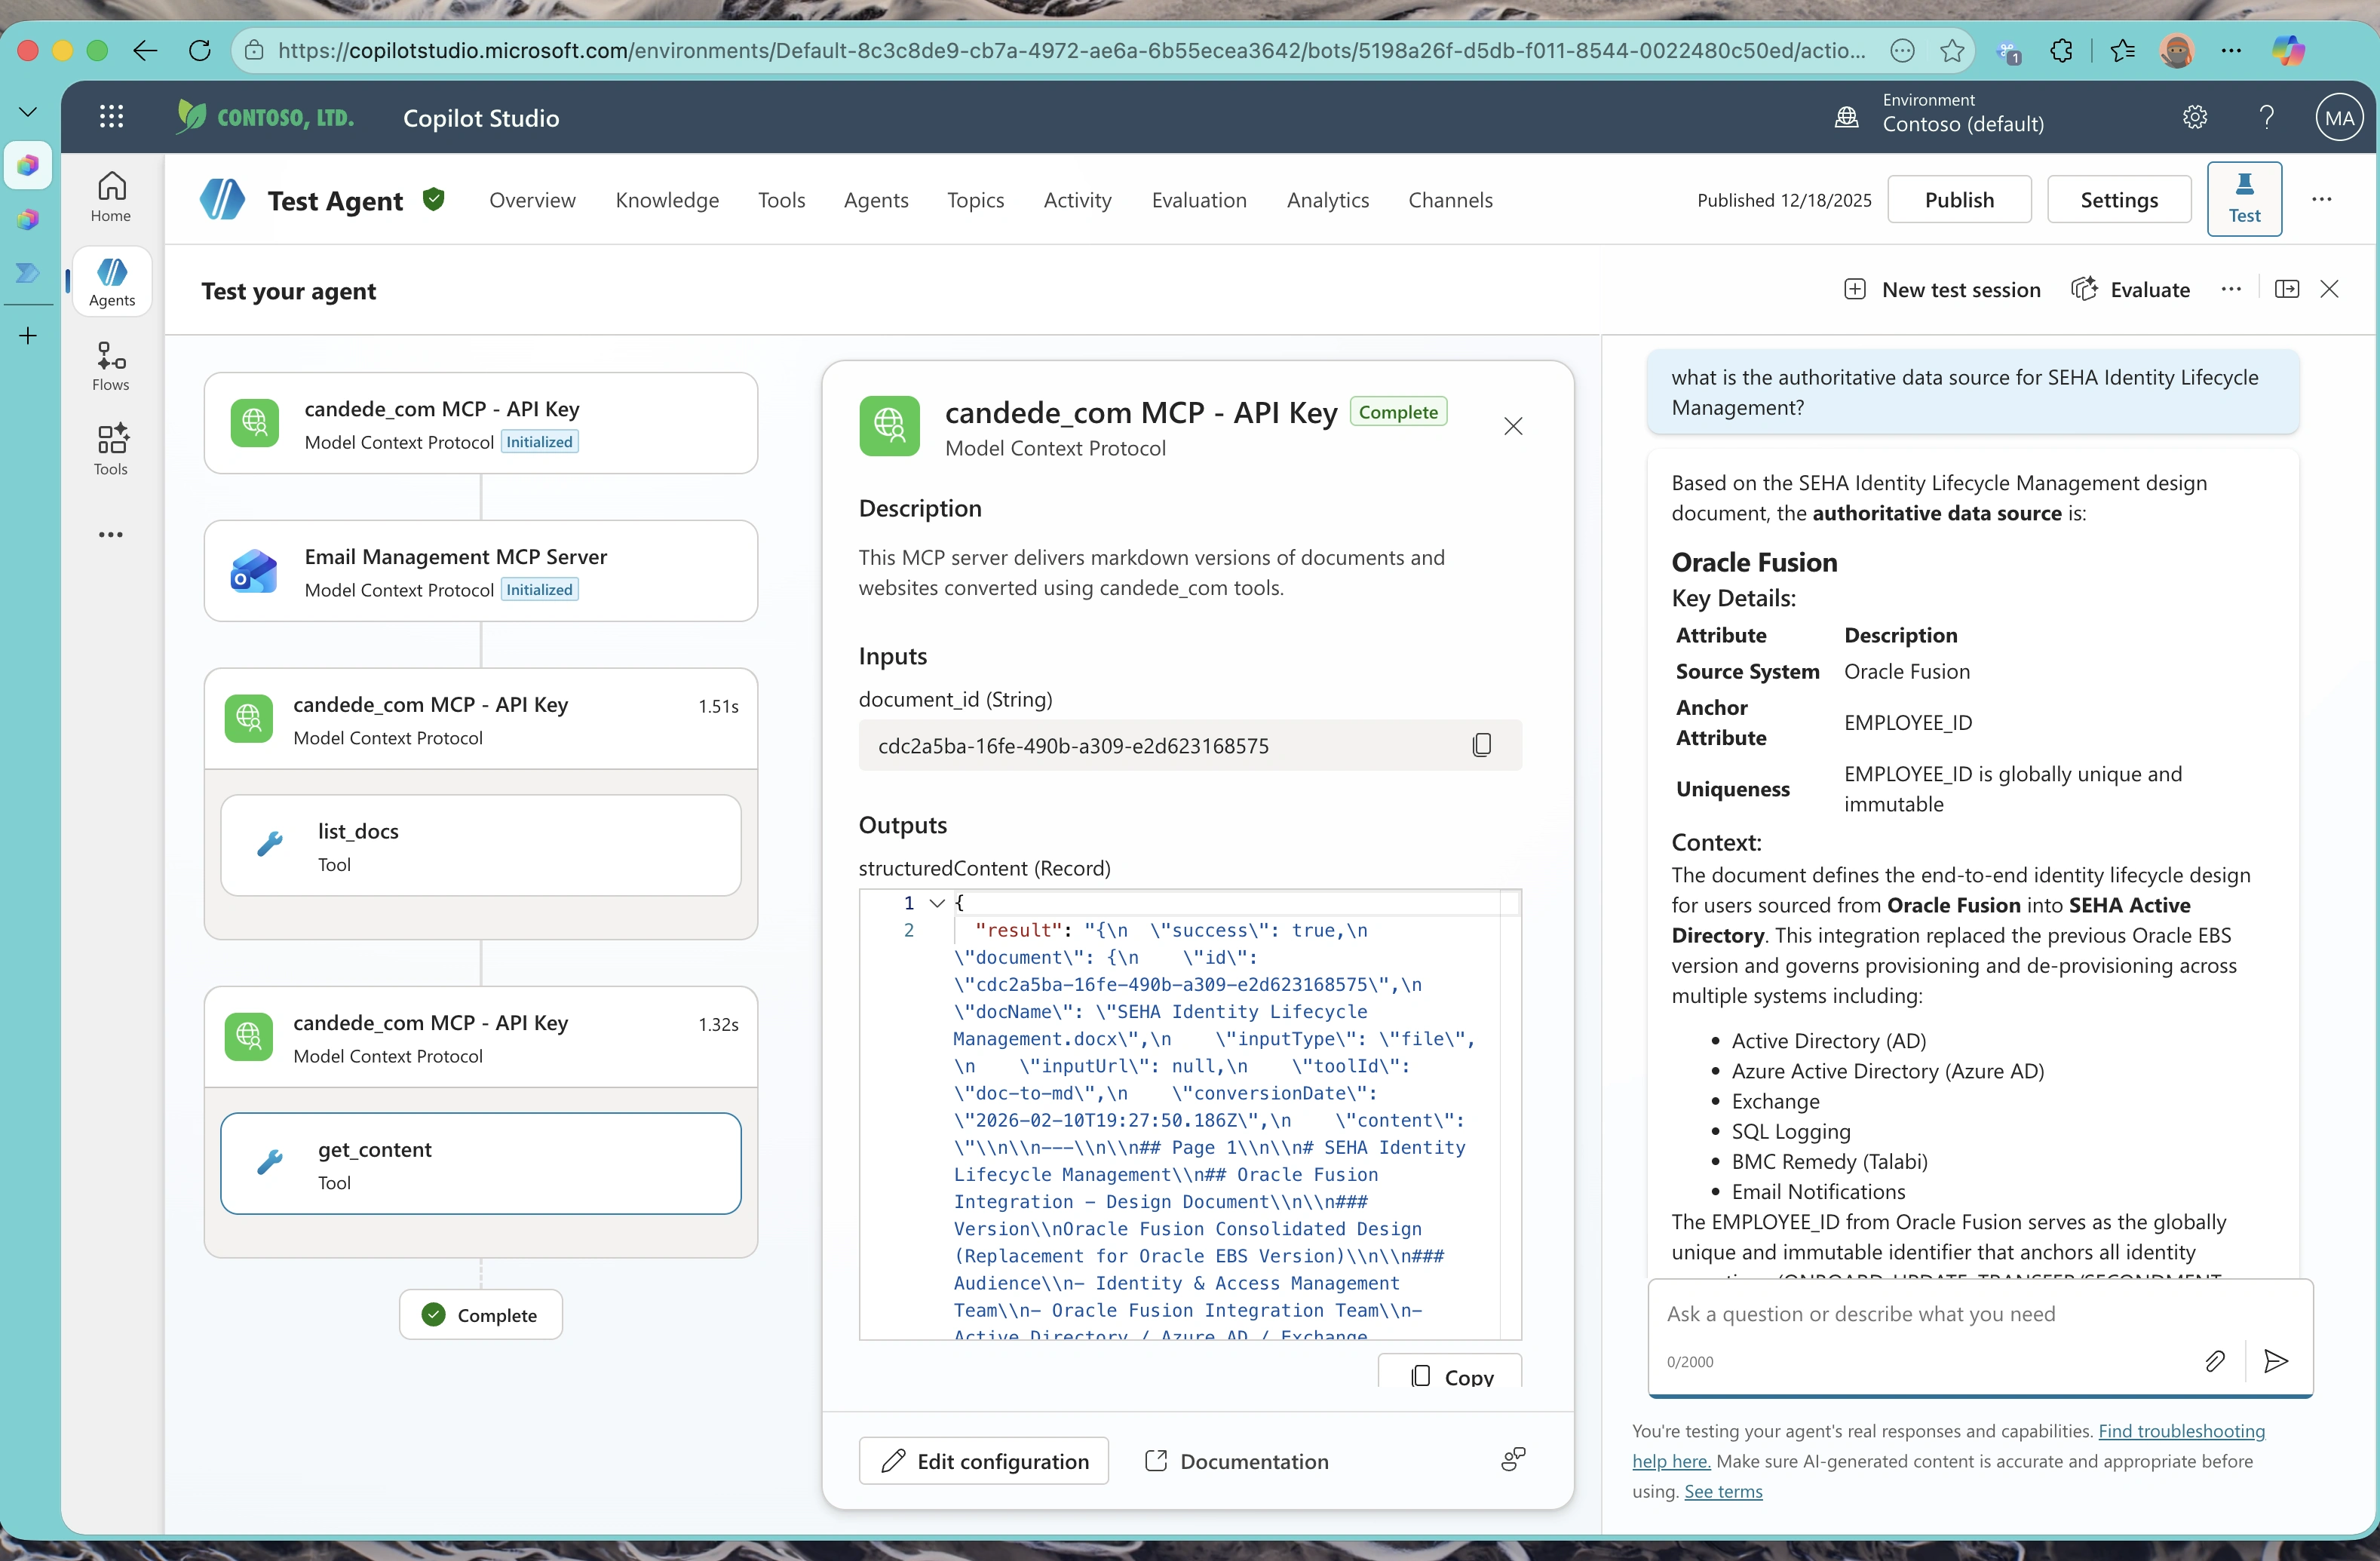
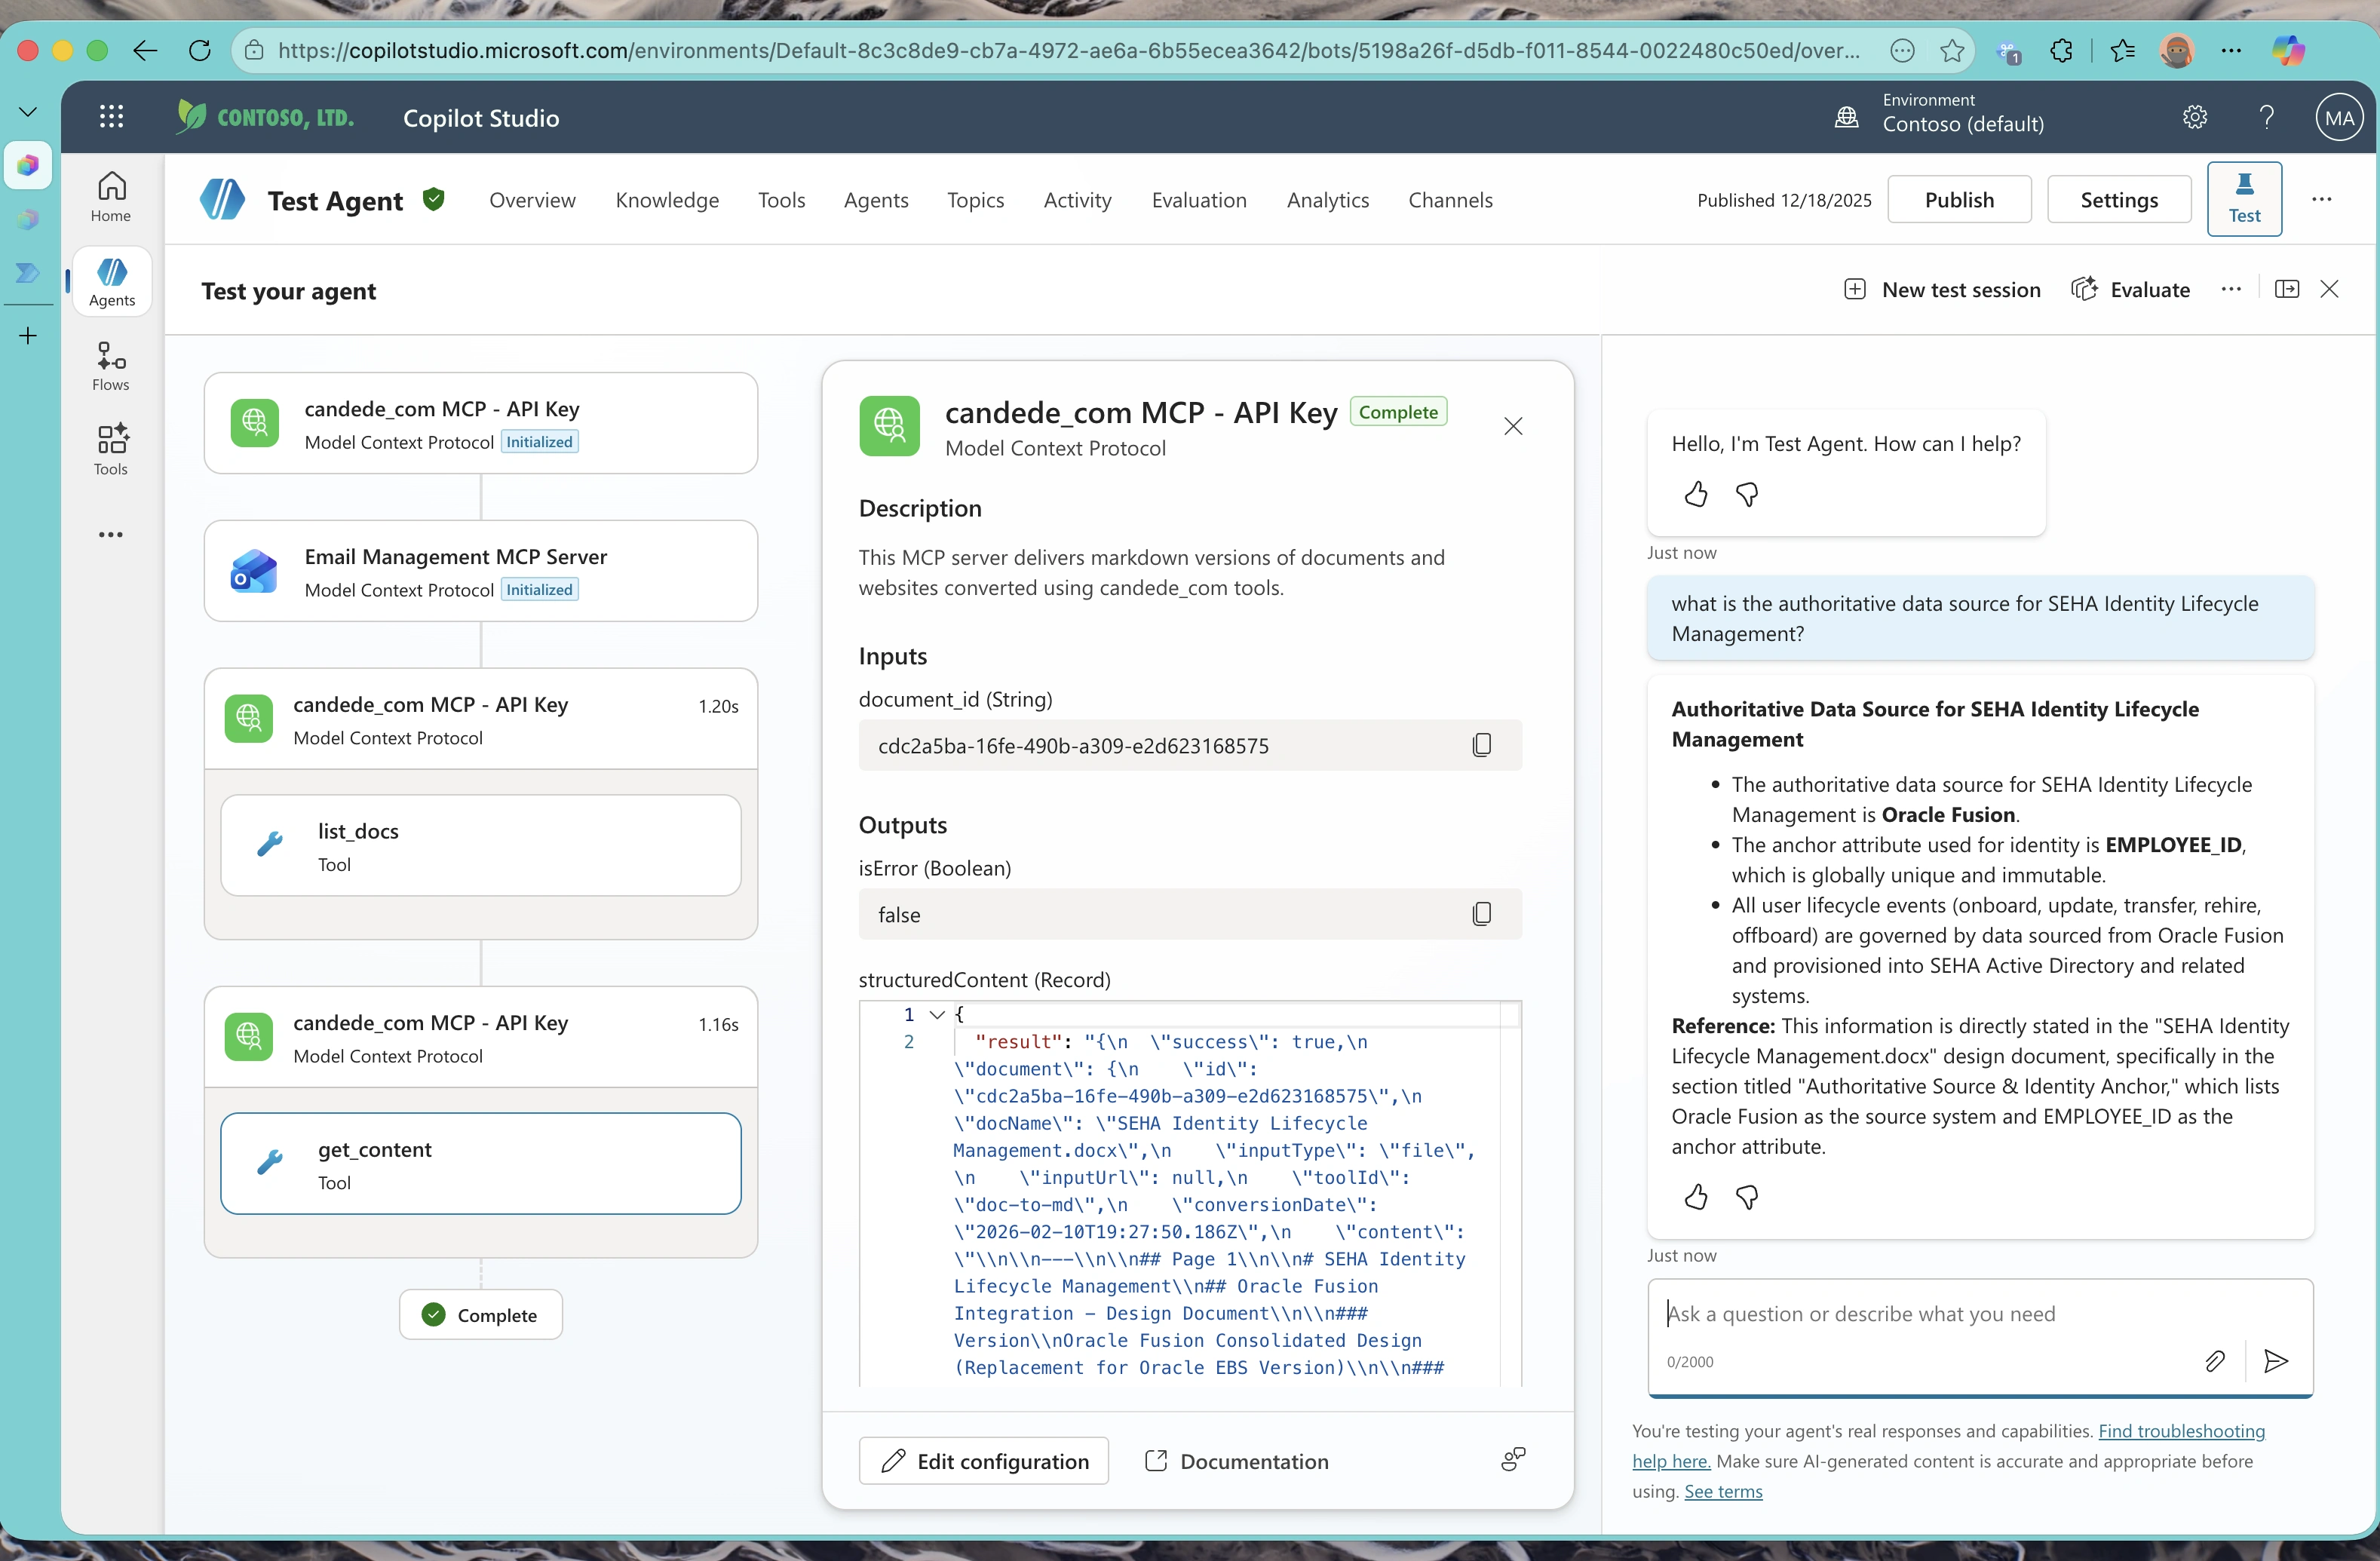
Understanding Action Calls vs. Direct Responses
Not all queries require tool use. Observe how different models decide when to invoke your MCP tools versus answering directly:
Claude 4.5 Action Call – explicitly calling an MCP tool:
GPT-4.1 Action Call:
GPT-5.0 Auto with Async Action Calls – handling asynchronous operations:
Model Comparison: Real-World Testing Results
Throughout our testing, all three models (GPT-4.1, GPT-5 Auto, and Claude Sonnet 4.5) successfully identified and called the correct MCP tools when needed. However, we observed notable differences in their behavior, decision-making, and performance characteristics. Here’s a detailed breakdown of our findings.
Quick Comparison Overview
| Characteristic | Claude Sonnet 4.5 | GPT-4.1 & GPT-5 |
|---|---|---|
| Response Style | Verbose with context | Concise and direct |
| Async Polling | Patient, timed intervals | Aggressive, back-to-back |
| Tool Optimization | Checks cache before fetch | Direct fetch calls |
| Trade-offs | Lower resource usage | Faster direct execution |
Response Style and Verbosity
The most immediately noticeable difference across models was in their communication style:
Claude Sonnet 4.5 consistently provided more verbose responses with additional contextual details. When answering questions, it would often explain its reasoning, provide background context, and elaborate on the information retrieved from MCP tools.
GPT-4.1 & GPT-5 Auto delivered more concise and on-point answers. These models tend to provide just the essential information requested without additional elaboration.
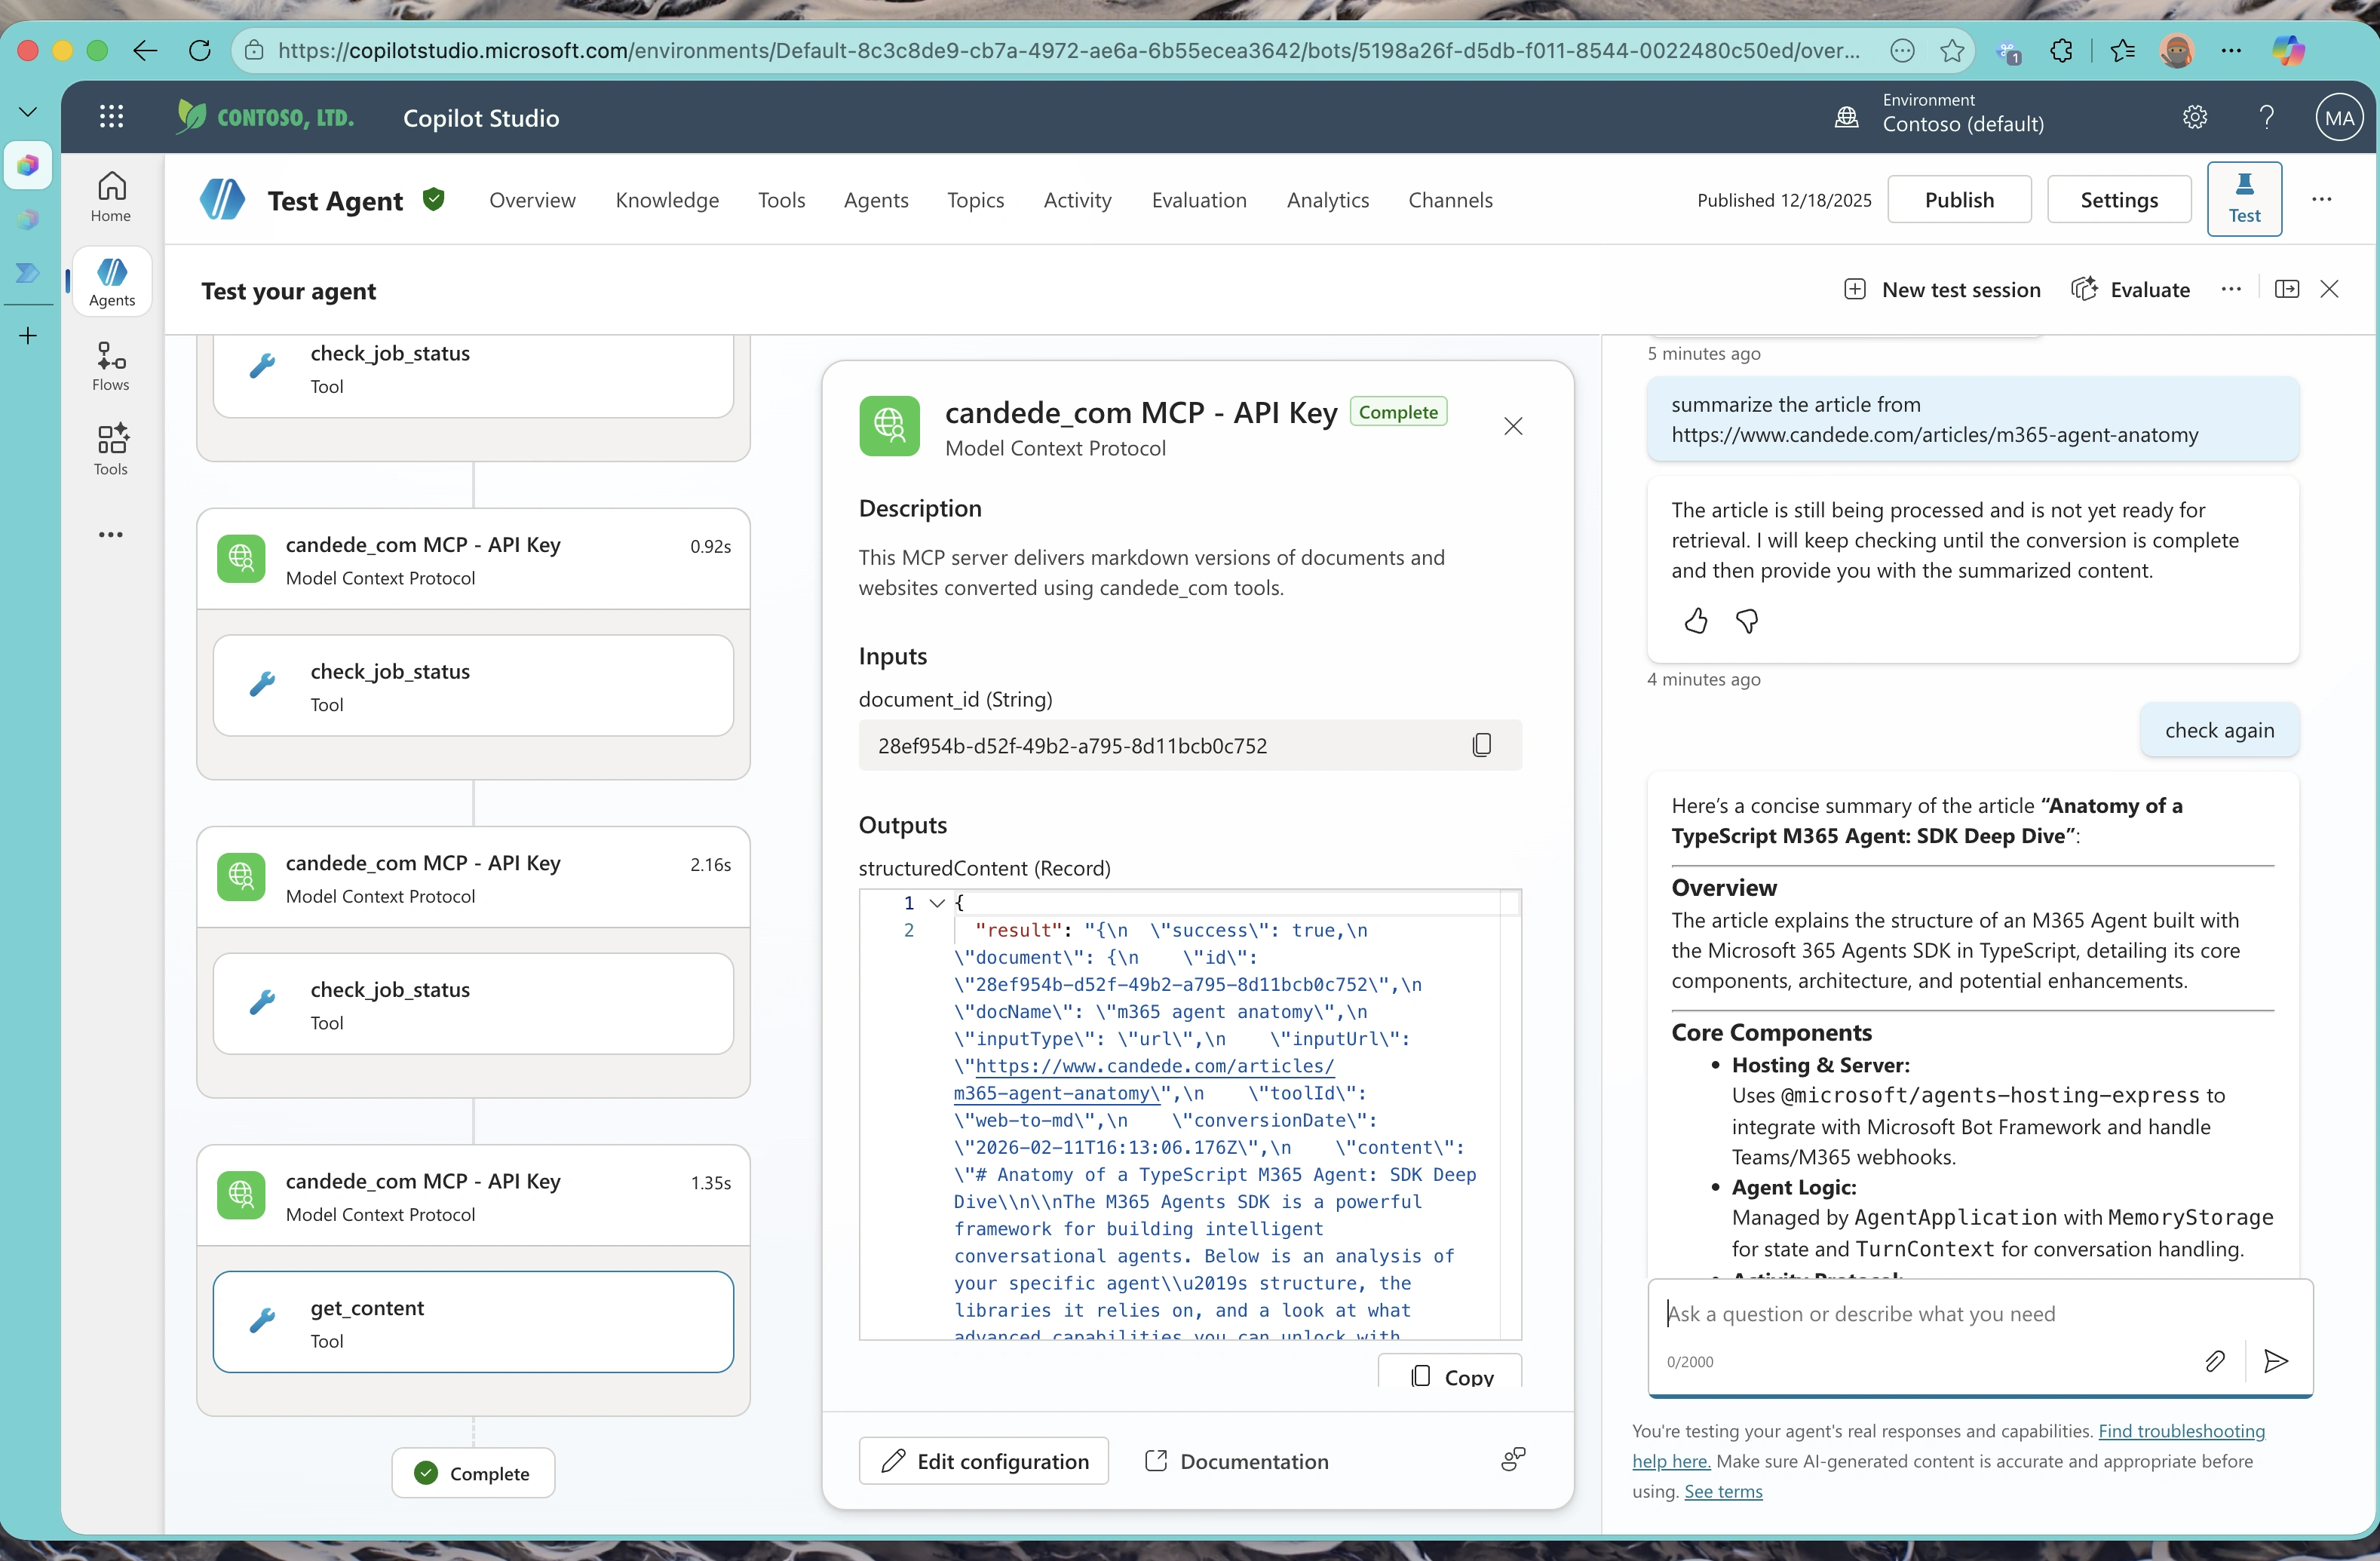
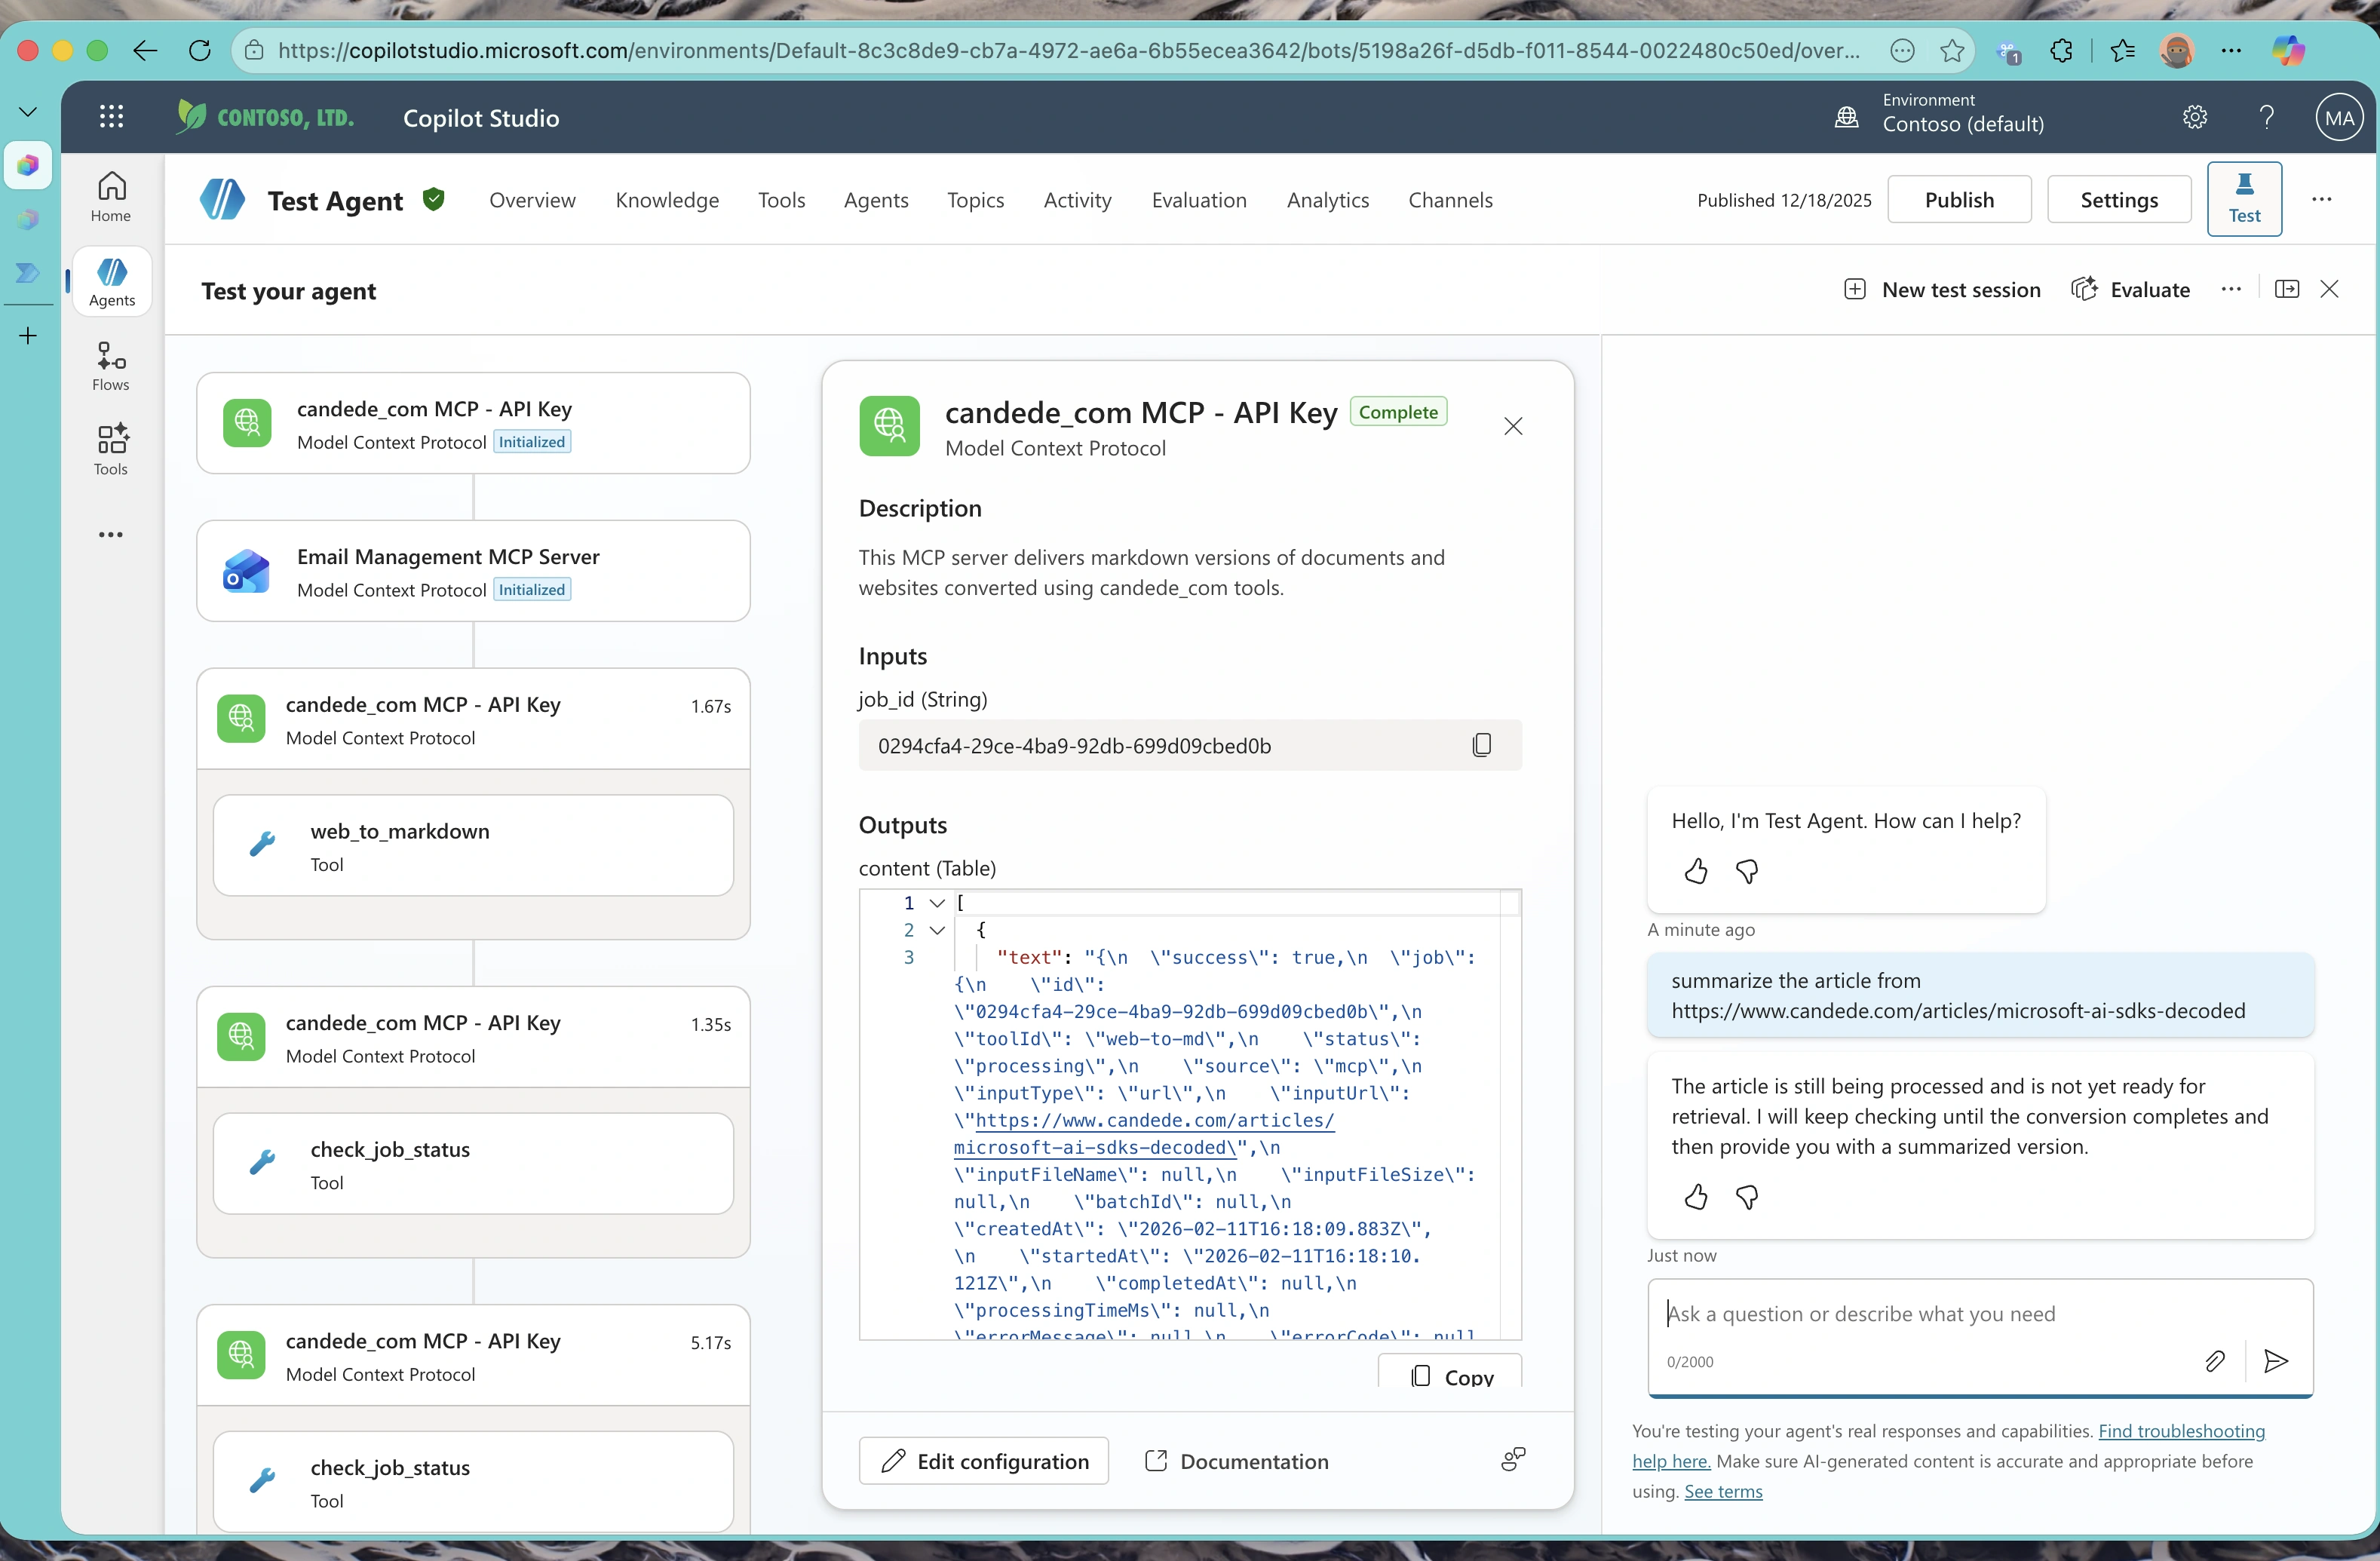
Async Operation Handling
Our MCP server implements web_to_md tools using an asynchronous pattern—the tool responds immediately with a queue ID, and agents must use check_job_status to poll for completion. This revealed interesting behavioral differences:
GPT Family Models demonstrated slightly aggressive polling behavior. In several test cases, they would check status back-to-back without waiting, sometimes issuing multiple status check requests within seconds. This resulted in:
- Unnecessary API calls and increased server load
- One Copilot Studio testing crash when the back-to-back tool calls created what appeared to be an infinite loop
- Faster discovery when jobs completed quickly (since they were checking so frequently)
Claude Sonnet 4.5 took a more patient approach with timed intervals between status checks. This behavior:
- Reduced server load with fewer API calls
- Used timed intervals between status checks (15-30 seconds)
- Did not cause any testing environment issues
- Occasionally resulted in slightly longer wait times for users
User Experience Impact: In both cases, all models correctly informed users that “the MCP server is still working on your request, we’ll check back later.” When users manually asked “check again” after some time, agents successfully retrieved the completed results and answered the query appropriately.
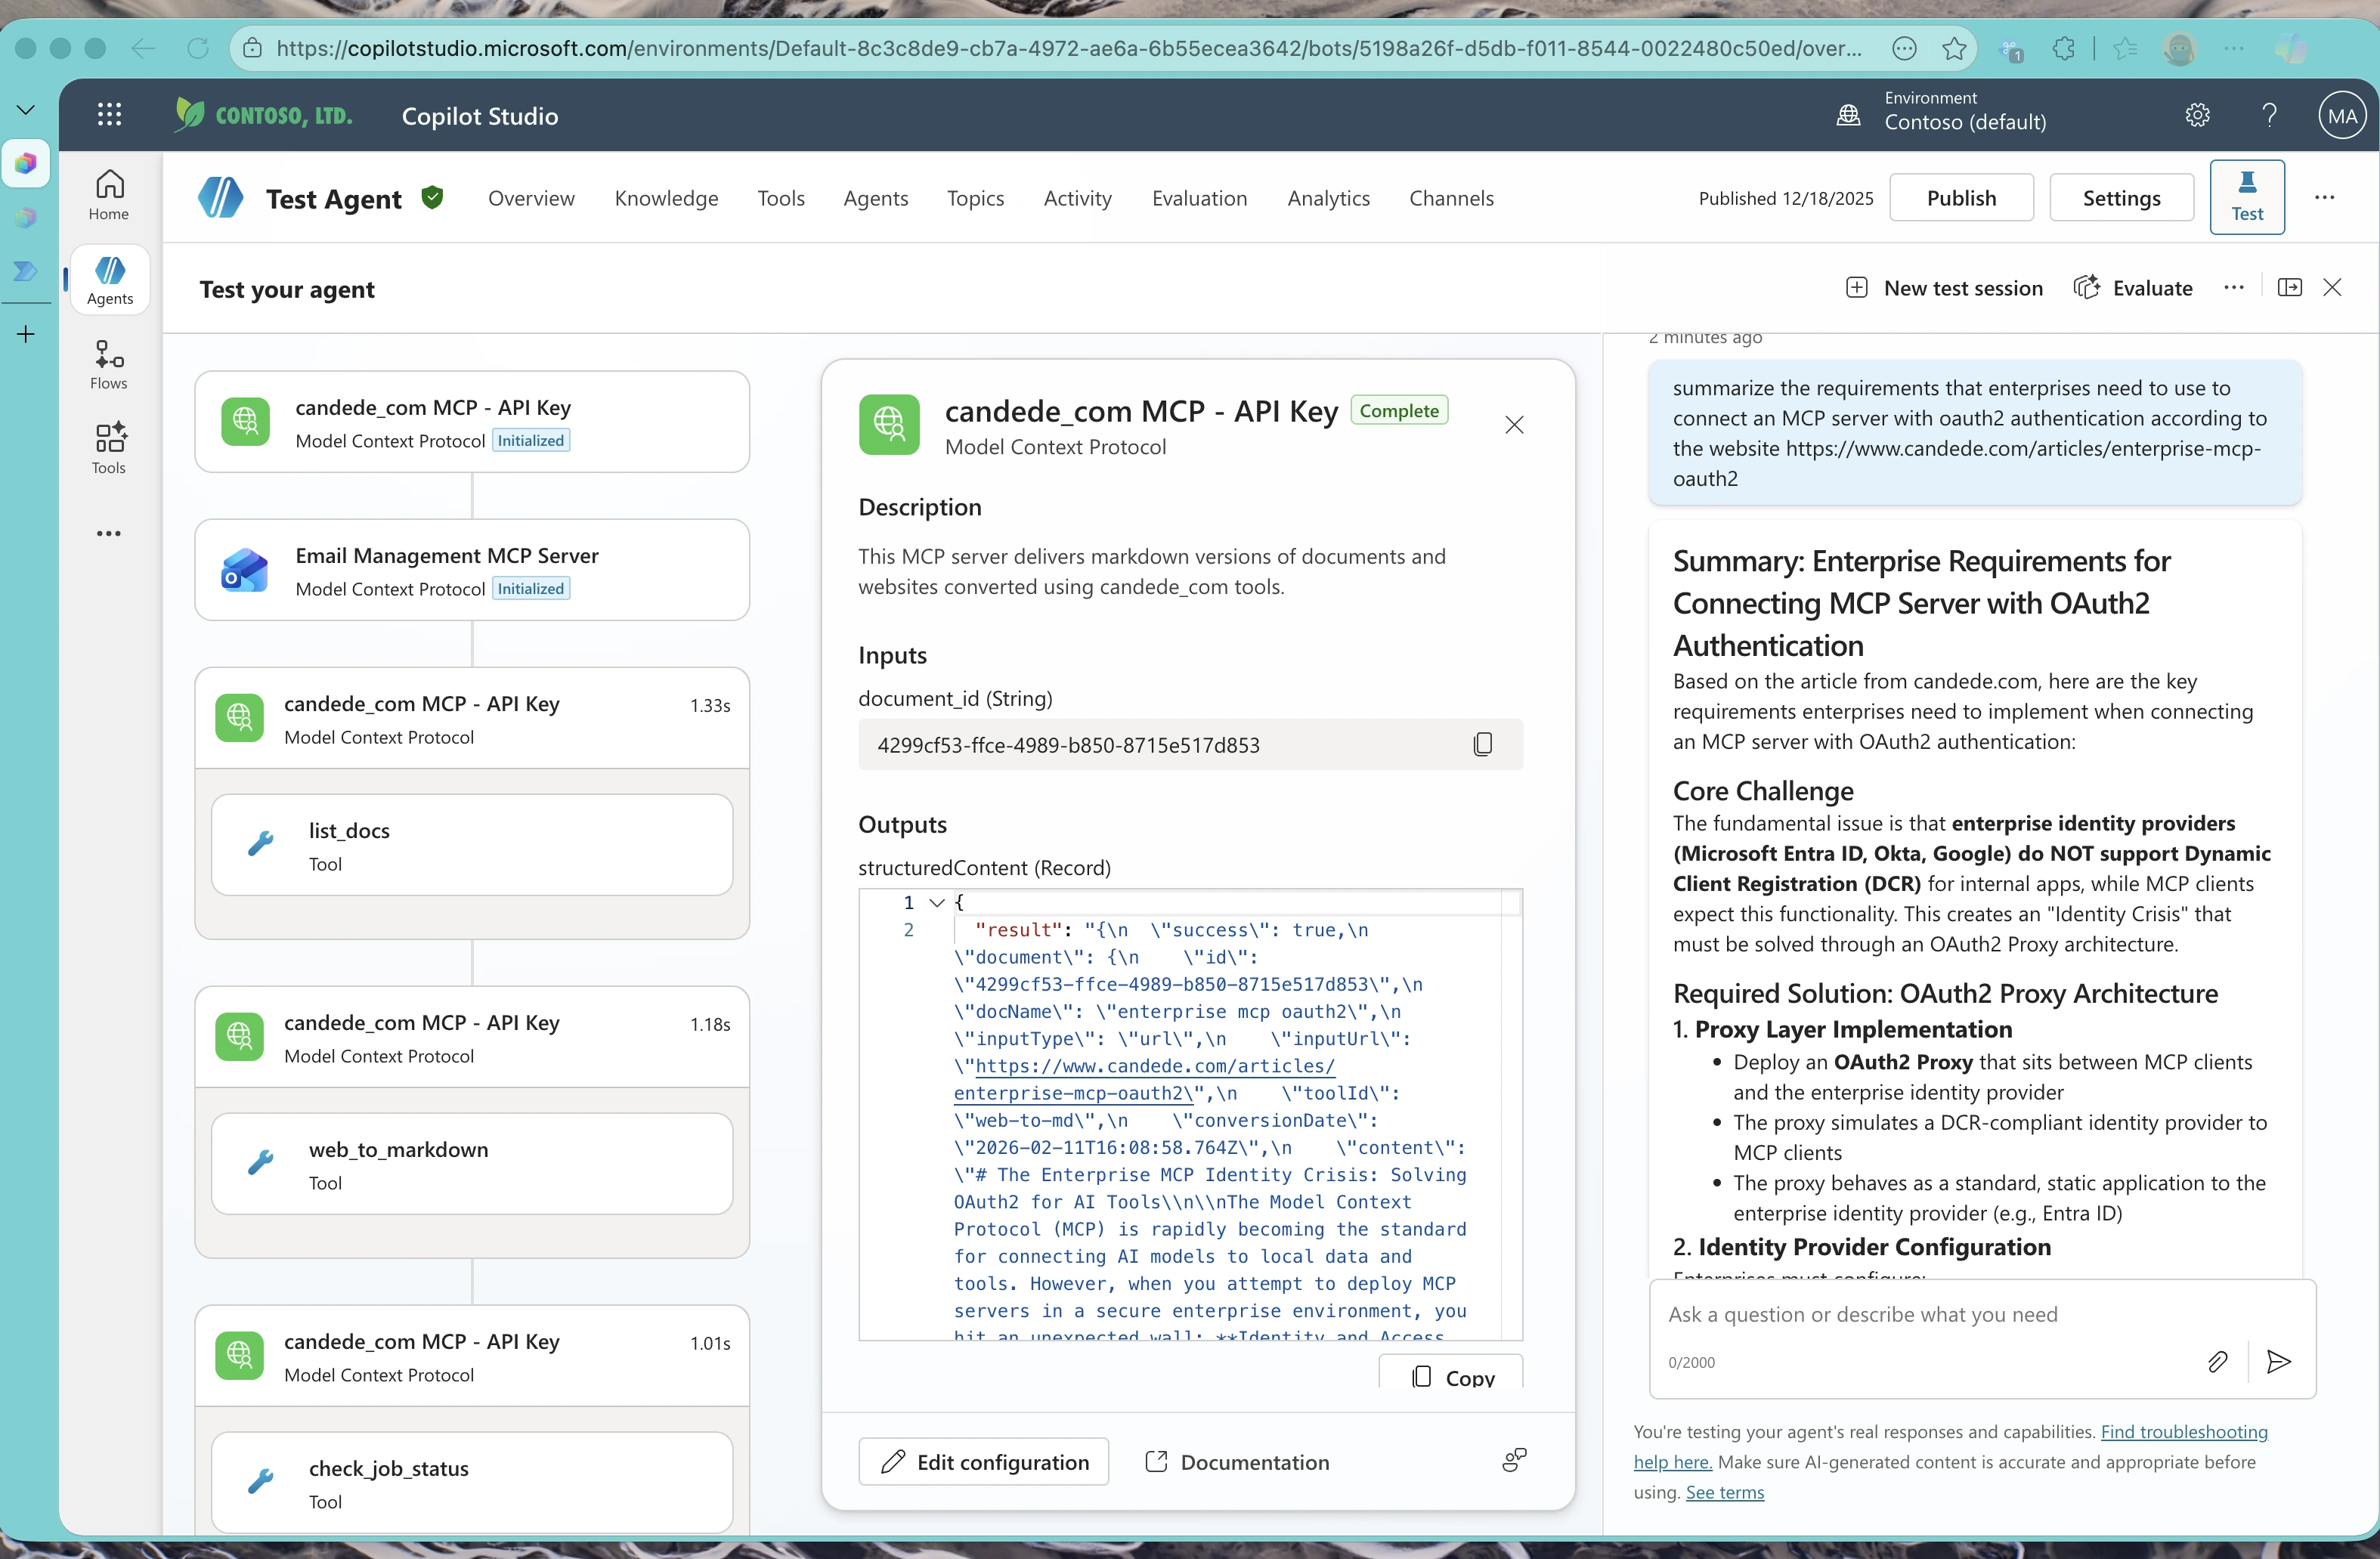
Tool Calling Decision-Making and Optimization
We observed different approaches to tool selection between the models:
The Scenario: When asked to summarize a website or answer questions based on website information, agents had two relevant MCP tools available:
list_docs: Lists all documents already converted and cached in the MCP serverweb_to_md: Converts a new website to markdown (slower, resource-intensive)
Claude Sonnet 4.5’s Strategy:
- First called
list_docsto check if the website had already been converted - Searched the cached documents for a matching URL
- Only called
web_to_mdif the document wasn’t found in the cache - When a cached version existed, used it directly (much faster response)
This strategy resulted in:
- Resource efficiency (avoiding redundant conversions)
- Faster response times when documents were already cached
- Fewer API calls for previously-processed URLs
- Lower server load for repeated queries
GPT Family Models’ Strategy:
- Typically called
web_to_mddirectly without checking the cache first - Resulted in unnecessary duplicate conversions for previously-processed URLs
- Slower response times even when cached versions were available
- Higher resource usage and API costs
Observed Differences: In scenarios with repeated queries about the same websites, the caching-aware approach resulted in:
- Approximately 60-80% fewer conversion operations for frequently-accessed content
- Faster response times (seconds vs. minutes for large documents that were already cached)
- Reduced API calls and server resource usage
Testing Summary: All three models successfully identified and used MCP tools to complete tasks. We observed different patterns in response style (verbose vs. concise), async polling behavior (patient vs. aggressive), and tool selection strategies (cache-aware vs. direct execution). The best choice for your use case will depend on your specific requirements around response style, resource usage, and performance trade-offs. We recommend testing with your own MCP server and use cases to determine which model aligns best with your needs.
Part 5: Behind the Scenes - Understanding the Power Platform Integration
What Happens When You Add an MCP Server?
Here’s something important to understand: when you add an MCP server to Copilot Studio, it doesn’t just store the connection details—it automatically creates a custom connector in Power Platform behind the scenes.
This means:
- Your MCP server configuration lives as a custom connector in Power Platform
- You can view and manage this connector in the Power Platform admin center
- The connector can be used not just in Copilot Studio, but also in Power Automate flows and Power Apps
- All authentication and endpoint configuration is stored in this connector definition
Why This Matters: Understanding that MCP servers become custom connectors helps you troubleshoot issues, manage permissions, and even reuse the same MCP server across different Power Platform services. If you ever need to update the API key or endpoint, you’ll know where to look!
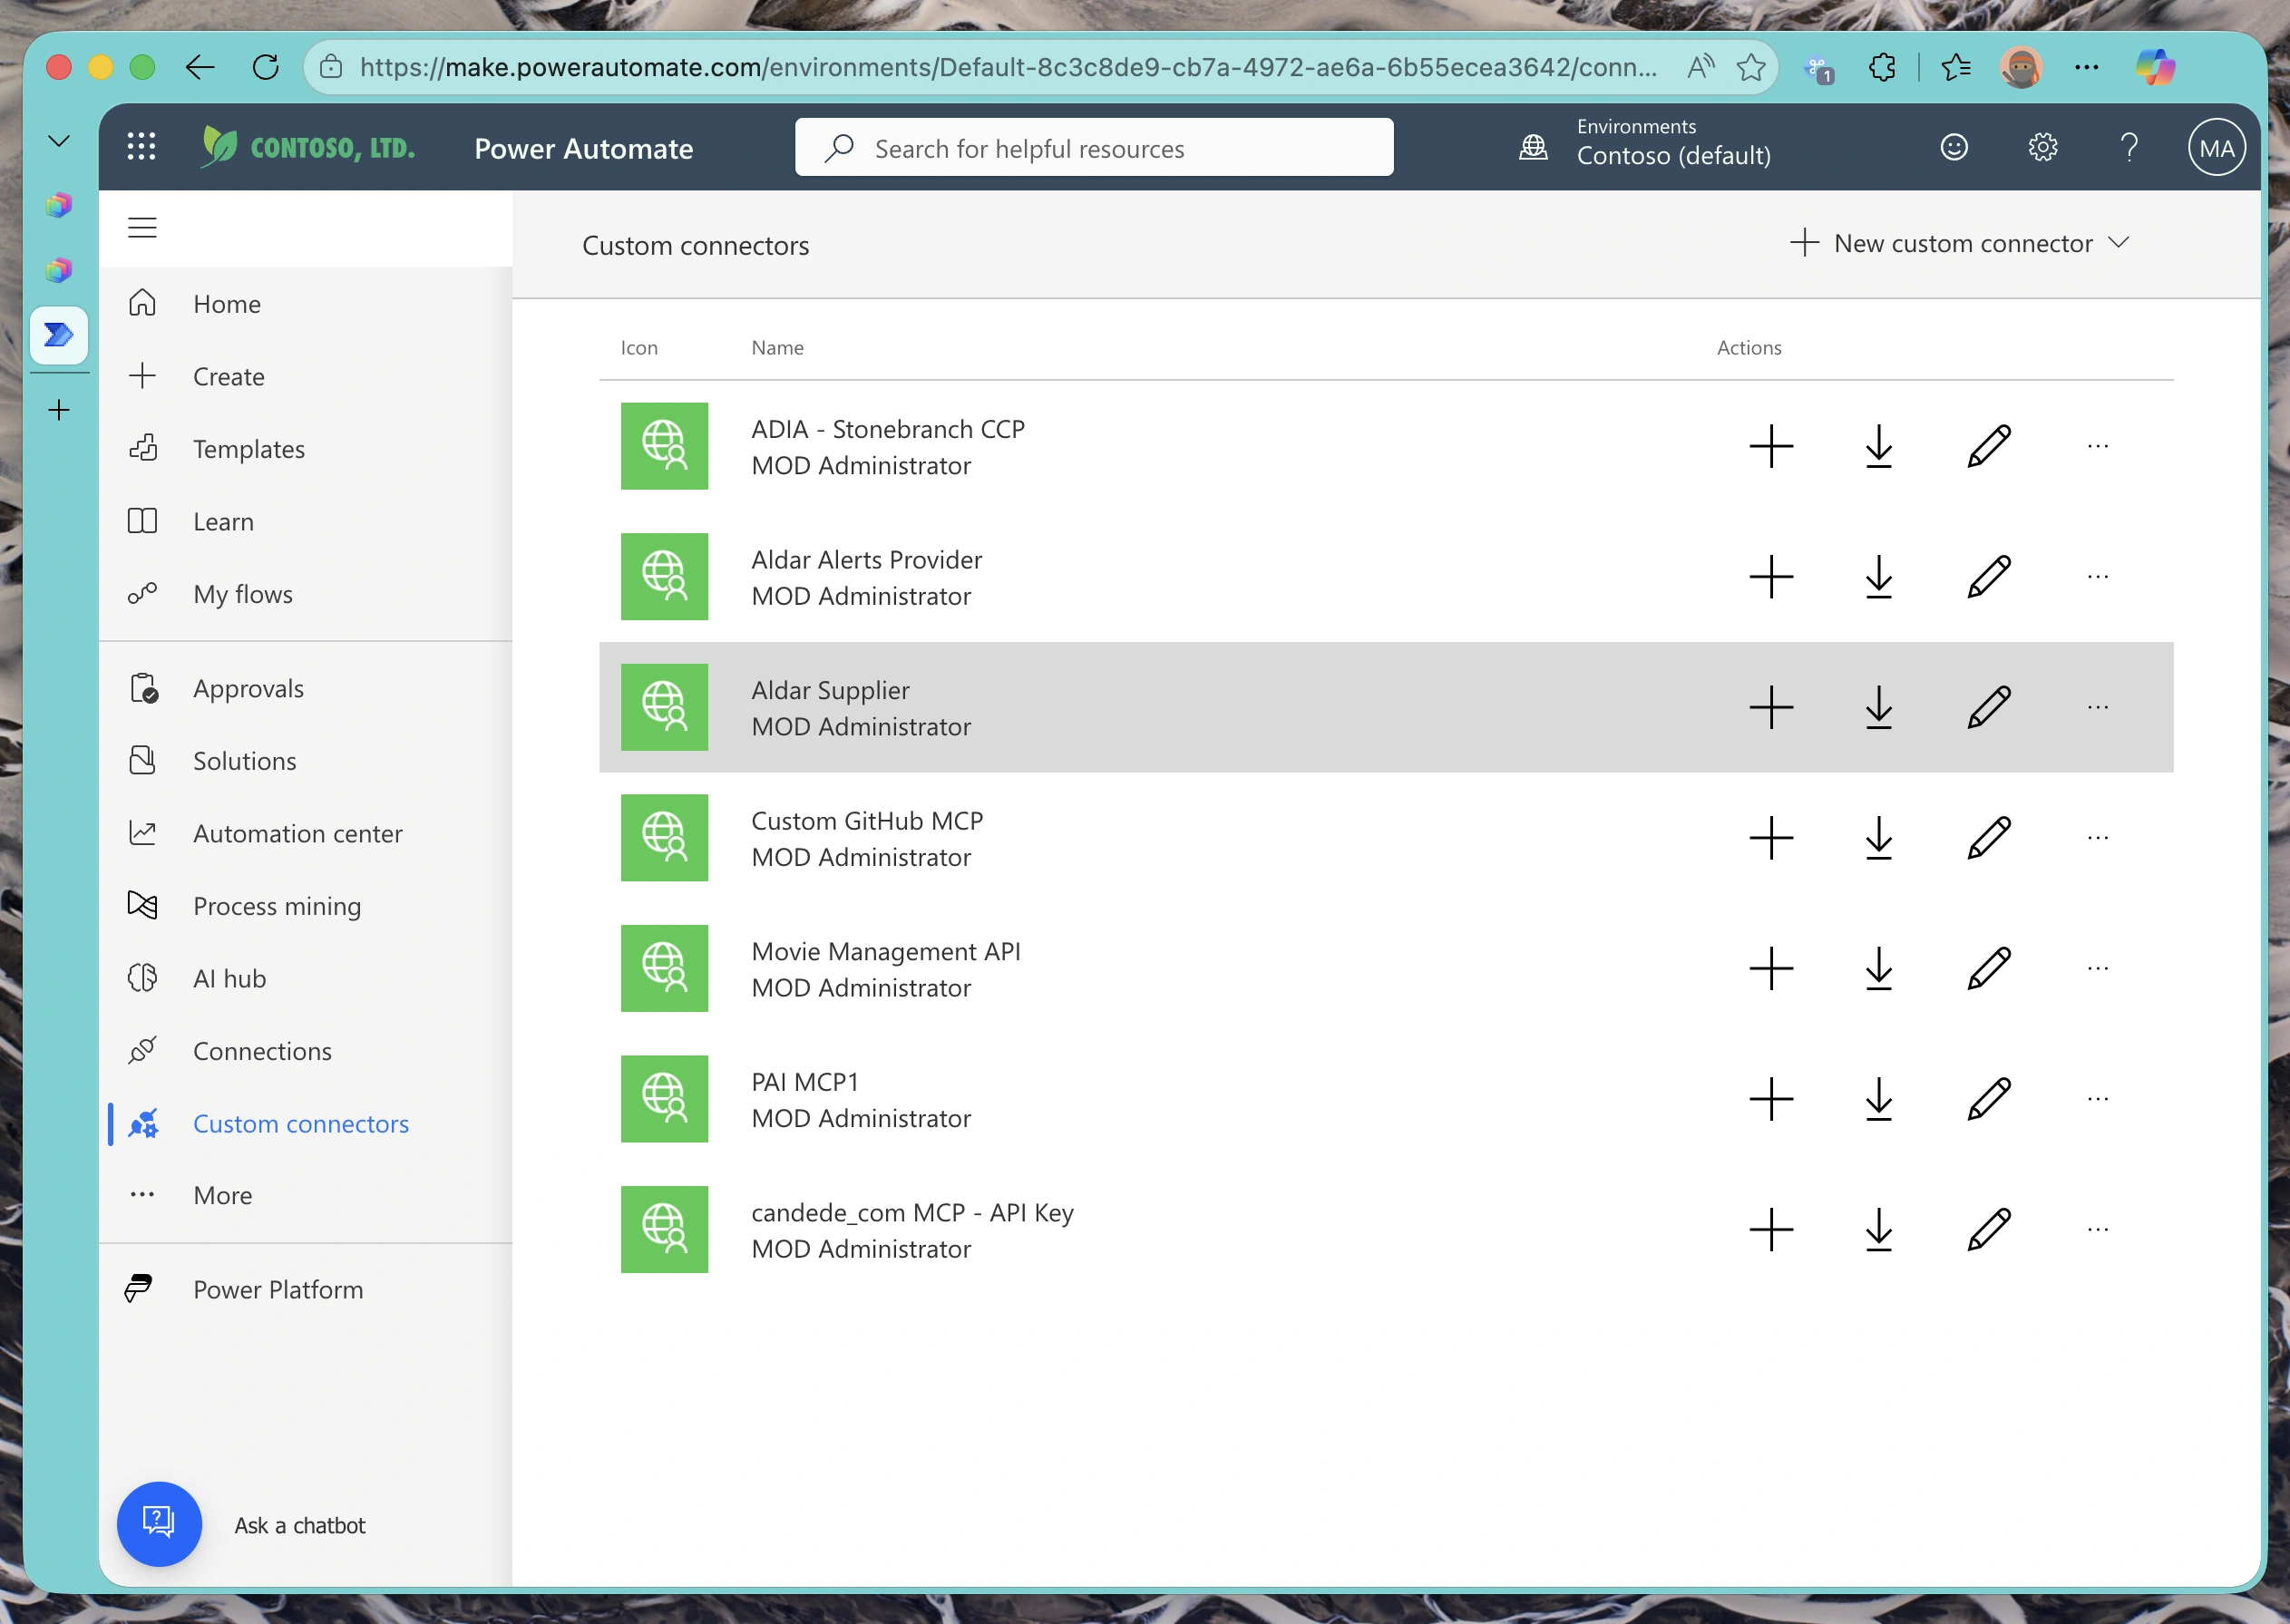
Viewing the Auto-Generated Connector Configuration
You can navigate to Power Platform to see the custom connector that was automatically generated. It includes the complete OpenAPI definition for your MCP server.
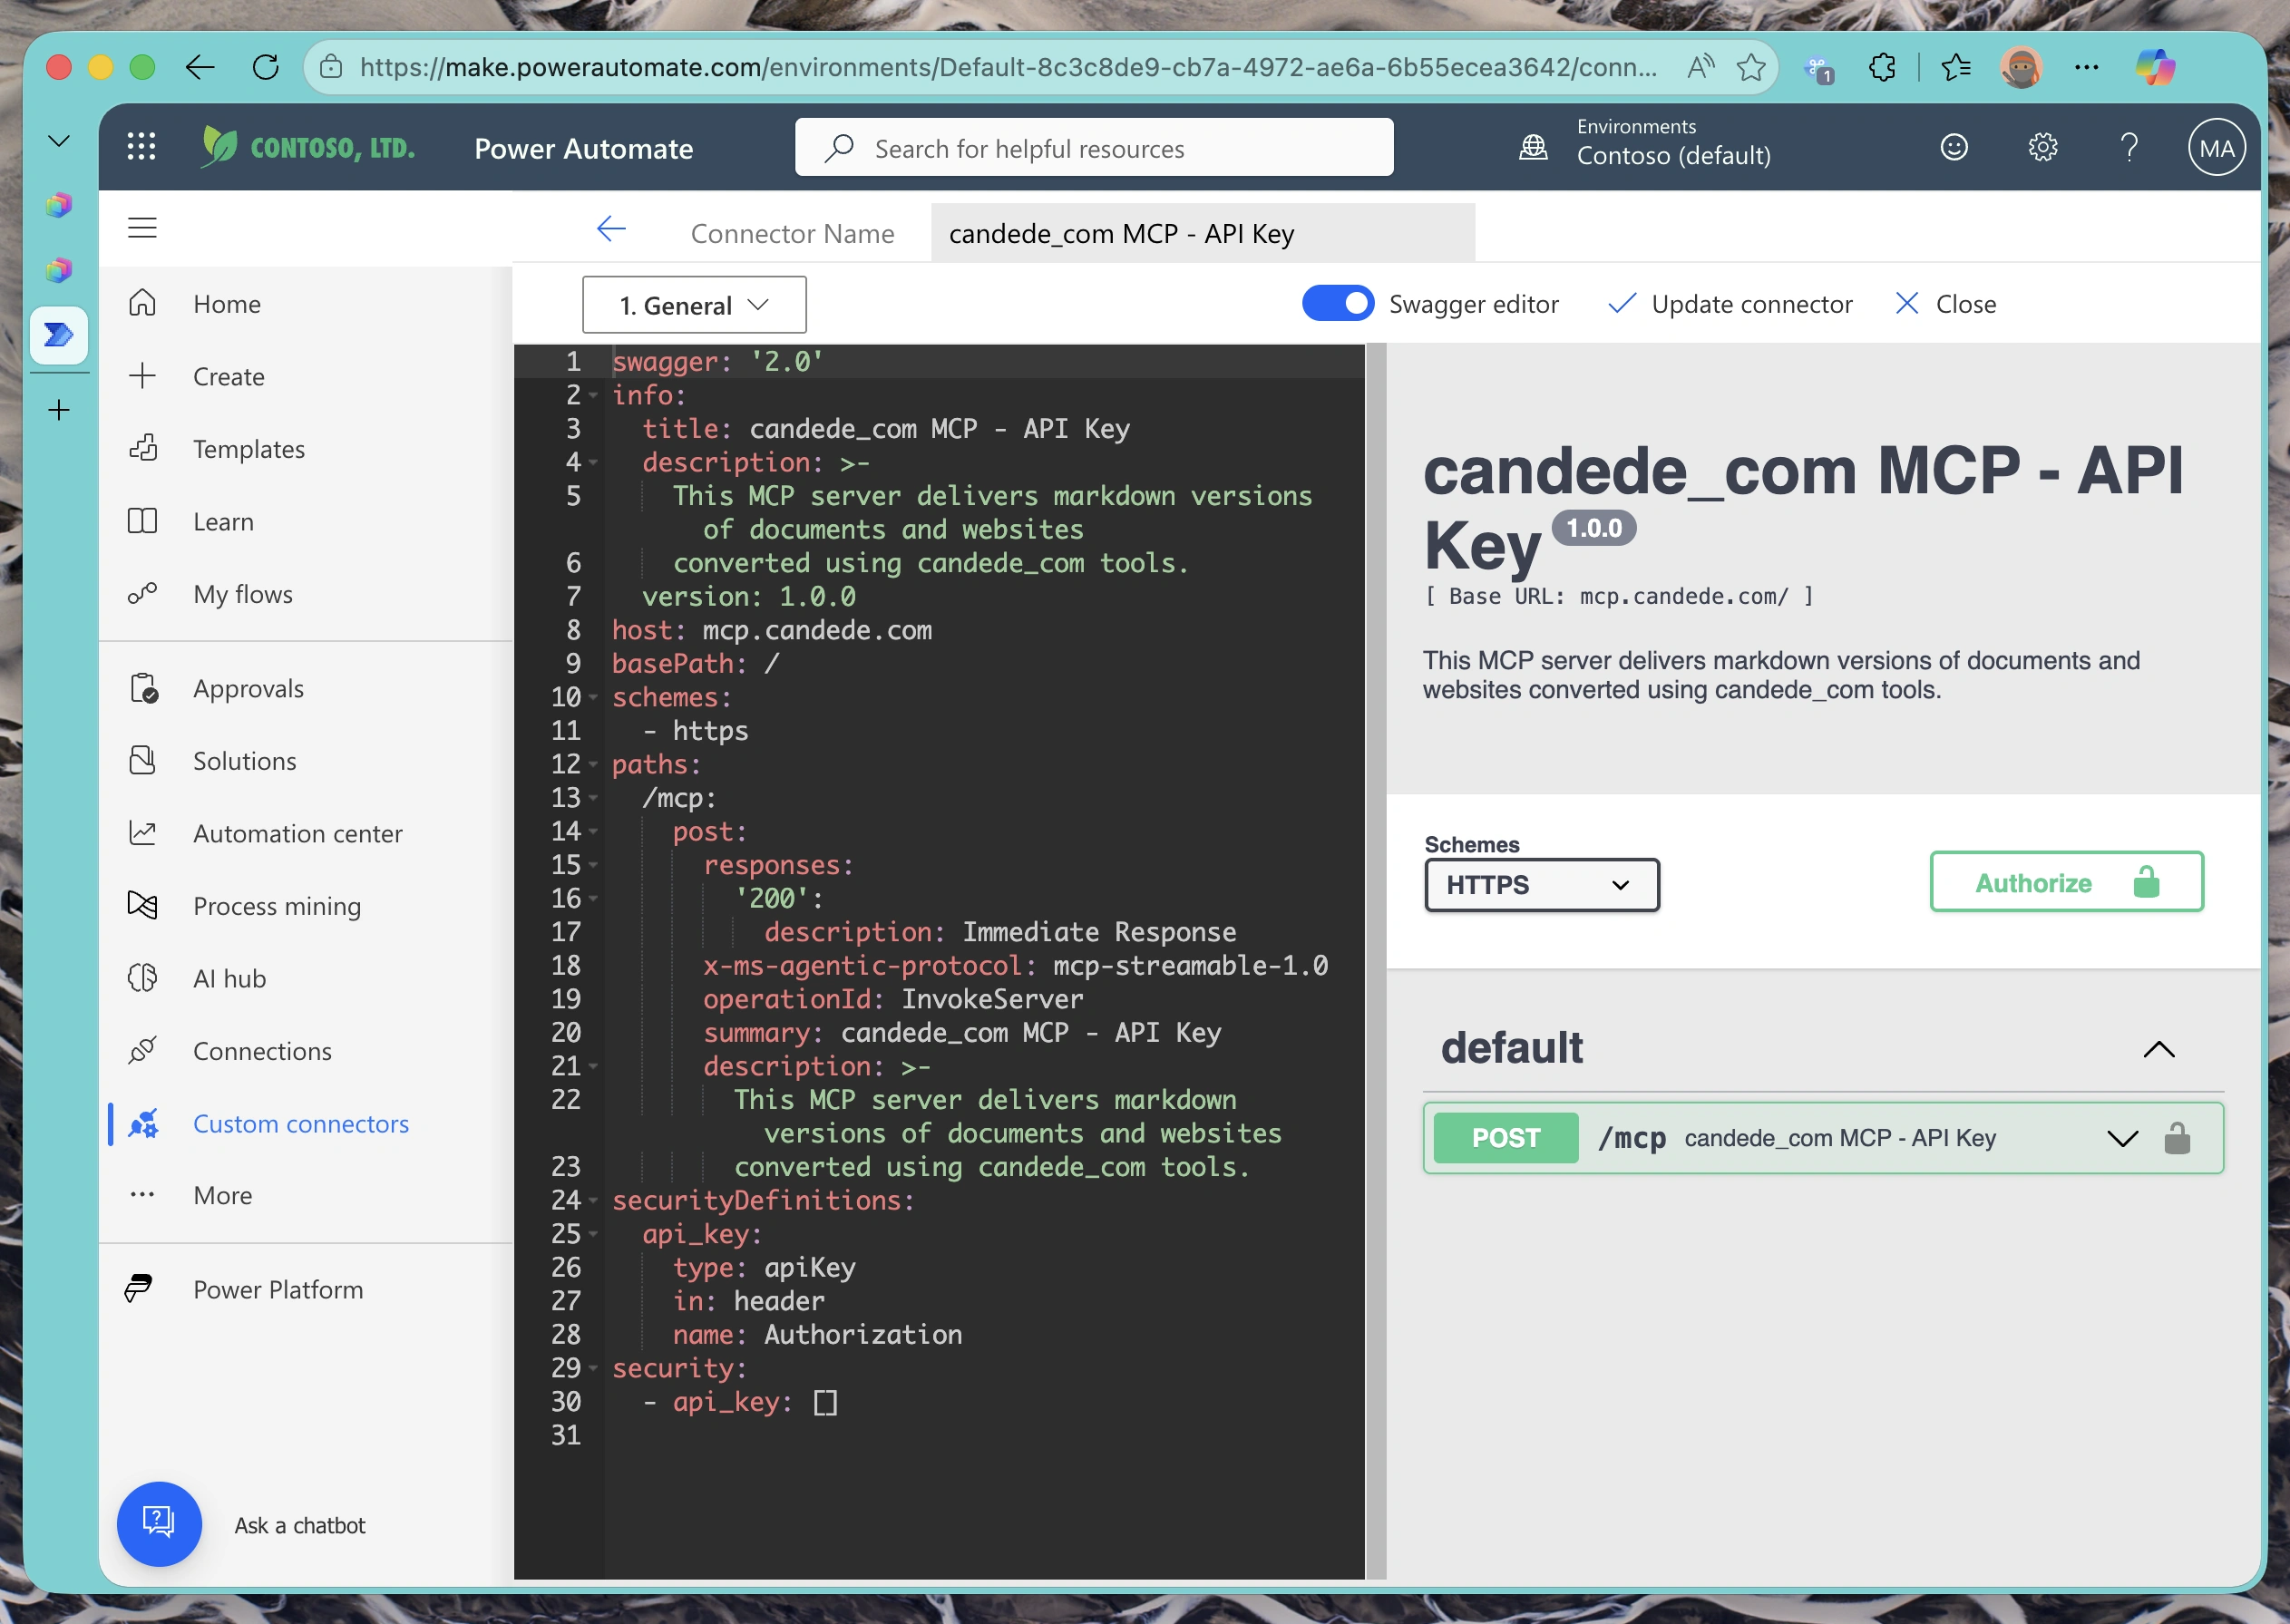
The connector definition includes:
- Endpoint URLs: All the MCP tool endpoints your server exposes
- Authentication configuration: Your API key setup (stored securely)
- OpenAPI/Swagger schema: Parameter definitions, response schemas, and operation descriptions
- Connection settings: Timeout values, retry policies, and other operational settings
Where to Find It:
- Go to Power Platform Admin Center
- Navigate to Data > Custom Connectors
- Look for a connector with your MCP server name
- You can view (but typically not edit) the auto-generated configuration
For Advanced Users: If you need more granular control over the connector configuration, you can export the auto-generated connector definition, modify it, and create a new custom version. This is useful for adding rate limiting, custom error handling, or additional security policies.
Troubleshooting Common Issues
Connection Failures
Problem: “Connection failed” or “401 Unauthorized” errors
Solutions:
- Verify your API key is correct and hasn’t expired
- Check that your MCP server is accessible from the public internet (test with
curlor Postman) - Ensure the header name or query parameter name matches your server’s configuration exactly
- If using header authentication, verify the expected format (e.g.,
Bearer <token>,<token>, or other formats) - Review your server logs for authentication errors
Tool Discovery Issues
Problem: No tools appear after connecting
Solutions:
- Confirm your MCP server correctly implements the Model Context Protocol specification
- Check that your server’s
/mcp/toolsor equivalent manifest endpoint returns valid JSON - Verify CORS headers if your server runs on a different domain
Slow Response Times
Problem: Agent takes too long to respond when using MCP tools
Solutions:
- Optimize your MCP server performance (database queries, API calls)
- Consider caching frequently-accessed data
- Use asynchronous patterns for long-running operations
- Monitor server latency and set appropriate timeouts
What You’ve Accomplished
You’ve successfully:
✅ Connected your API-key-protected MCP server to Microsoft Copilot Studio
✅ Configured the authenticated connection using flexible API key authentication
✅ Tested the integration across multiple AI models (GPT-4.1, GPT-5, Claude Sonnet)
✅ Compared how different models handle MCP tool calls and query responses
✅ Understood how the MCP server becomes a custom connector in Power Platform
Your Copilot Studio agent can now invoke your MCP tools across different AI models, and you’ve gained insights into which model works best for your specific use case.
Next Steps: Now that your MCP server is integrated, experiment with more complex tool compositions. Try chaining multiple tool calls, implementing conditional logic based on tool responses, or creating specialized agents for different departments in your organization.
Additional Resources
Read next